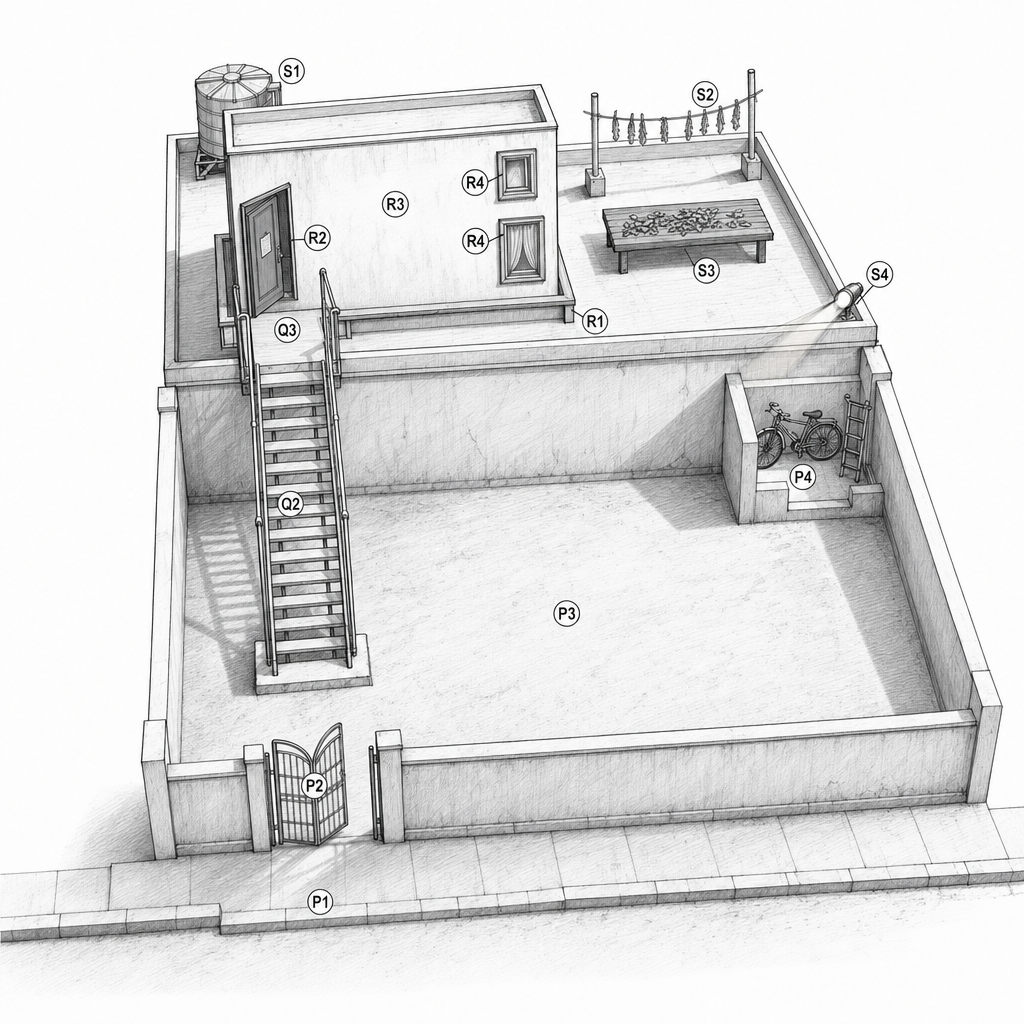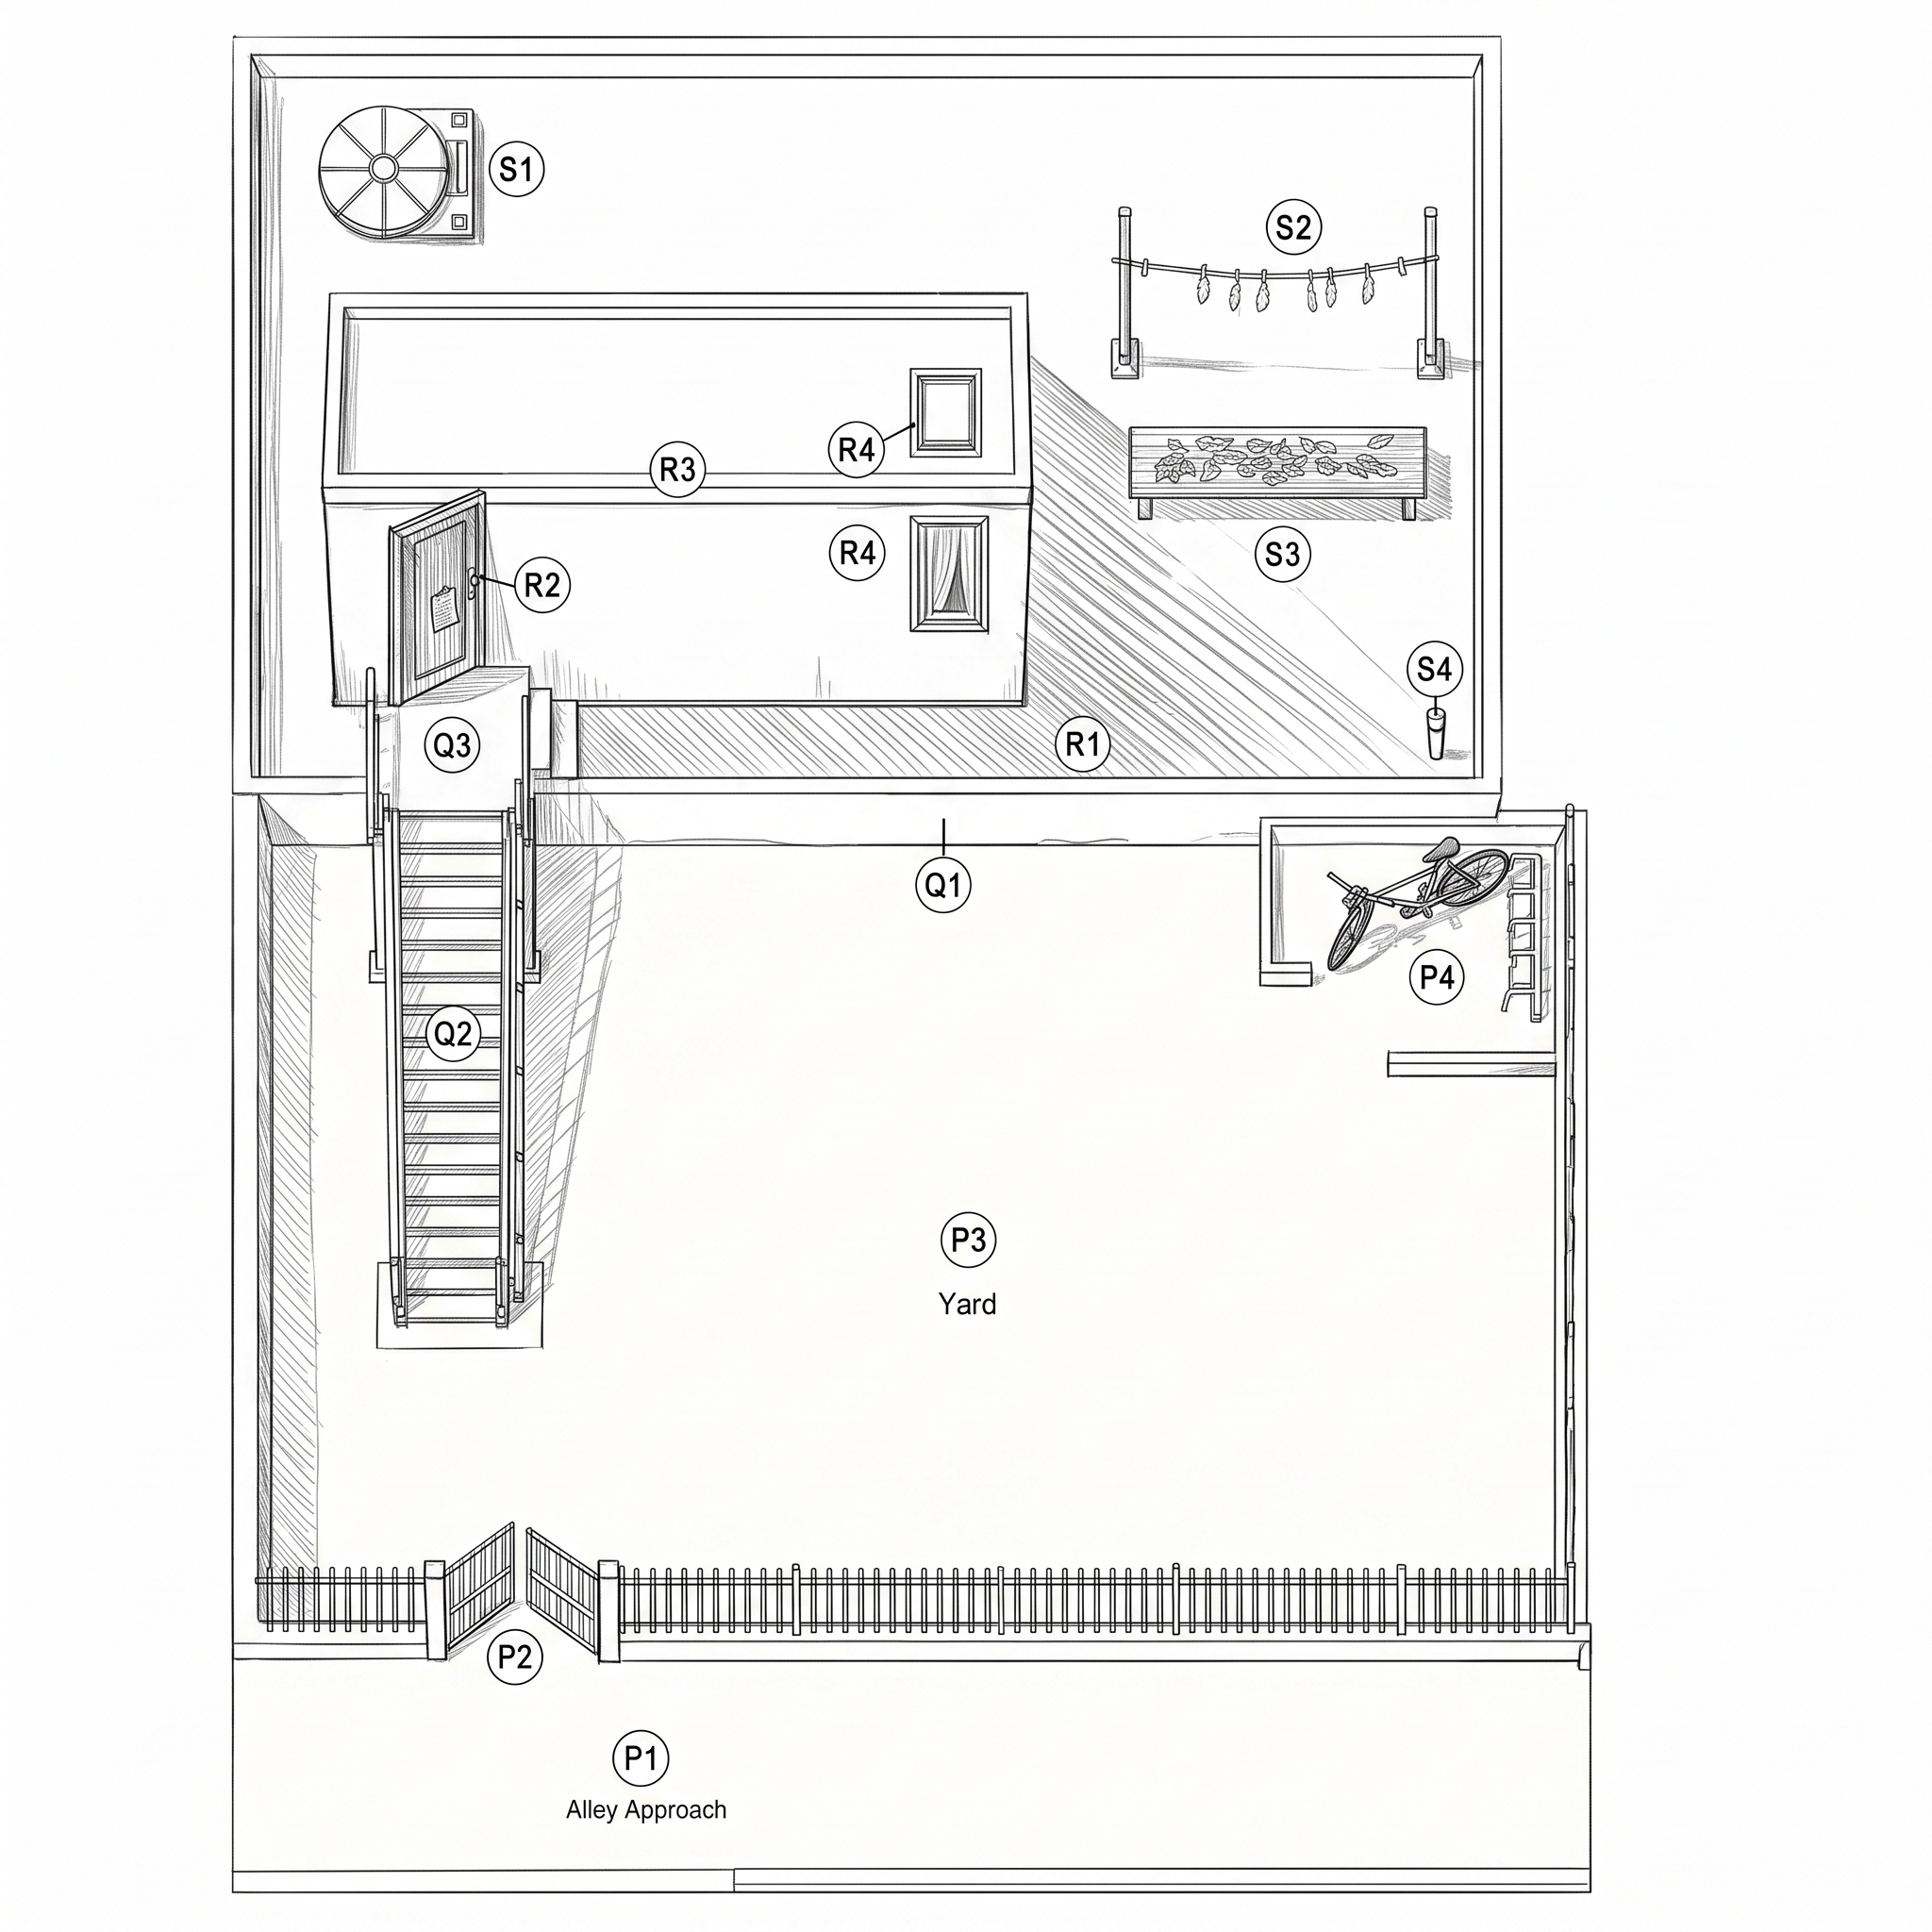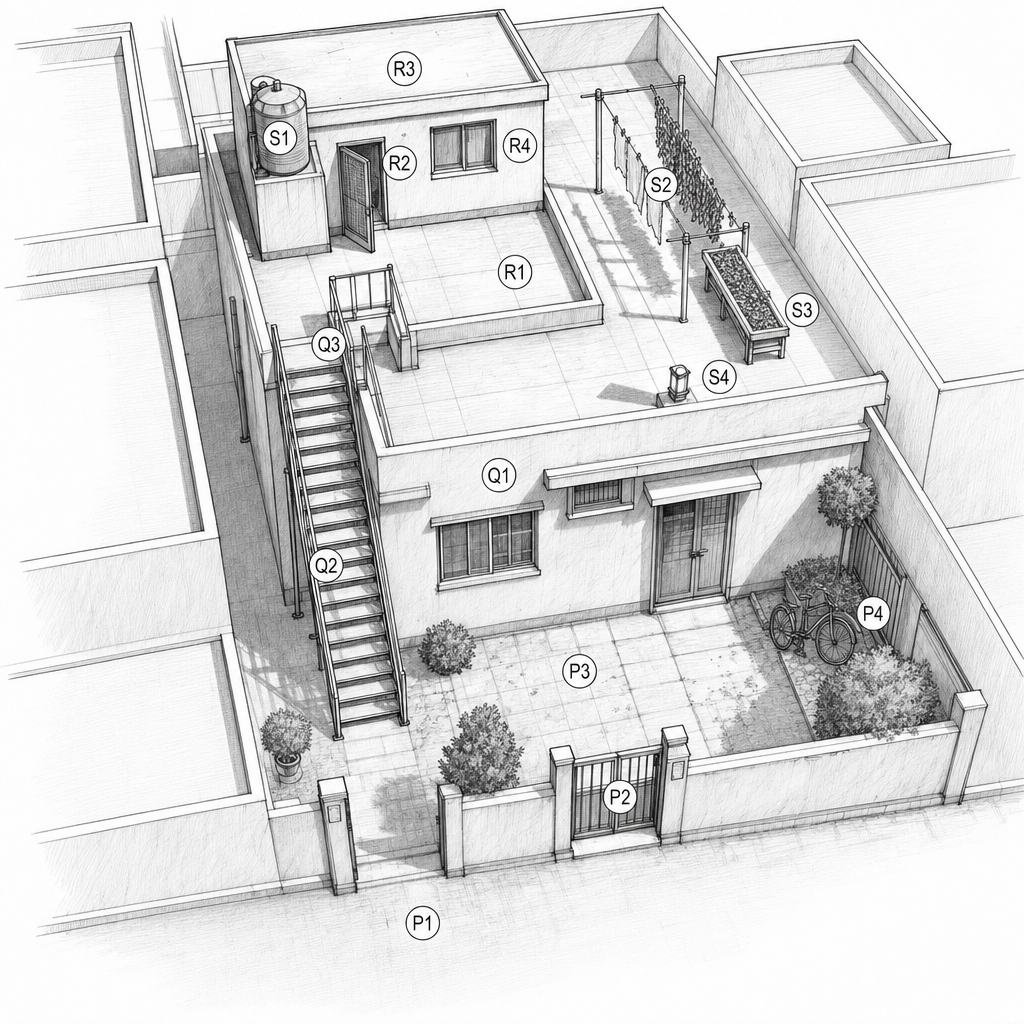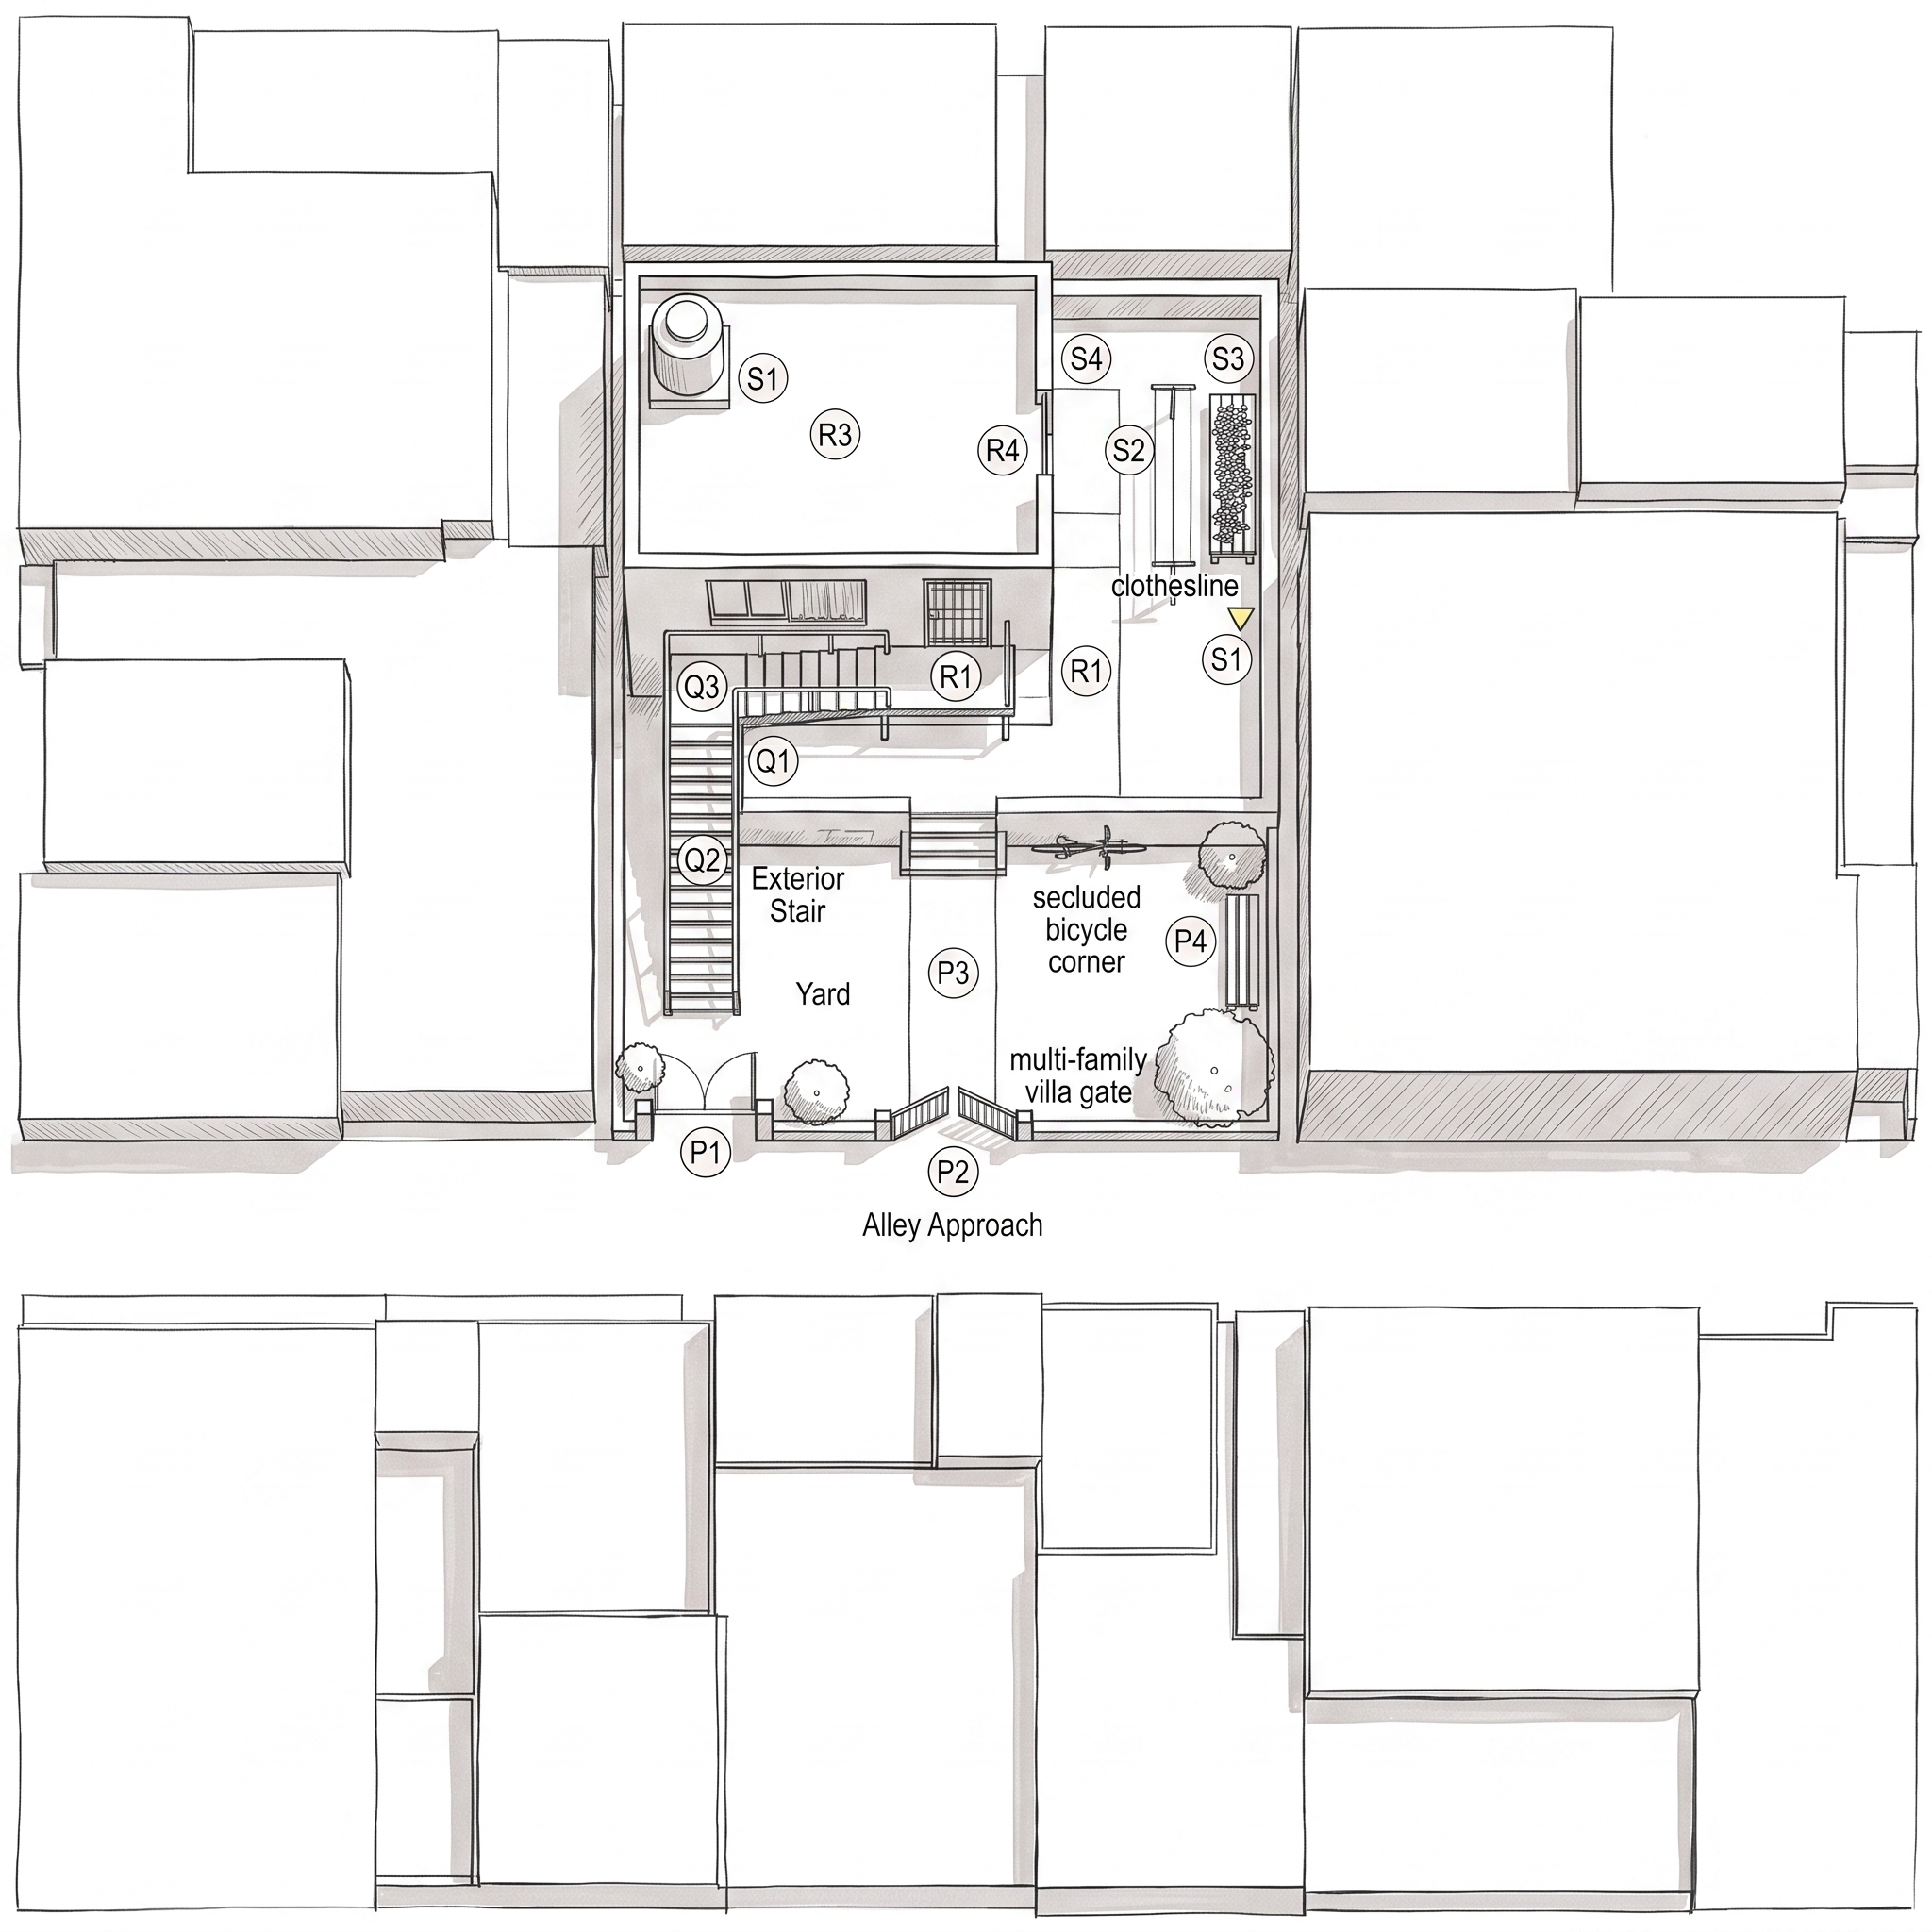
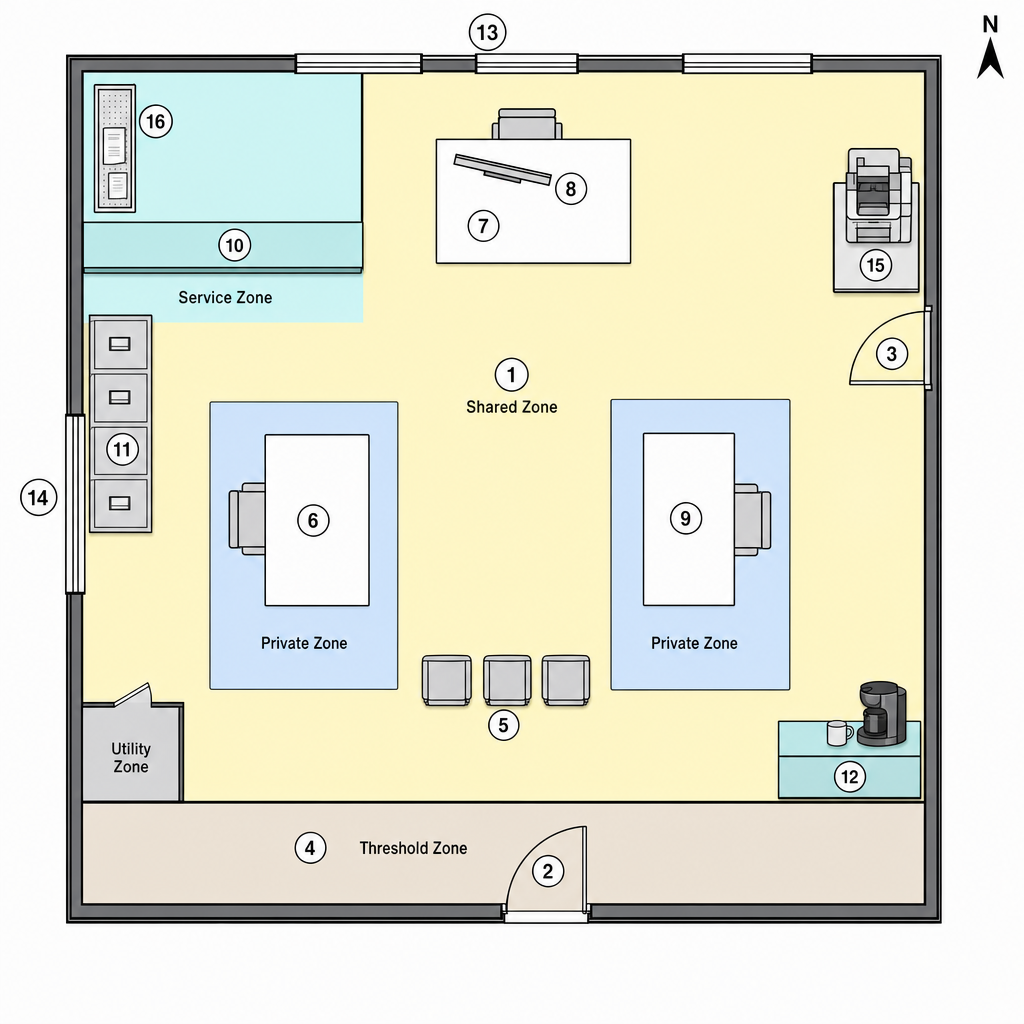
스타일 SOT=경찰서 FP(TASK 1 산출, 아래 썸네일) · 콘텐츠 SOT=공간 단서 그래프 v1(evidence-bound 저작) · 마커: 지도=A–F+숫자 / 상세=P–W+숫자(완전 상이) · 구성=지도 i2/nb2 2장 + 상세(지도 계보×엔진 교차) 4장.
스타일 참조:
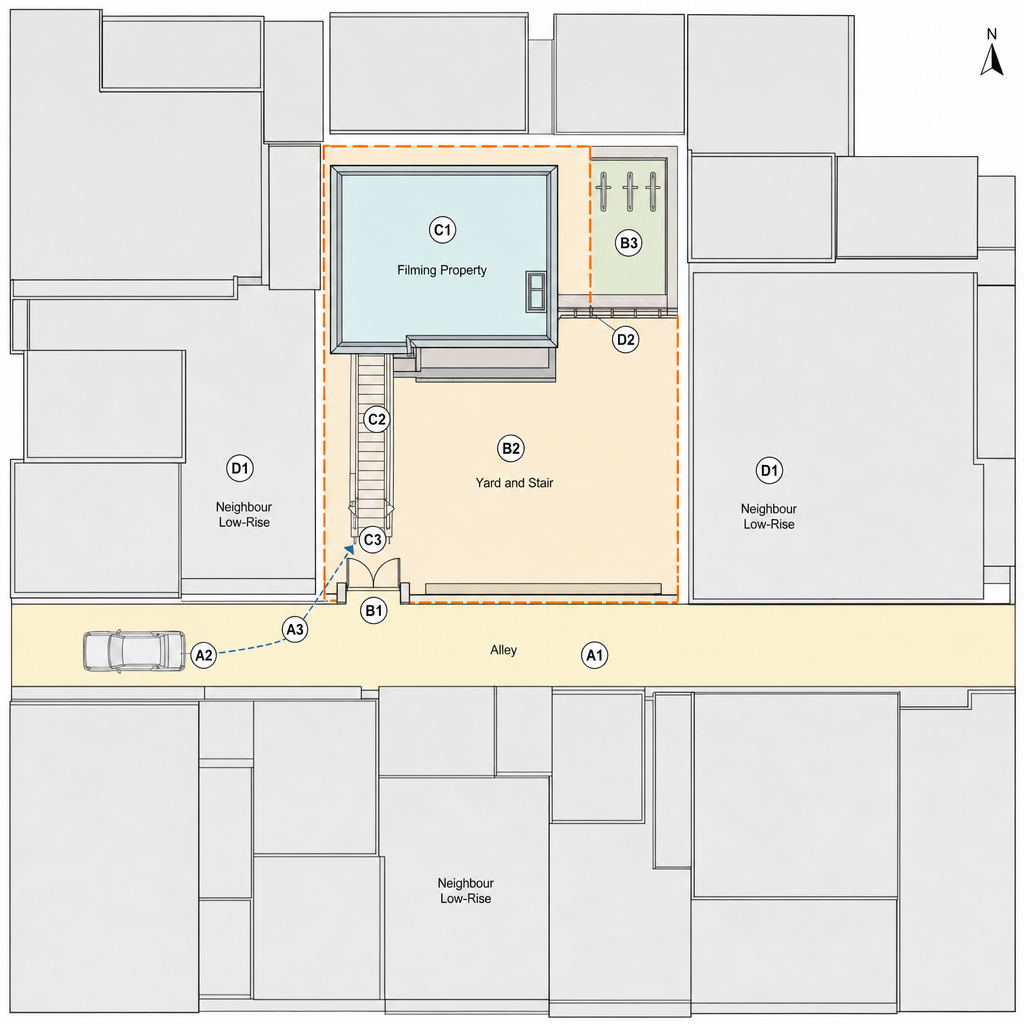
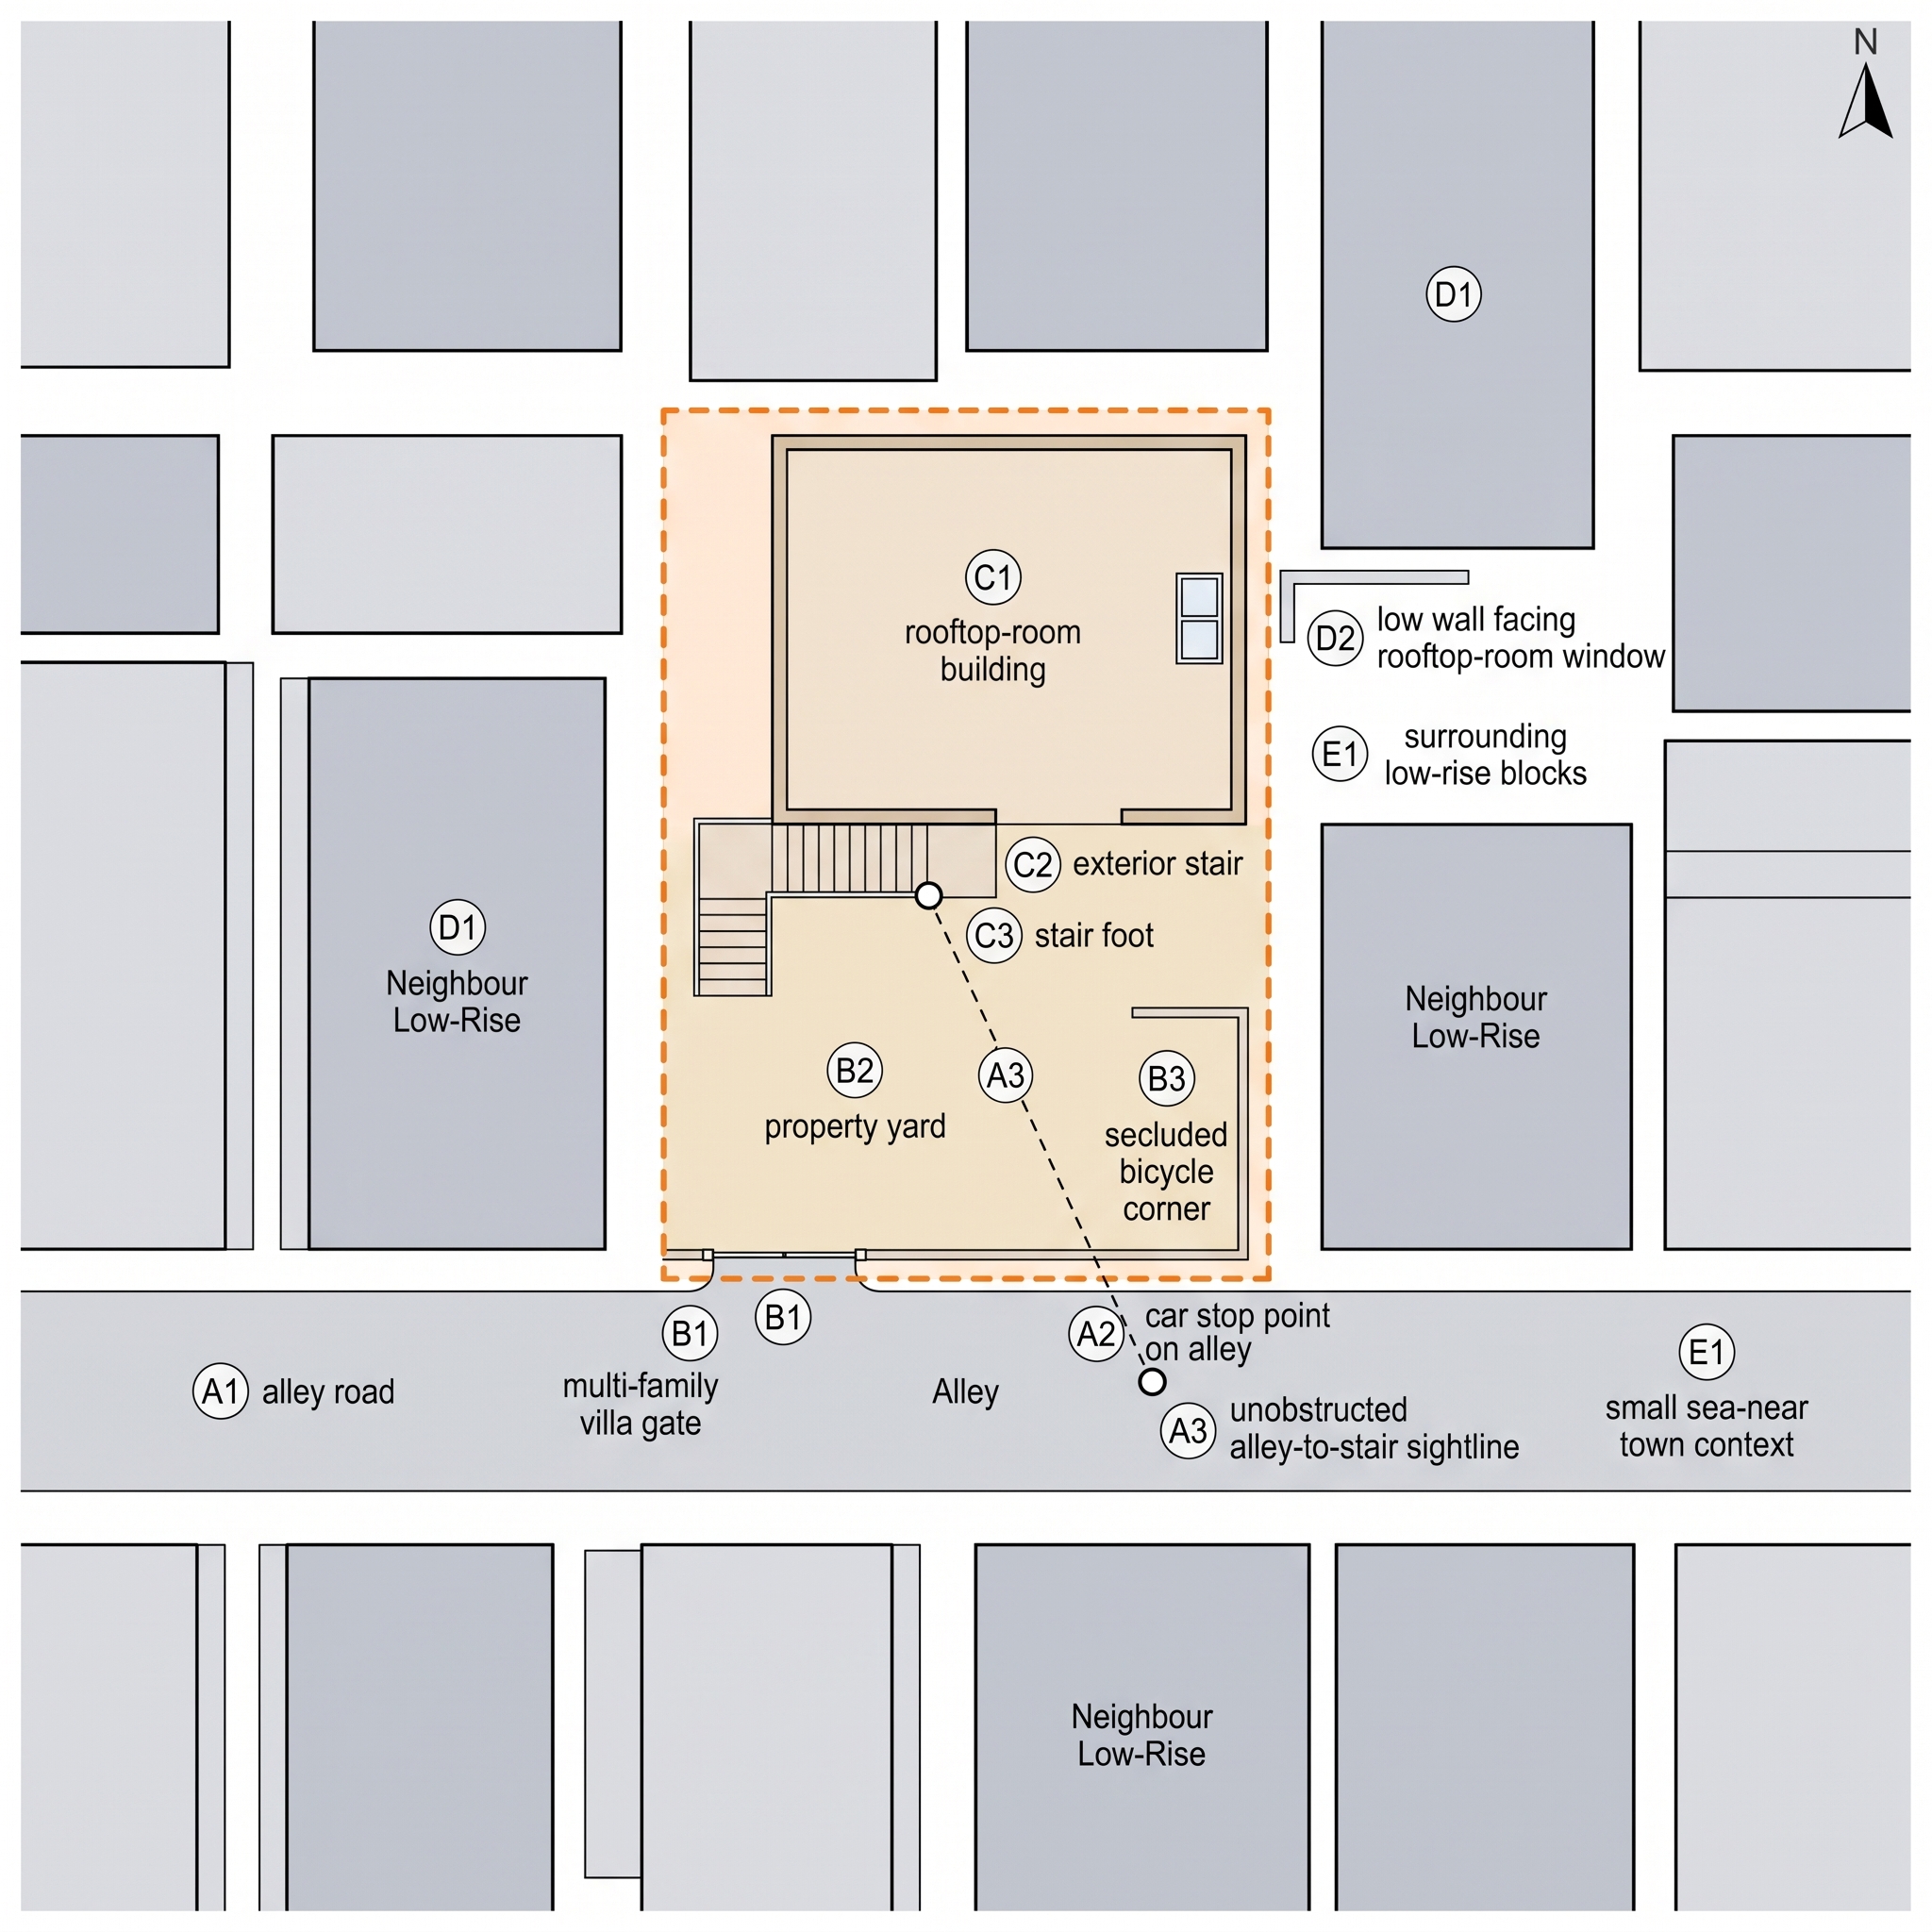
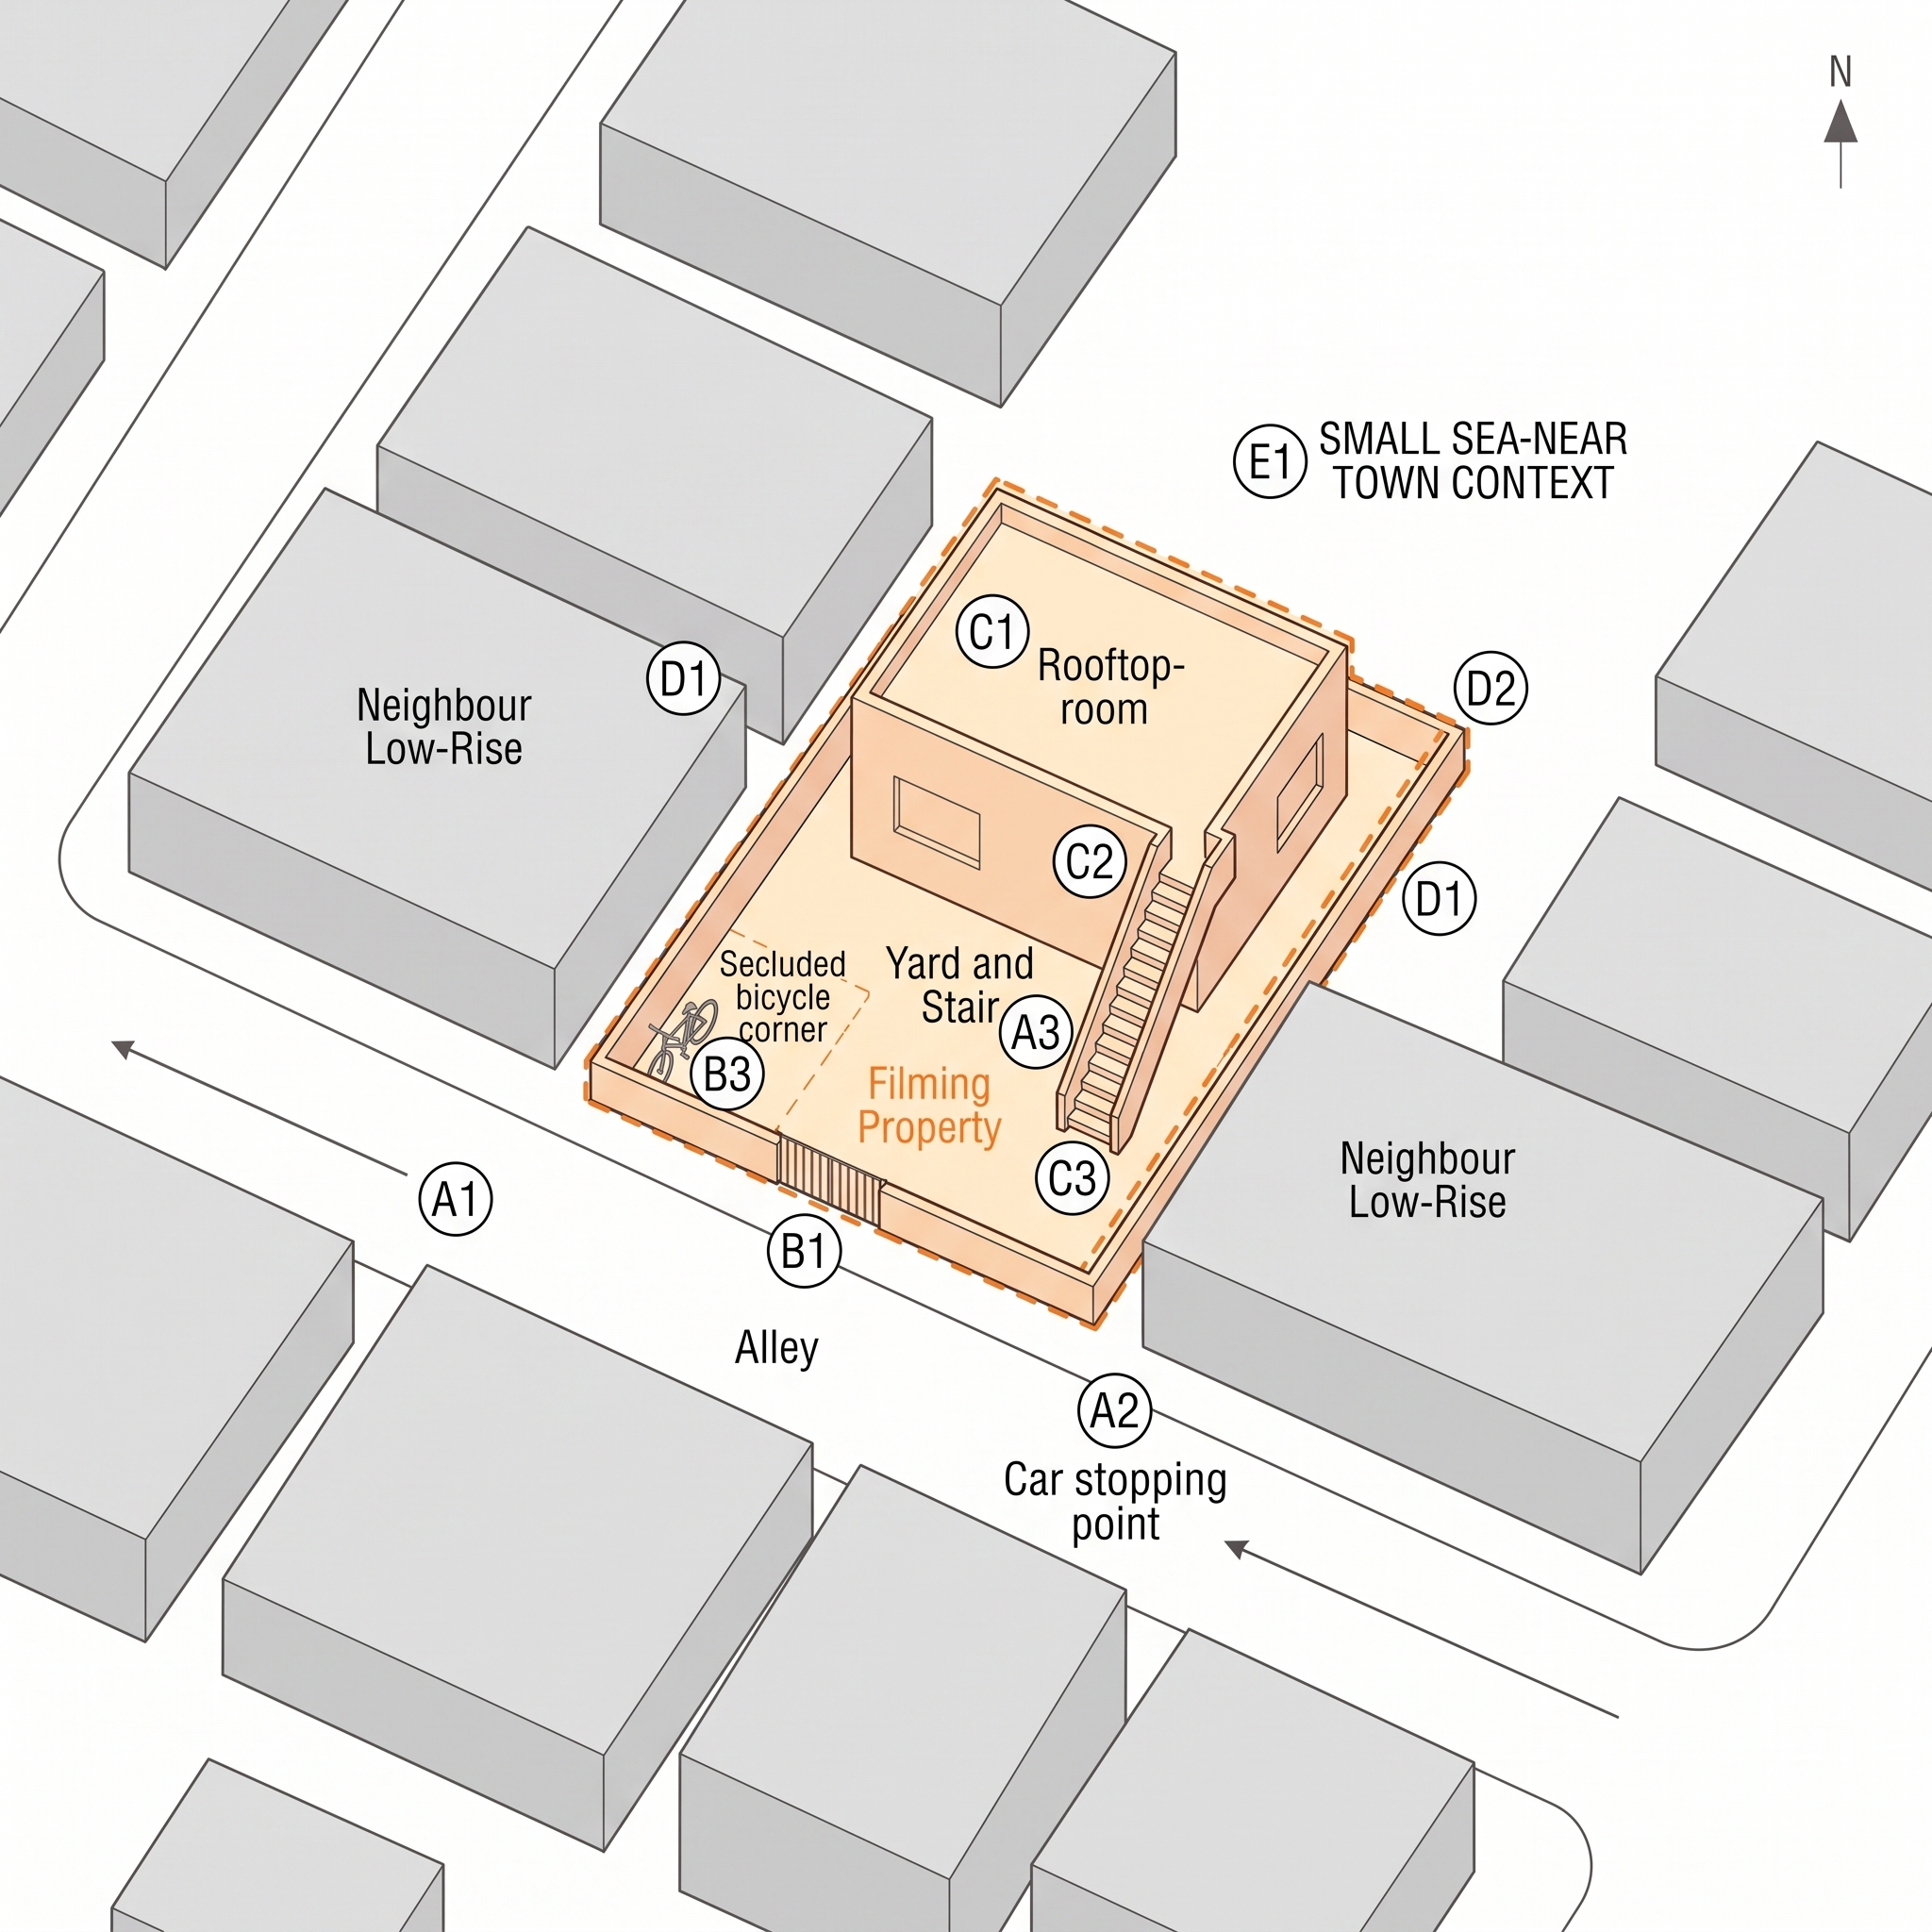
| code | name | kind | placement | evidence |
|---|---|---|---|---|
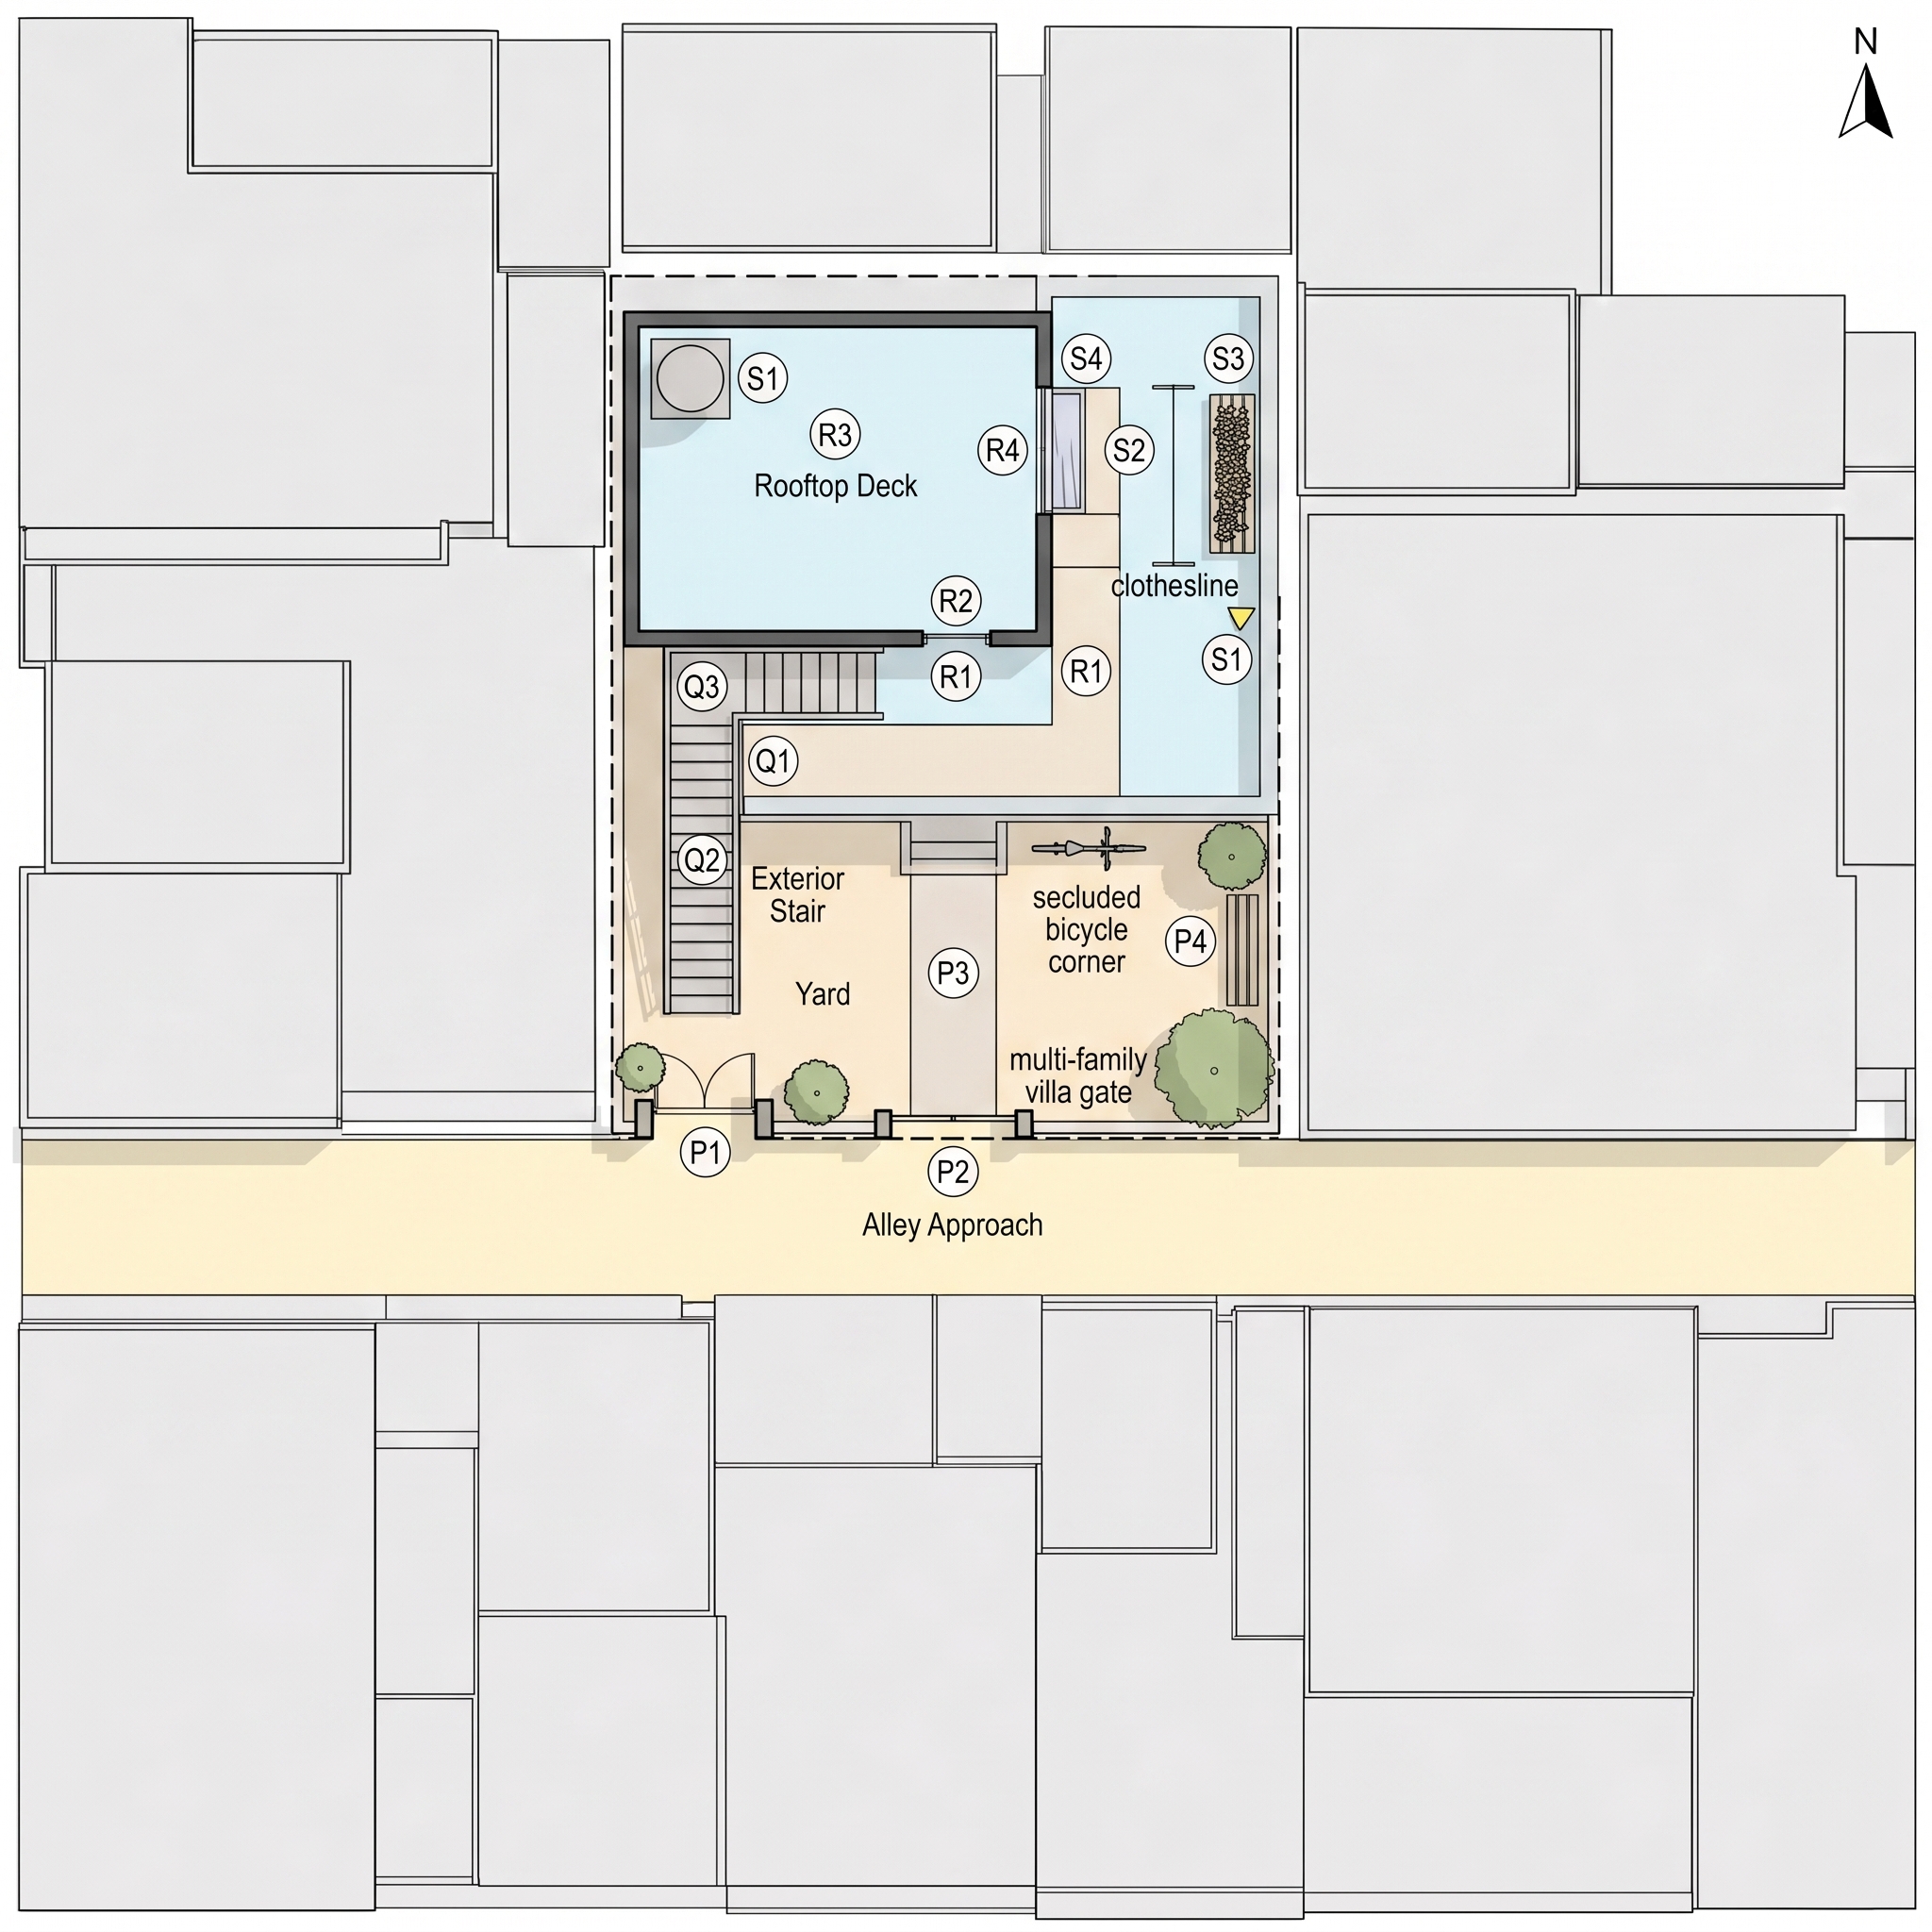
| A1 | alley road | street | Draw the alley road along the filming property frontage, with enough continuity for bicycle travel through the block. | E001 |
| A2 | car stop point on alley | vehicle stop | Mark a stopping point on the alley from which the lower stair area can be seen and reached quickly. | E007 |
| A3 | unobstructed alley-to-stair sightline | sightline | Keep the line between the car stop point and the stair foot straight and clear as a practical staging corridor. | E008 (inferred) |
| B1 | multi-family villa gate | gate | Place the gate on the alley edge of the filming property so entry from the alley opens directly into the property. | E002 |
| B2 | property yard | yard | Place the yard immediately inside the gate, serving as the ground-level space before the exterior stair. | E003 |
| B3 | secluded bicycle corner | yard feature | Mark a rear or tucked-away corner within the yard for leaving a bicycle roughly. | E003 |
| C1 | rooftop-room building | building | Set the old multi-family villa as the filming property’s main building, with the rooftop room carried above it. | E018 |
| C2 | exterior stair position | stair | Attach the exterior stair to the filming property so it connects directly from the yard toward the rooftop room. | E004 |
| C3 | stair foot | stair entry | Place the stair foot where a runner from the alley stop can enter the upward route to the rooftop room without a detour. | E010 |
| D1 | surrounding low-rise blocks | surroundings | Surround the filming property with dense low-rise neighbouring blocks suitable for a bird’s-eye rooftop-villa view. | E019 (inferred) |
| D2 | low wall facing rooftop-room window | wall | Place a low wall within sight of the rooftop-room window, low enough for a cat route and clear enough to maintain the window relationship. | E017 (inferred) |
| E1 | small sea-near town context | regional context | Indicate only as a contextual note that the block belongs to a small town with the sea nearby; do not draw a sea or harbour edge inside the block unless separately established. | E020 |
Draw ONE neighbourhood site map of a filming location.

Format: like a partial screen capture from an online map app of one
small neighbourhood block, but redrawn as an architectural site map.
Streets run off the frame edges; unmarked neighbour buildings are
simple flat grey blocks; the filming property is highlighted with a
dashed orange boundary and slightly warmer fills so it reads as the
subject of the capture.

LAYOUT (the content ground truth):
Lay out the neighbourhood map as a partial small-town block with the alley road as the main lower circulation line. Put the filming property on the alley frontage, with the gate opening directly from the alley into the yard. Inside the property, place the yard first, and include the secluded bicycle corner away from the direct gate-to-stair route. Set the rooftop-room building behind or beside that yard so the exterior stair can attach to the building and rise from the yard. Mark the stair foot close enough to the alley-side route that the car stop point on the alley has a clear view and quick running access to it. Keep the car stop point on the same alley rather than on a separate street, because the stop, discovery, and stair entry must operate as one continuous exterior action. Surround the filming property with low-rise neighbouring blocks to support the bird’s-eye view of an old rooftop-room villa in a dense low-rise fabric. Place the low wall where it can maintain a sightline relationship with the rooftop-room window while remaining a separate boundary feature. Treat the sea-near small-town cue only as regional context on the map, not as permission to add a visible shoreline within this one-block drawing.

CIRCLED MARKERS (all of them, nothing else):
- (A1) alley road — Draw the alley road along the filming property frontage, with enough continuity for bicycle travel through the block.
- (A2) car stop point on alley — Mark a stopping point on the alley from which the lower stair area can be seen and reached quickly.
- (A3) unobstructed alley-to-stair sightline — Keep the line between the car stop point and the stair foot straight and clear as a practical staging corridor.
- (B1) multi-family villa gate — Place the gate on the alley edge of the filming property so entry from the alley opens directly into the property.
- (B2) property yard — Place the yard immediately inside the gate, serving as the ground-level space before the exterior stair.
- (B3) secluded bicycle corner — Mark a rear or tucked-away corner within the yard for leaving a bicycle roughly.
- (C1) rooftop-room building — Set the old multi-family villa as the filming property’s main building, with the rooftop room carried above it.
- (C2) exterior stair position — Attach the exterior stair to the filming property so it connects directly from the yard toward the rooftop room.
- (C3) stair foot — Place the stair foot where a runner from the alley stop can enter the upward route to the rooftop room without a detour.
- (D1) surrounding low-rise blocks — Surround the filming property with dense low-rise neighbouring blocks suitable for a bird’s-eye rooftop-villa view.
- (D2) low wall facing rooftop-room window — Place a low wall within sight of the rooftop-room window, low enough for a cat route and clear enough to maintain the window relationship.
- (E1) small sea-near town context — Indicate only as a contextual note that the block belongs to a small town with the sea nearby; do not draw a sea or harbour edge inside the block unless separately established.

Allowed zone labels: Alley, Filming Property, Yard and Stair, Neighbour Low-Rise

Drawing style: a clean flat 2D architectural site map, straight-down
orthographic view — the exact drafting language of the attached style
reference: pure white page background, thin dark outlines, flat muted
pastel colour fills per zone (pale yellow, pale cyan, pale blue, light
tan, soft green, light grey), heavier dark strokes for building
outer walls, simple flat plan symbols. NO 3D, no axonometric tilt, no
perspective, no shadows, no photo textures, no people, no story
props.
Markers: ONLY the circled markers listed below — each is a small
white circle with a thin black ring containing a short code (one
capital letter + one digit). Place each circle exactly on its listed
target. Besides these circles, the only text allowed is the short
English zone labels listed below and a small 'N' north arrow at the
top-right corner. No other words, numbers, legend or title.

The LAST attached image is a site plan from the same production —
use it ONLY as the DRAFTING-STYLE reference (line weight, pastel
fill language, circled-marker look, label typography). Its place and
layout have NOTHING to do with this map — never copy its content.
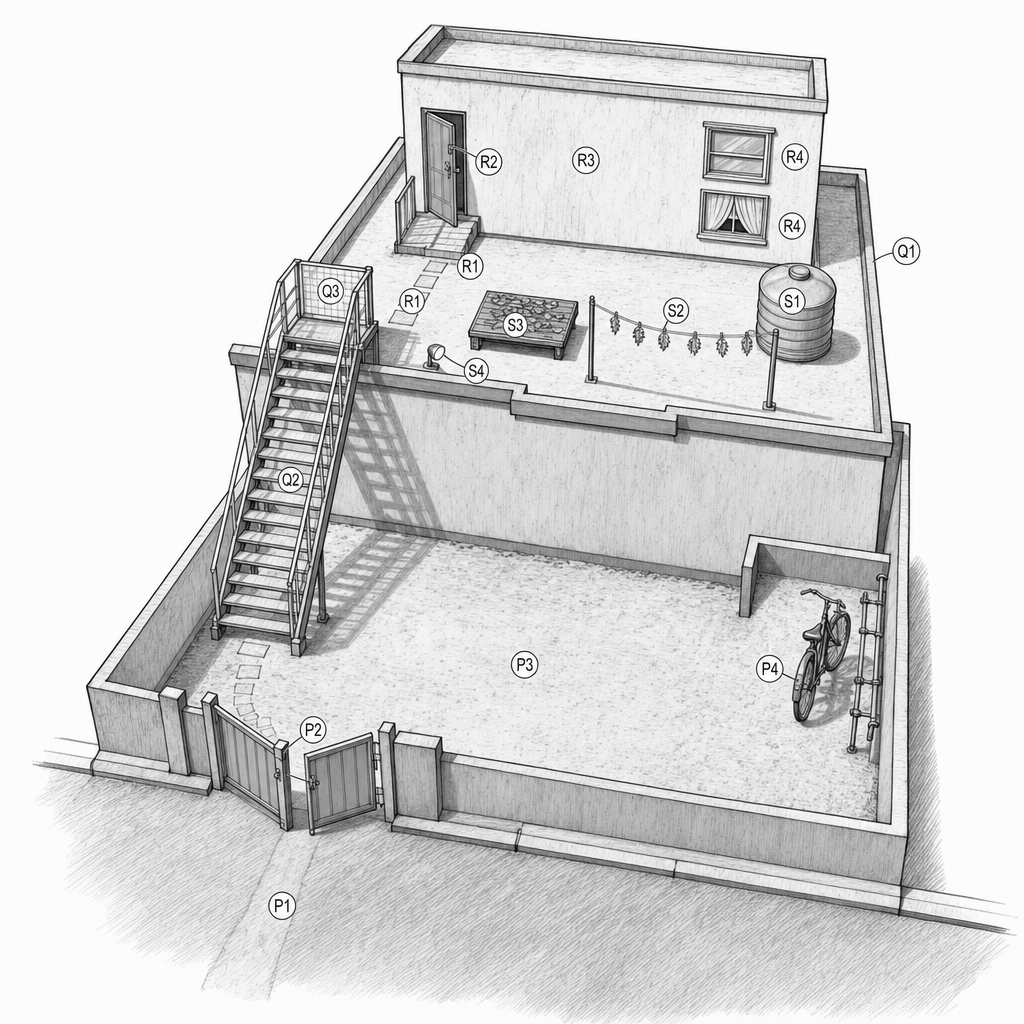
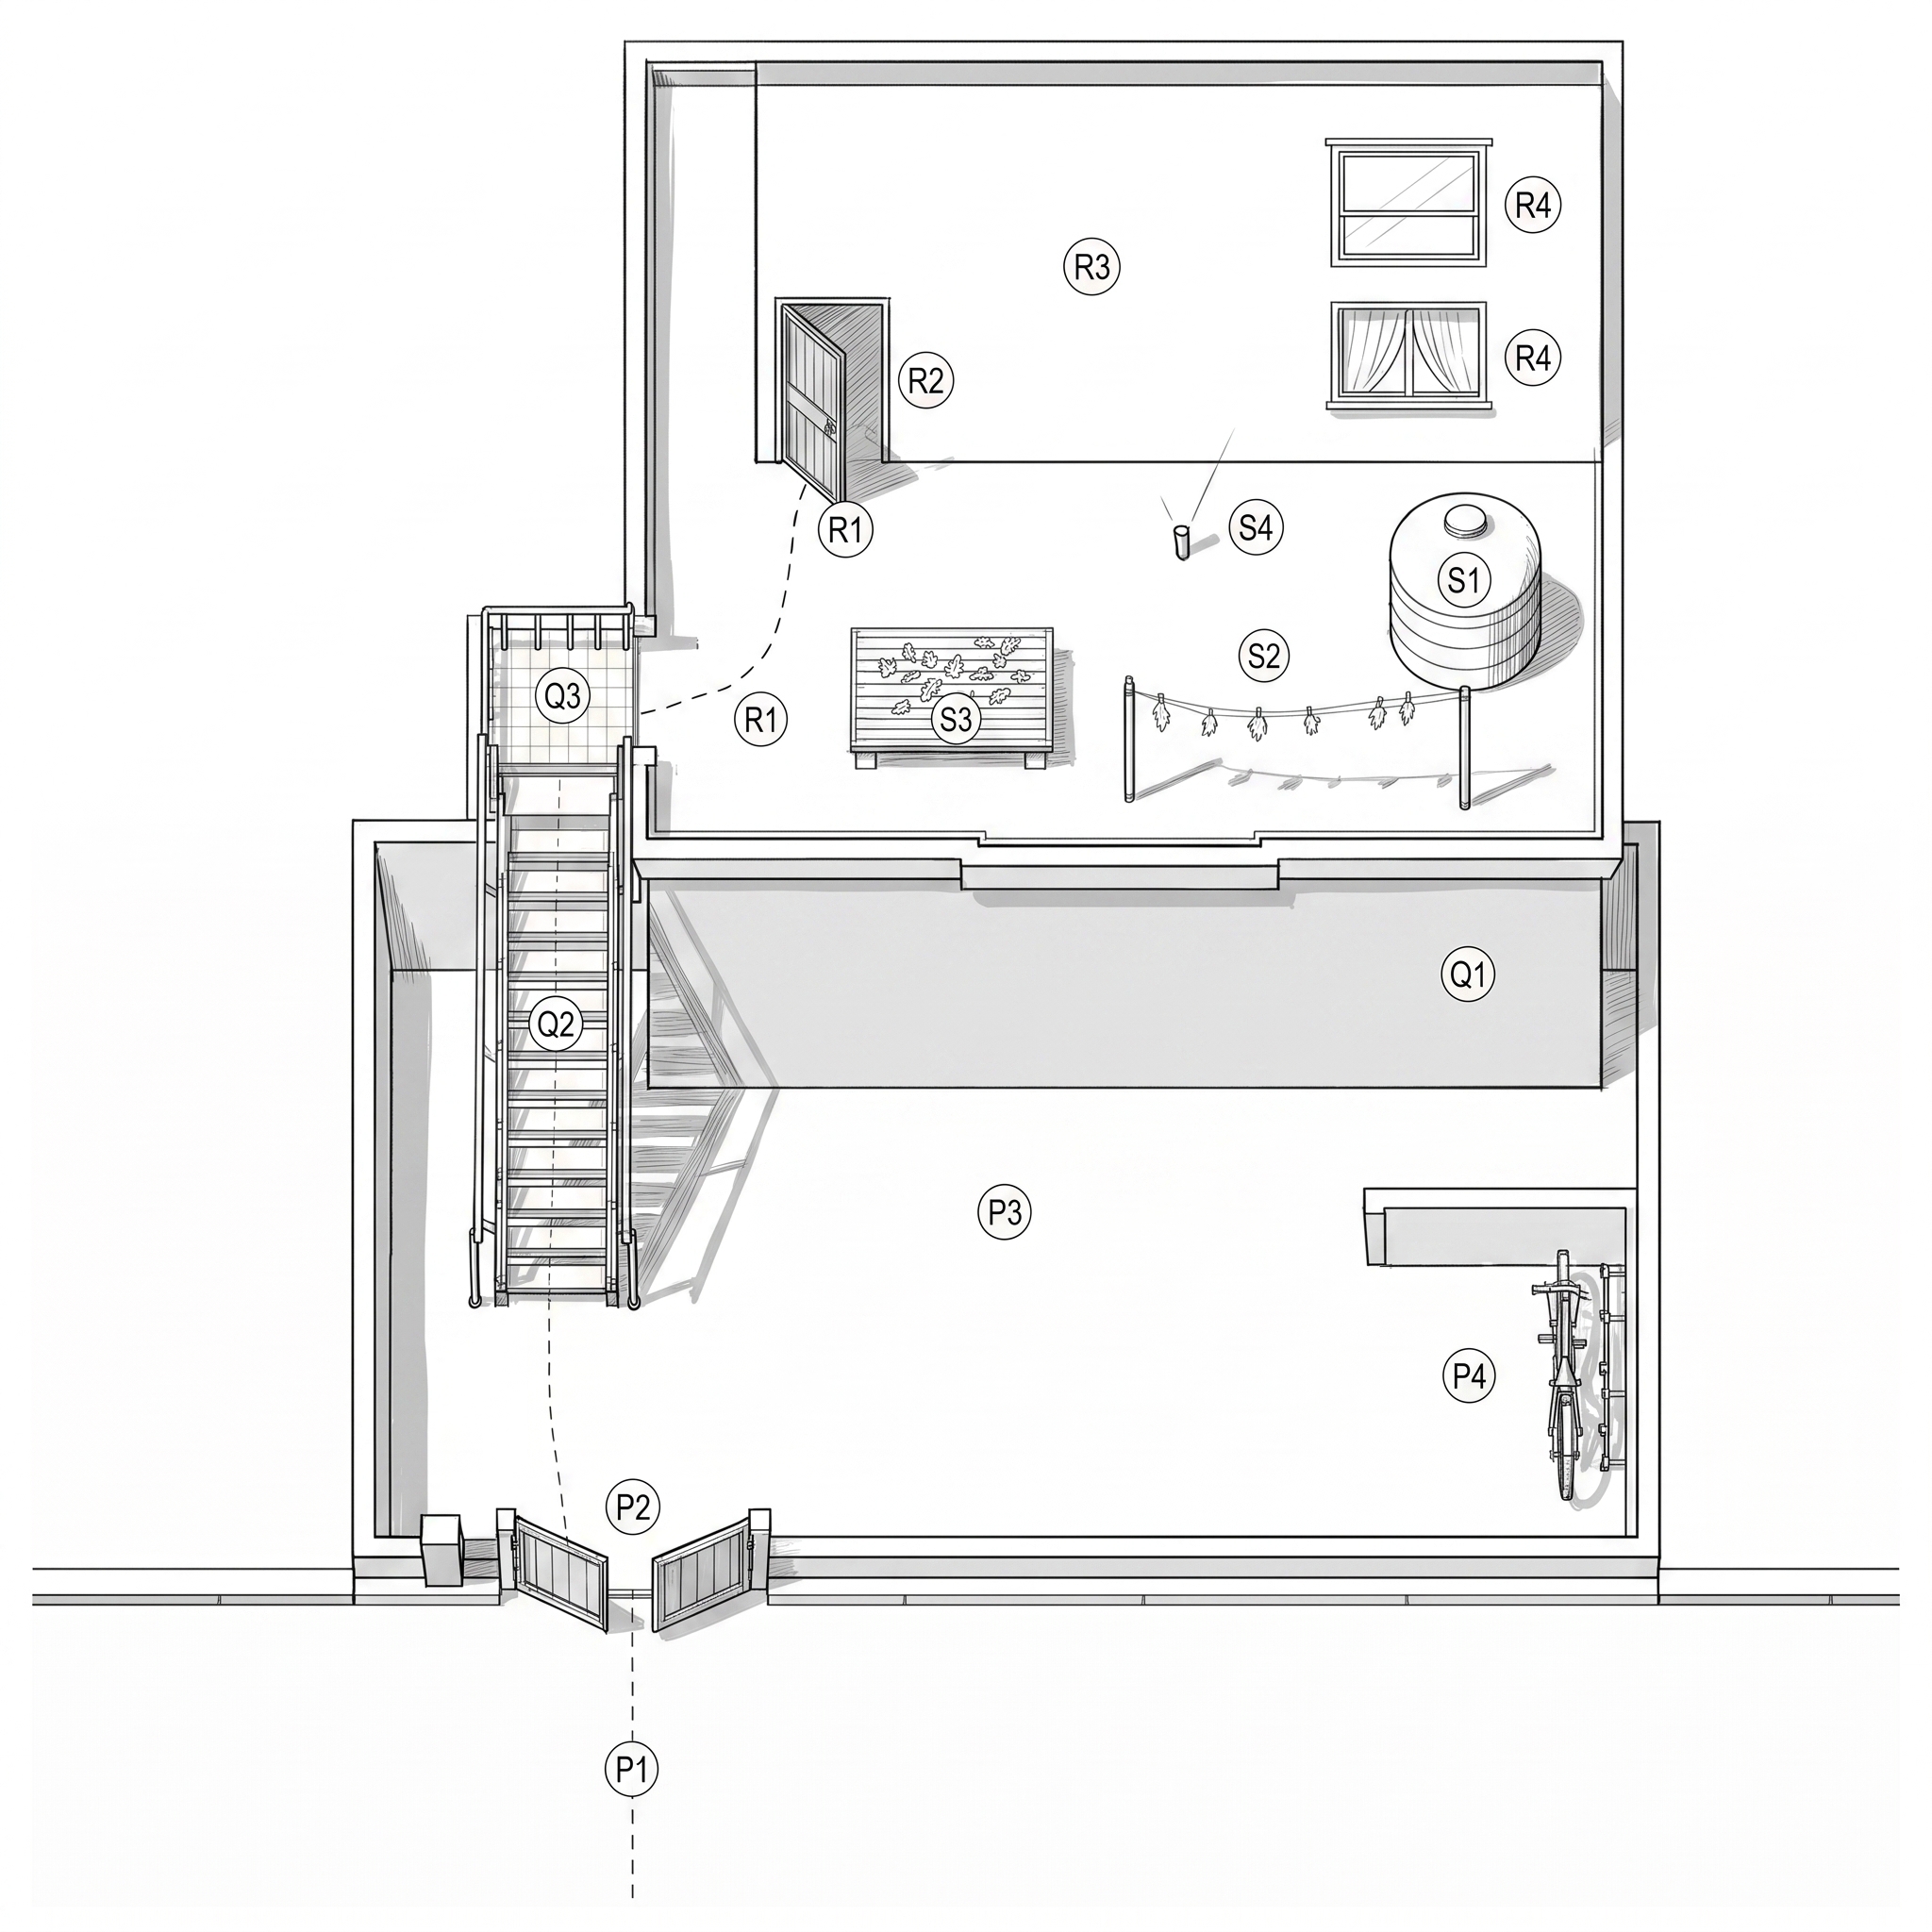
| code | name | kind | placement | evidence |
|---|---|---|---|---|
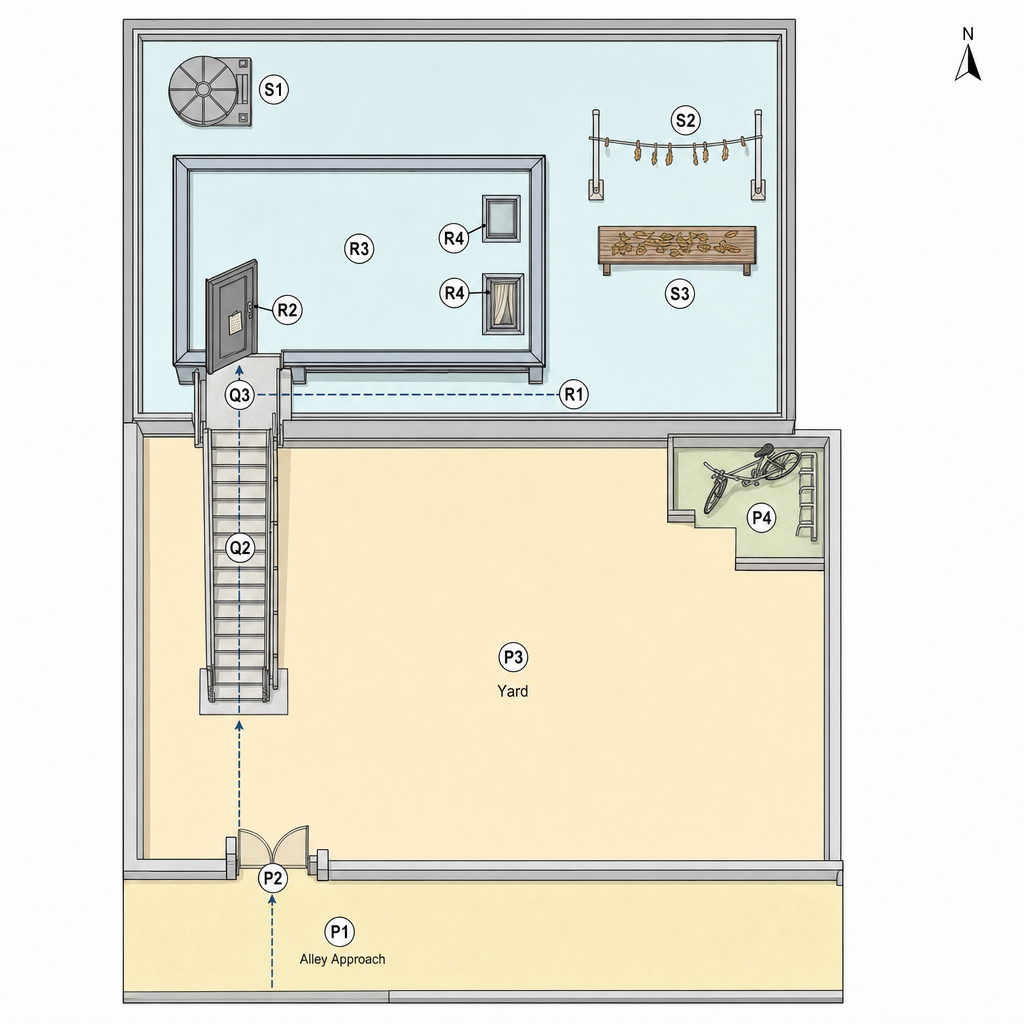
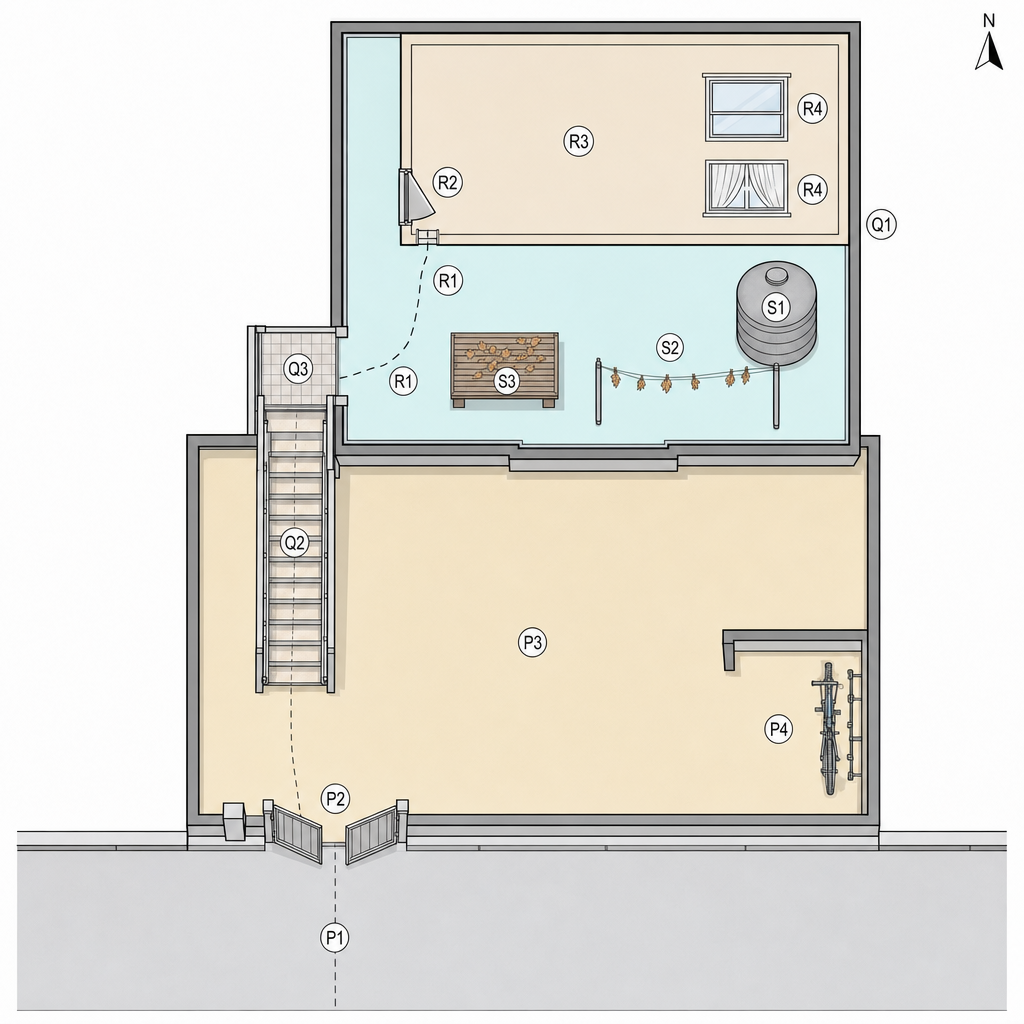
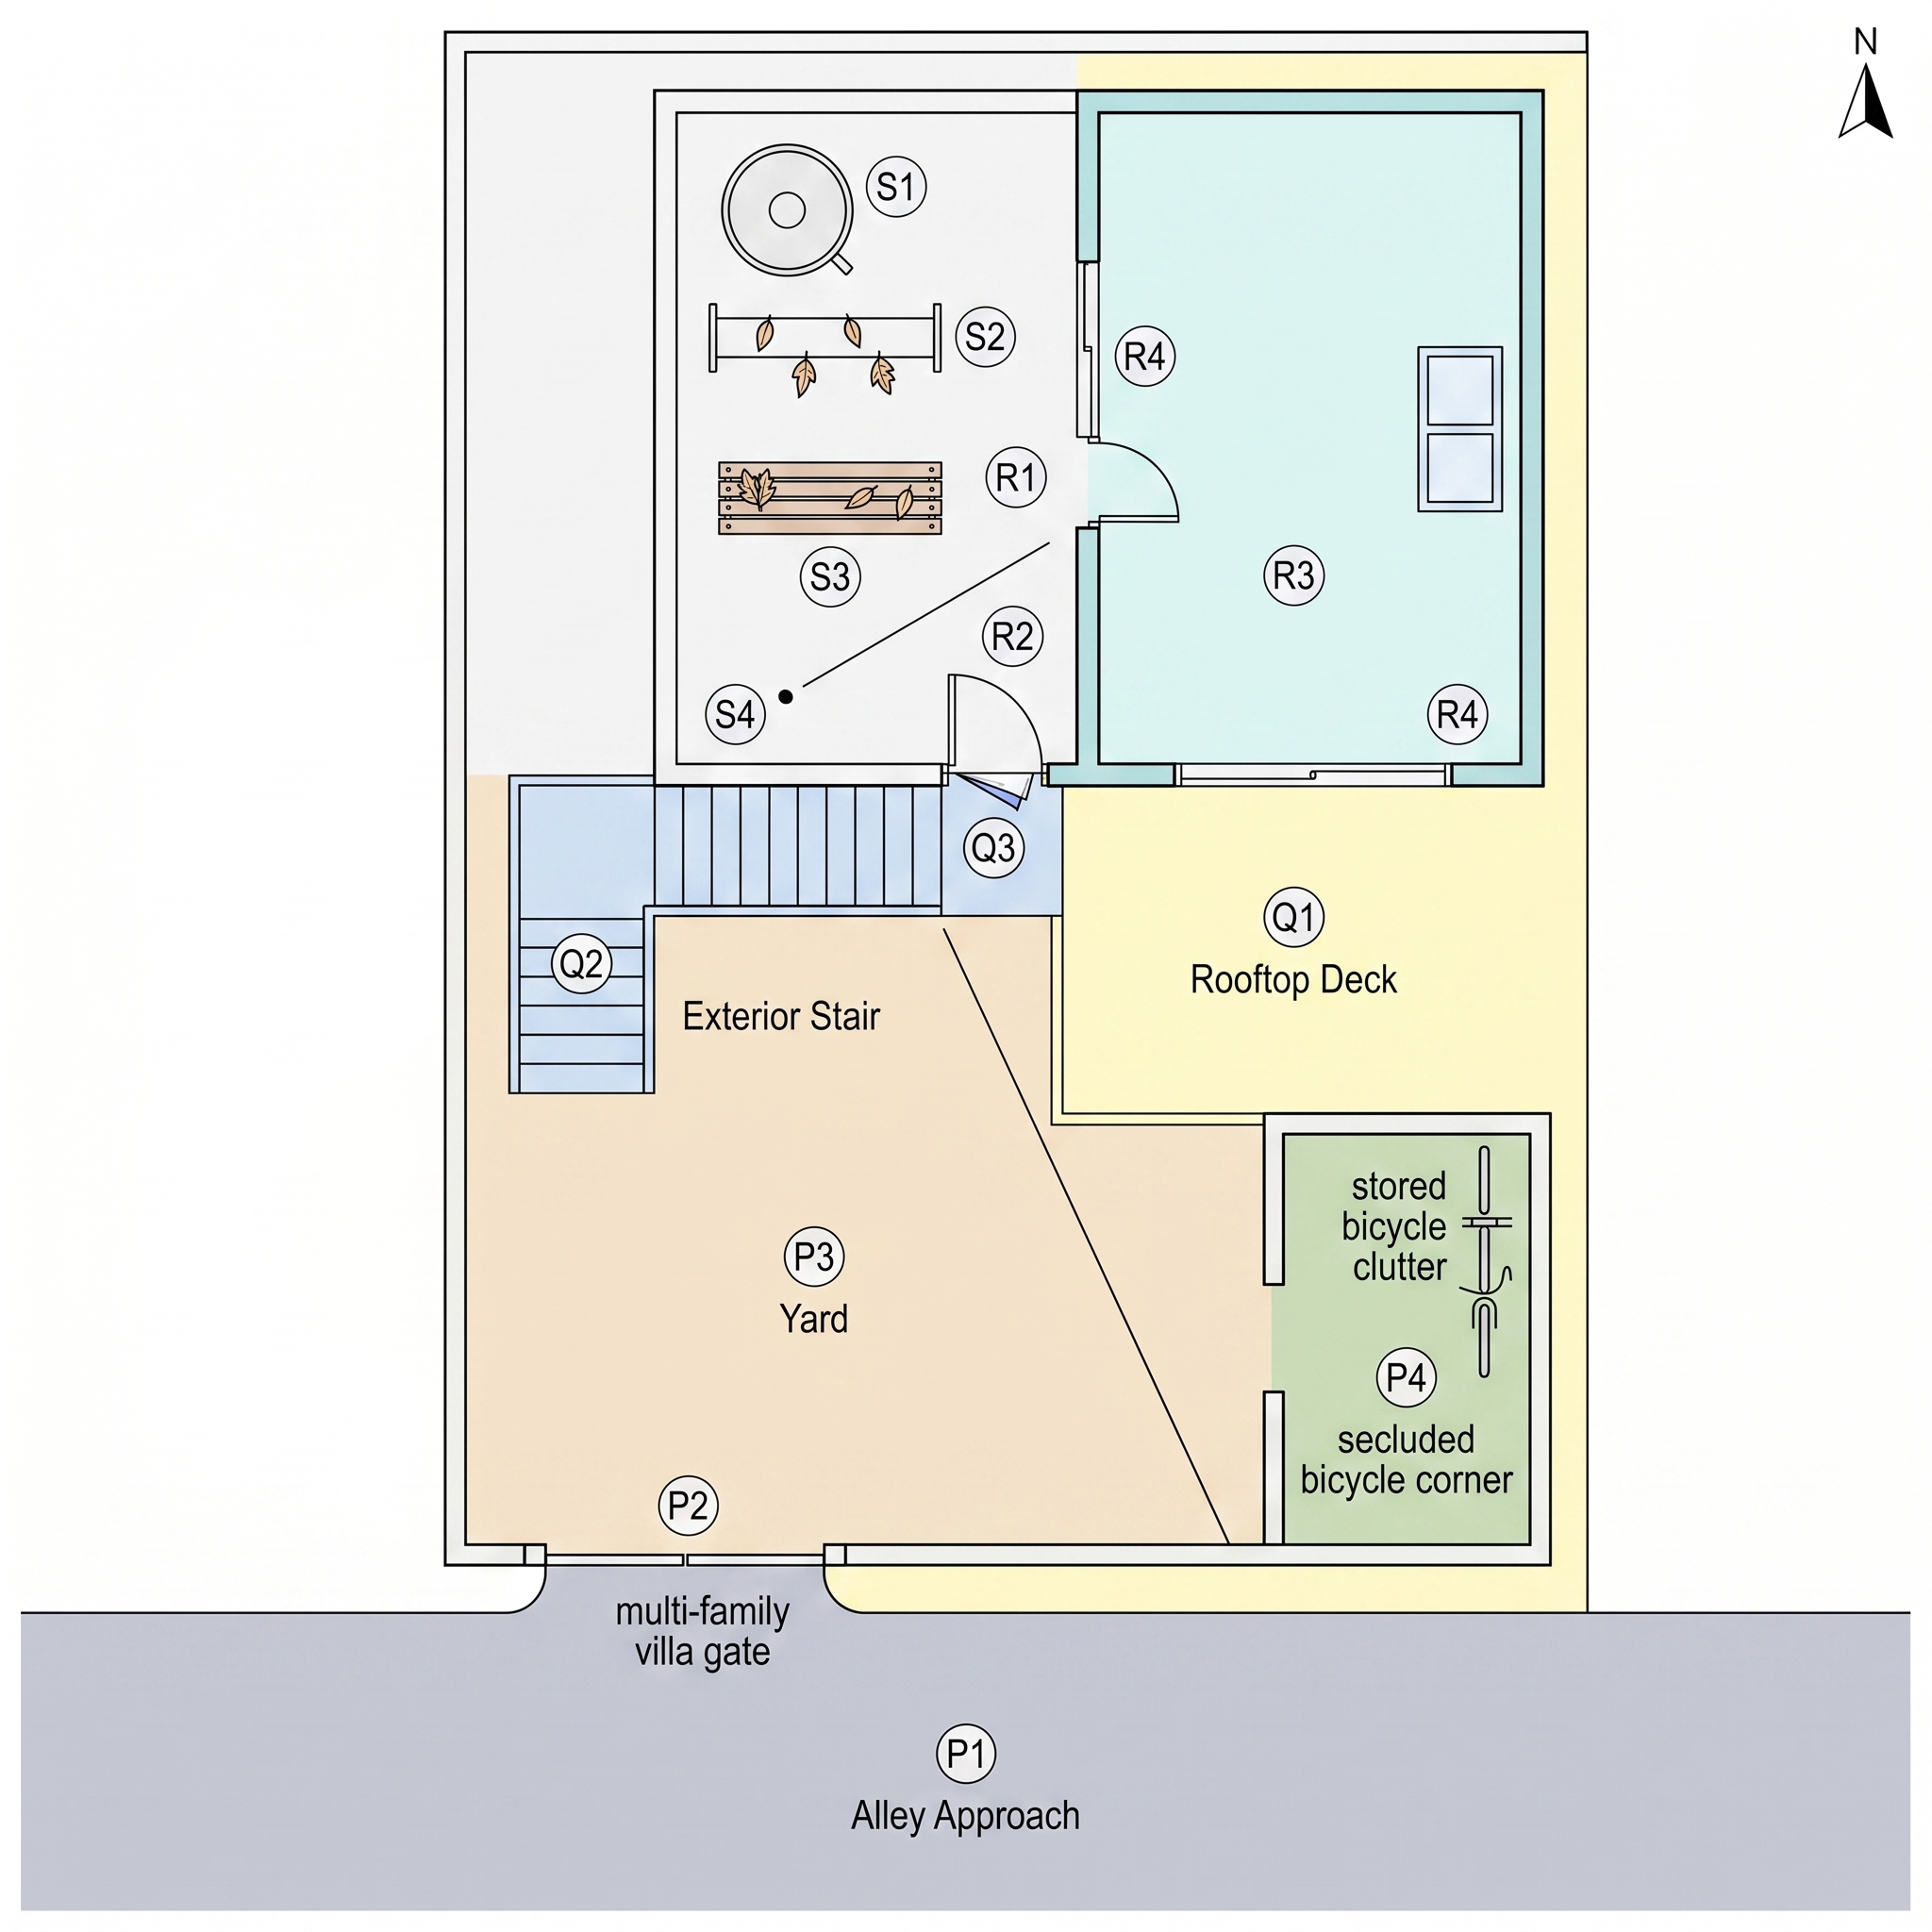
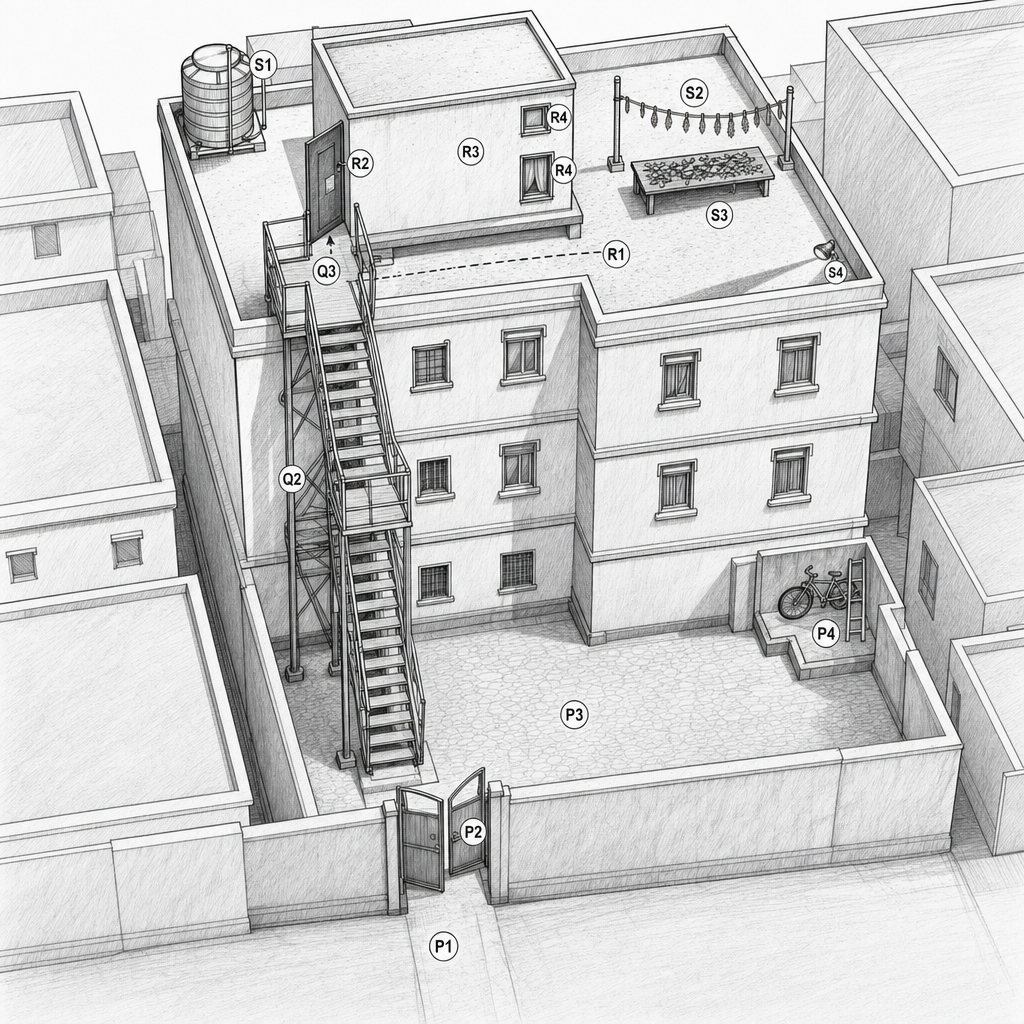
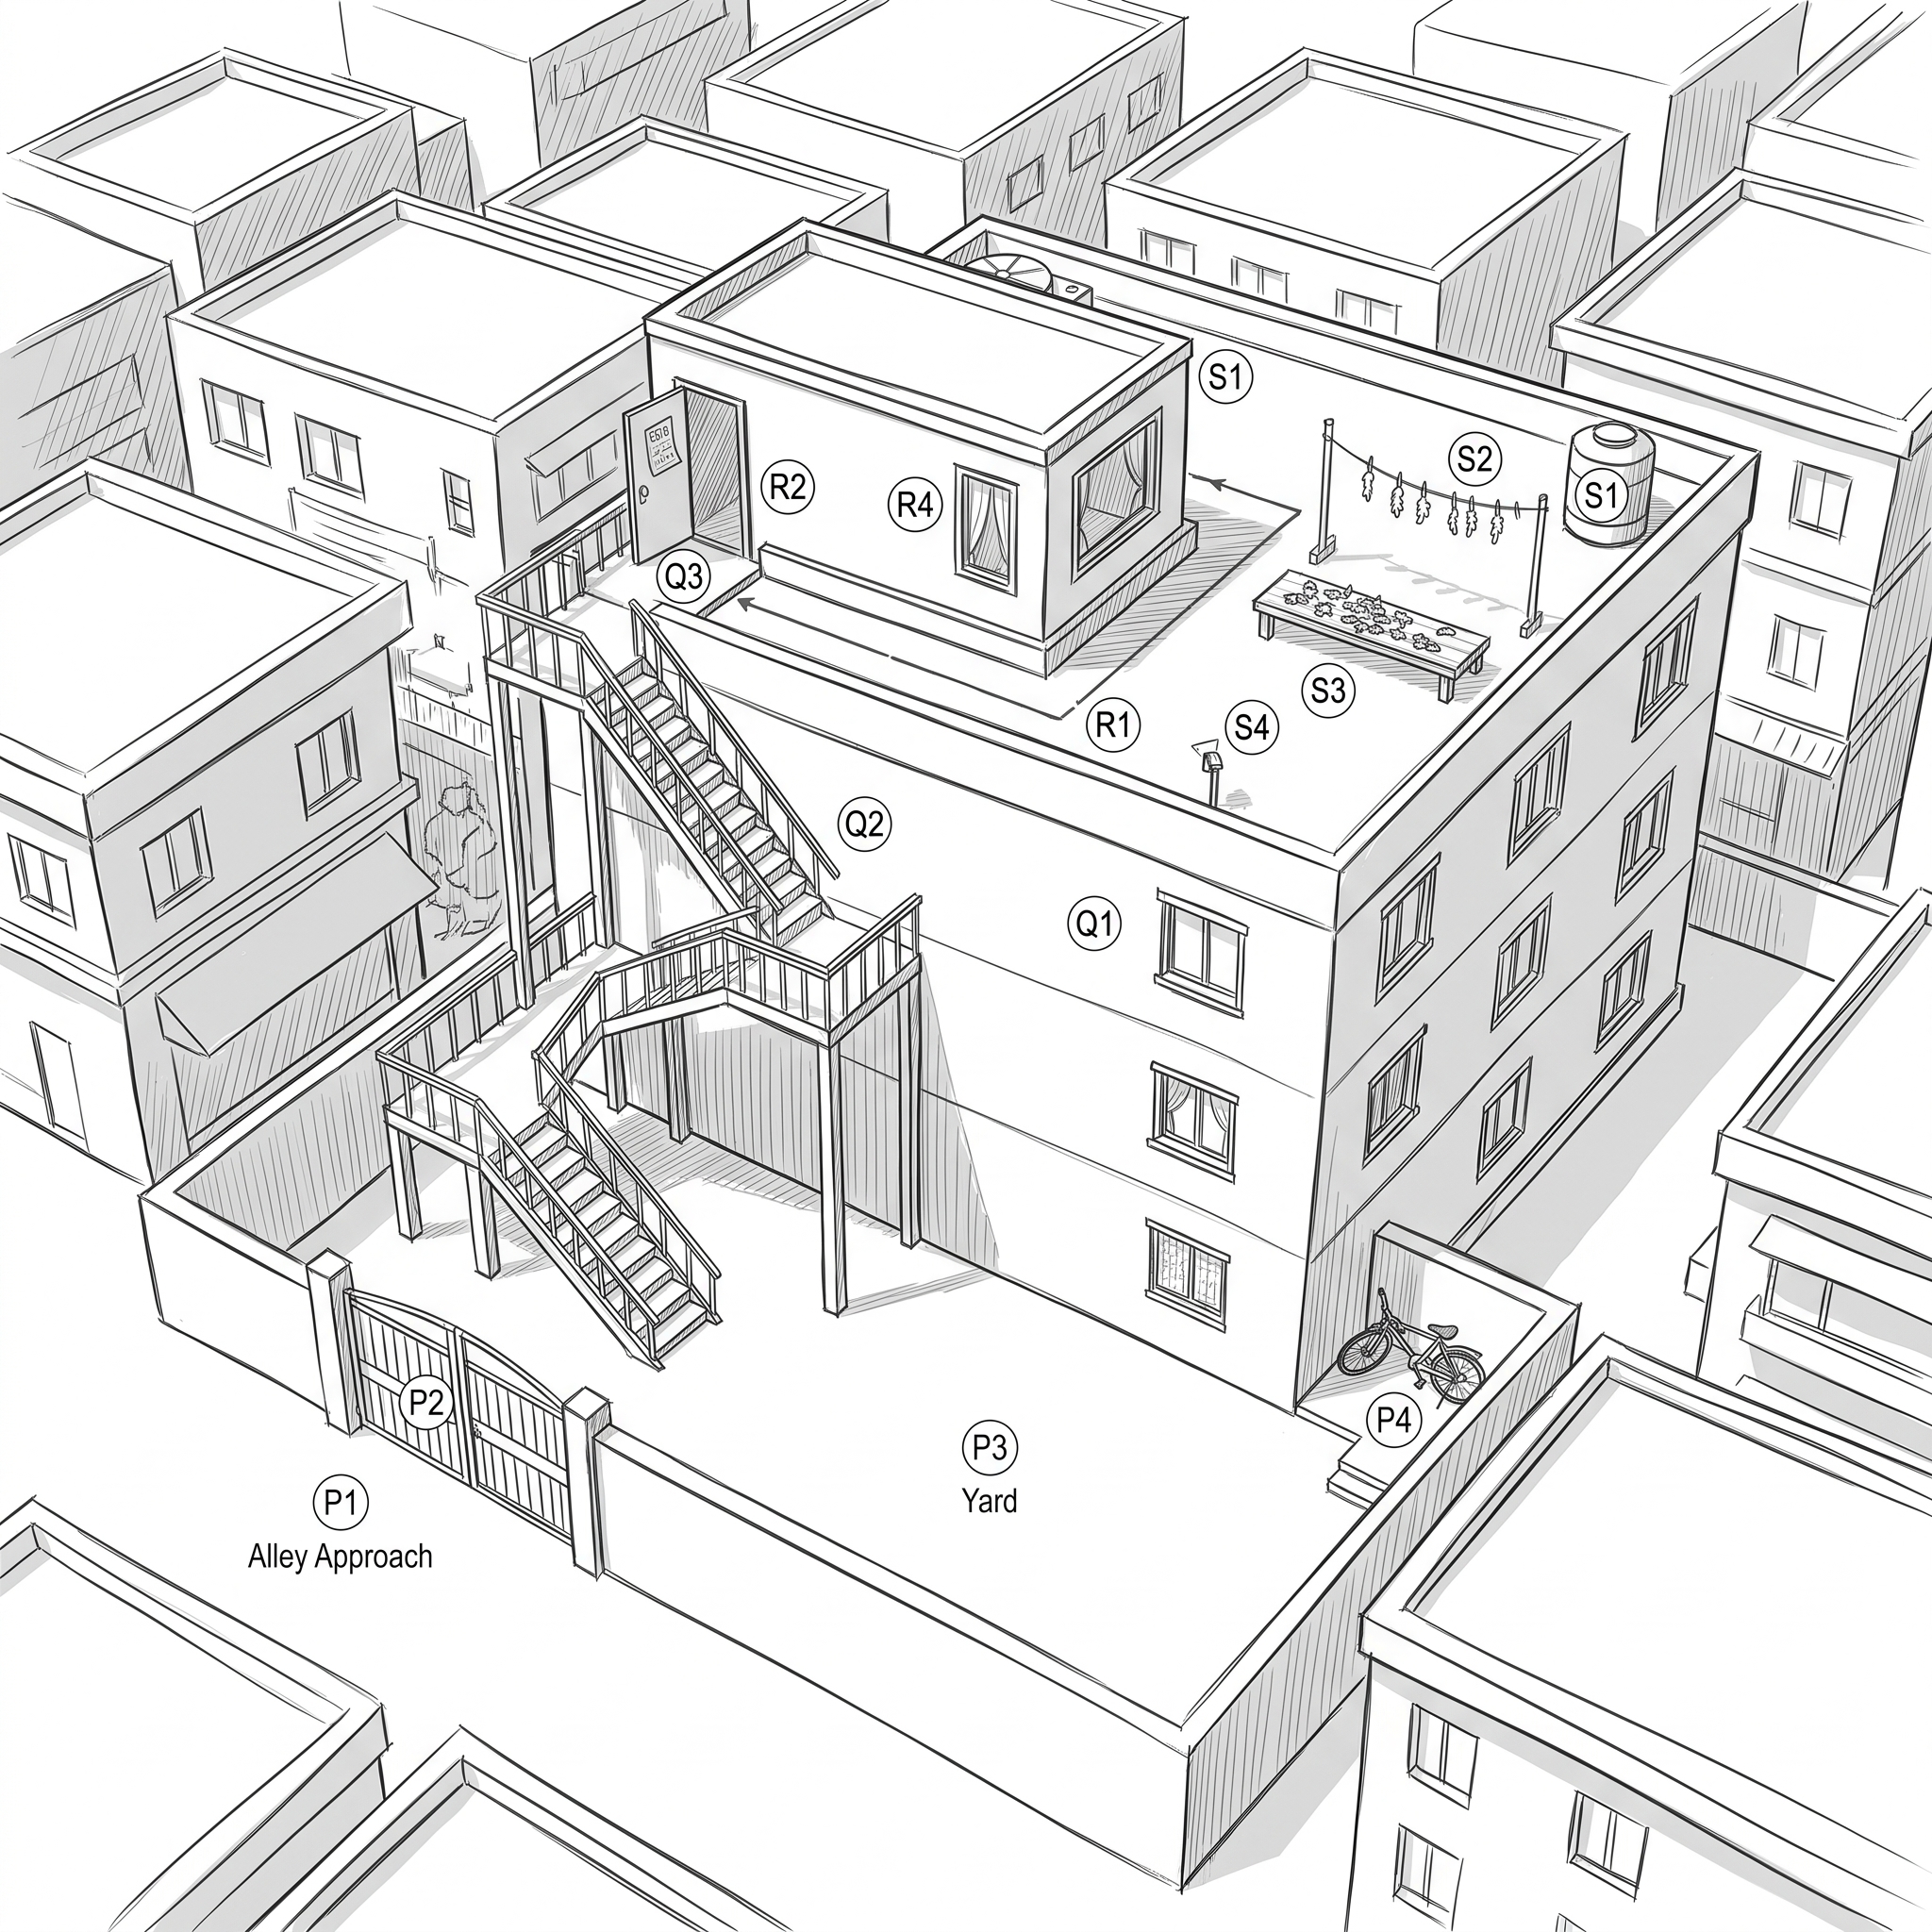
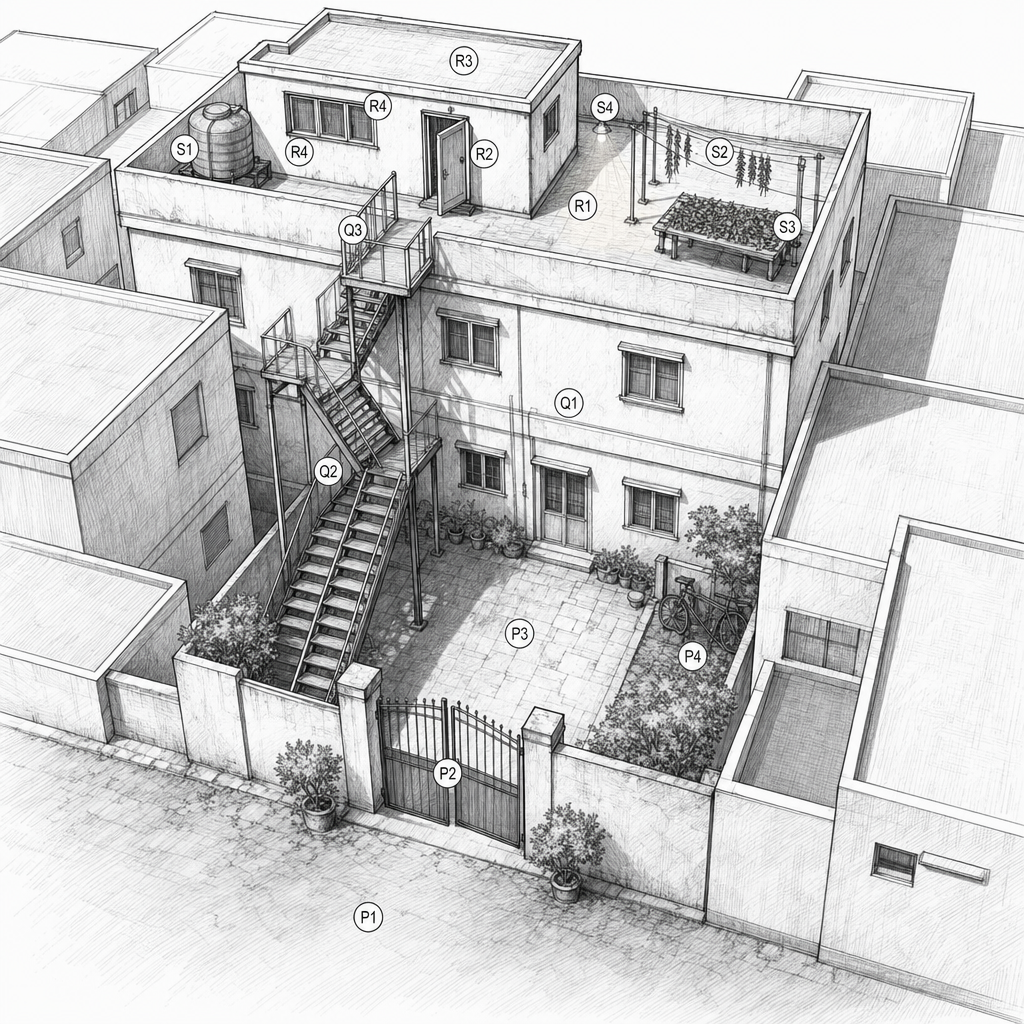
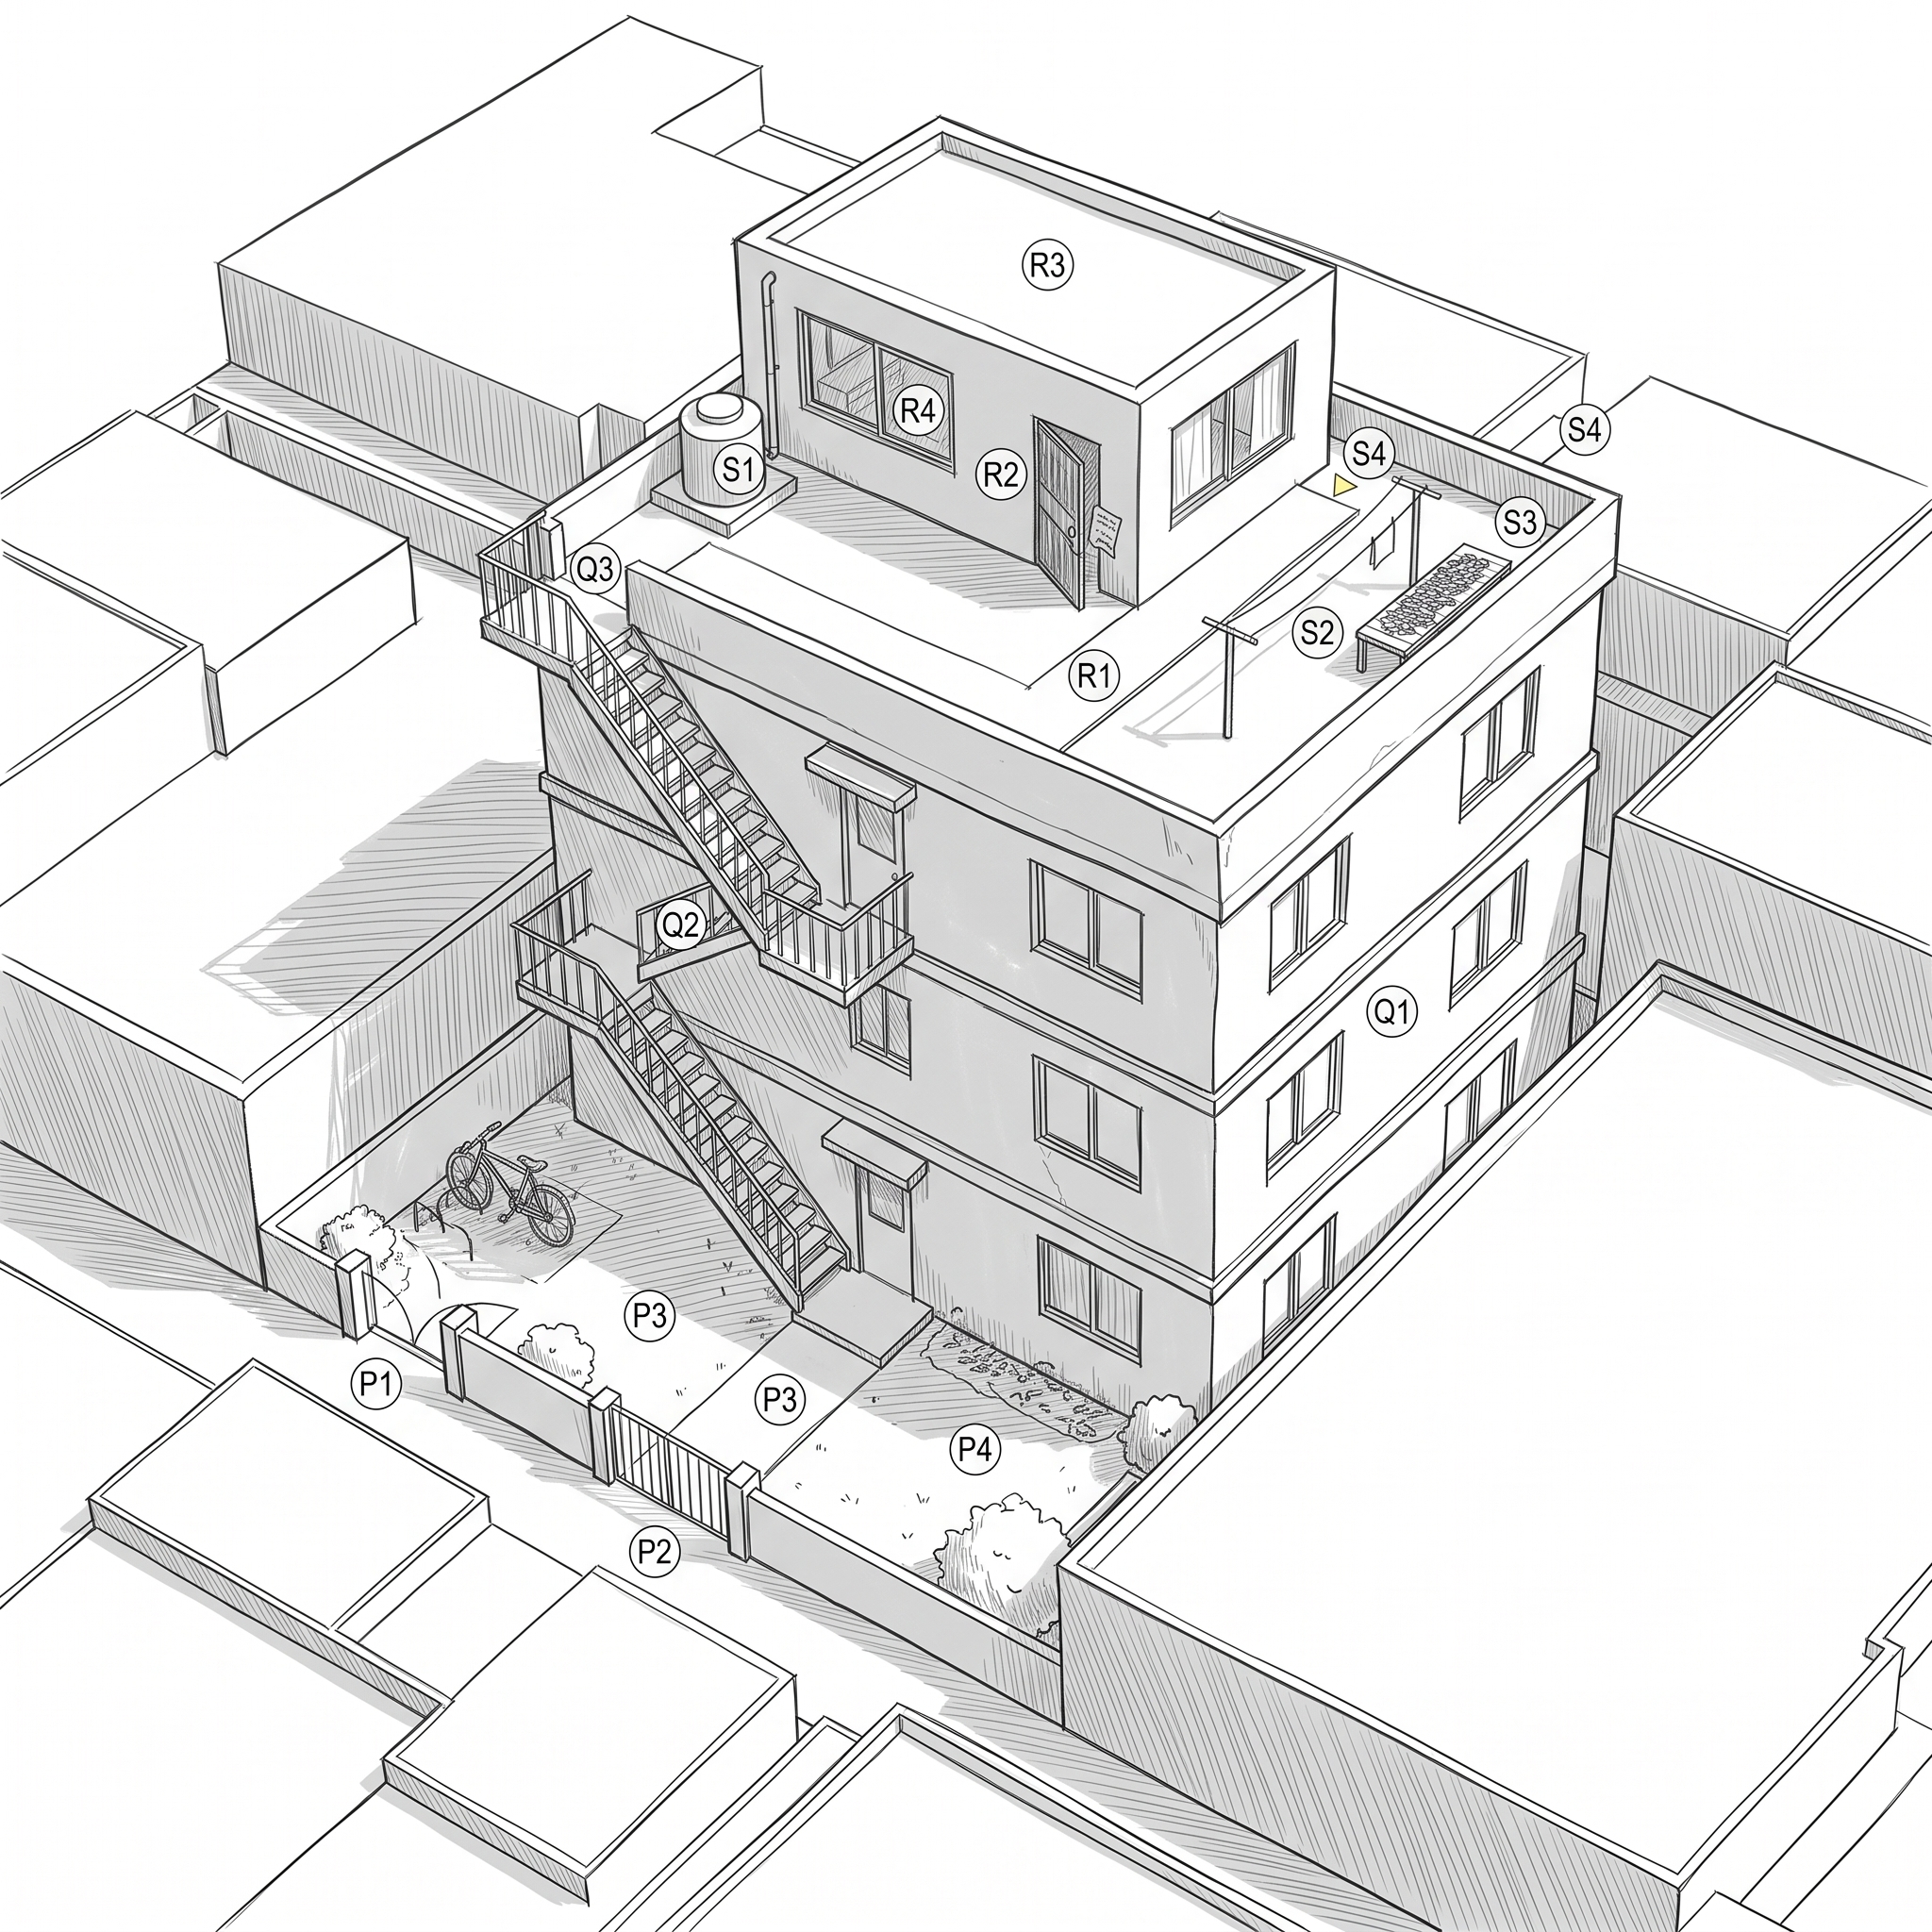
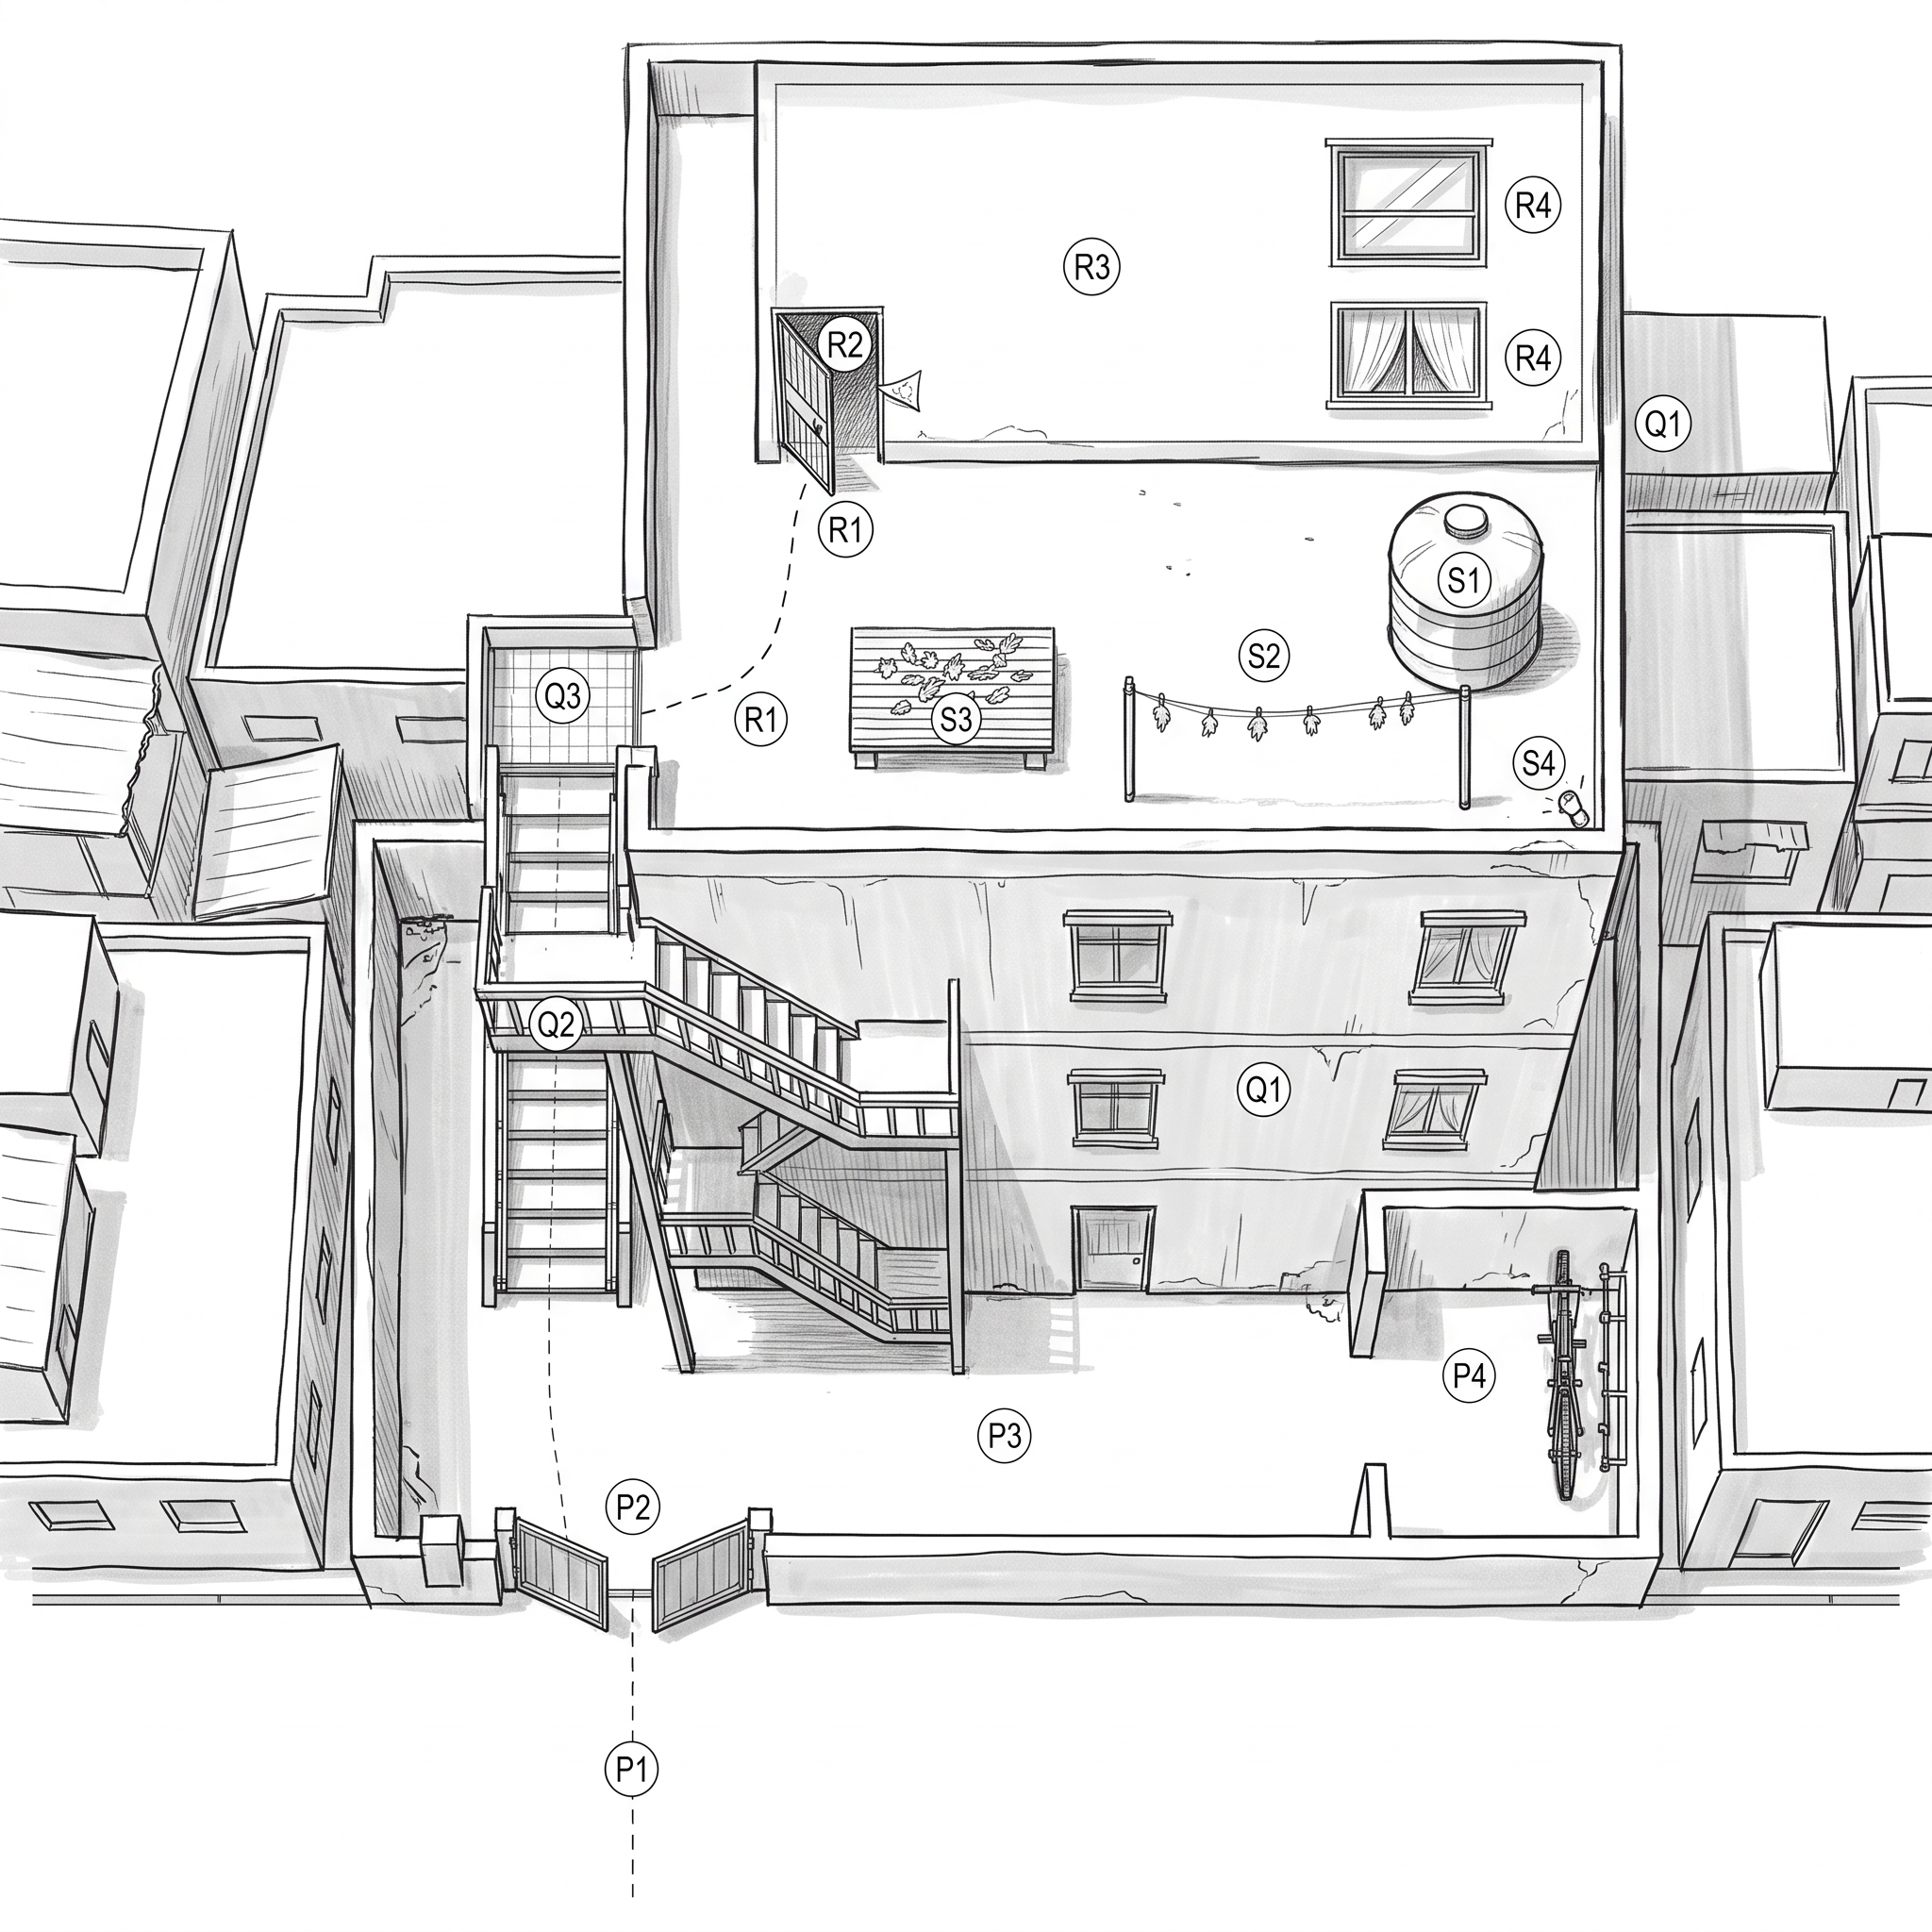
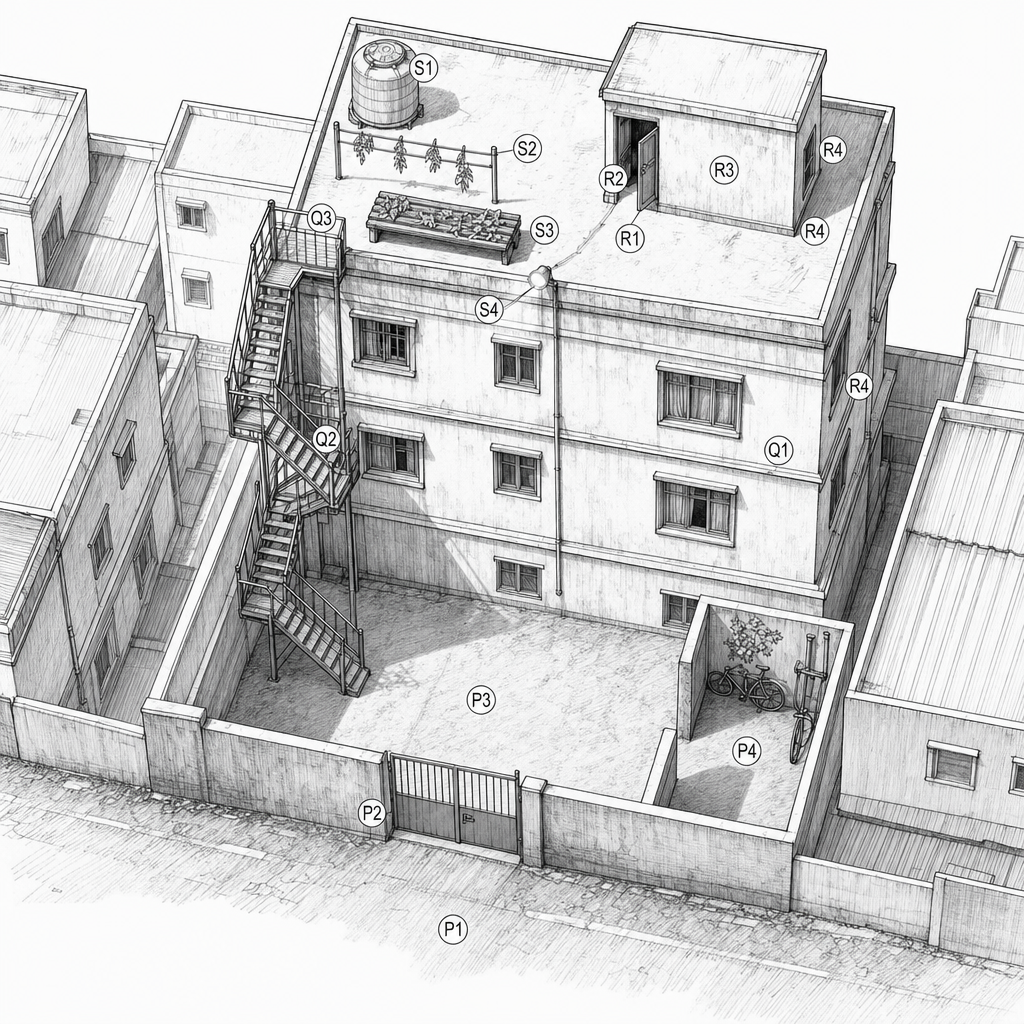
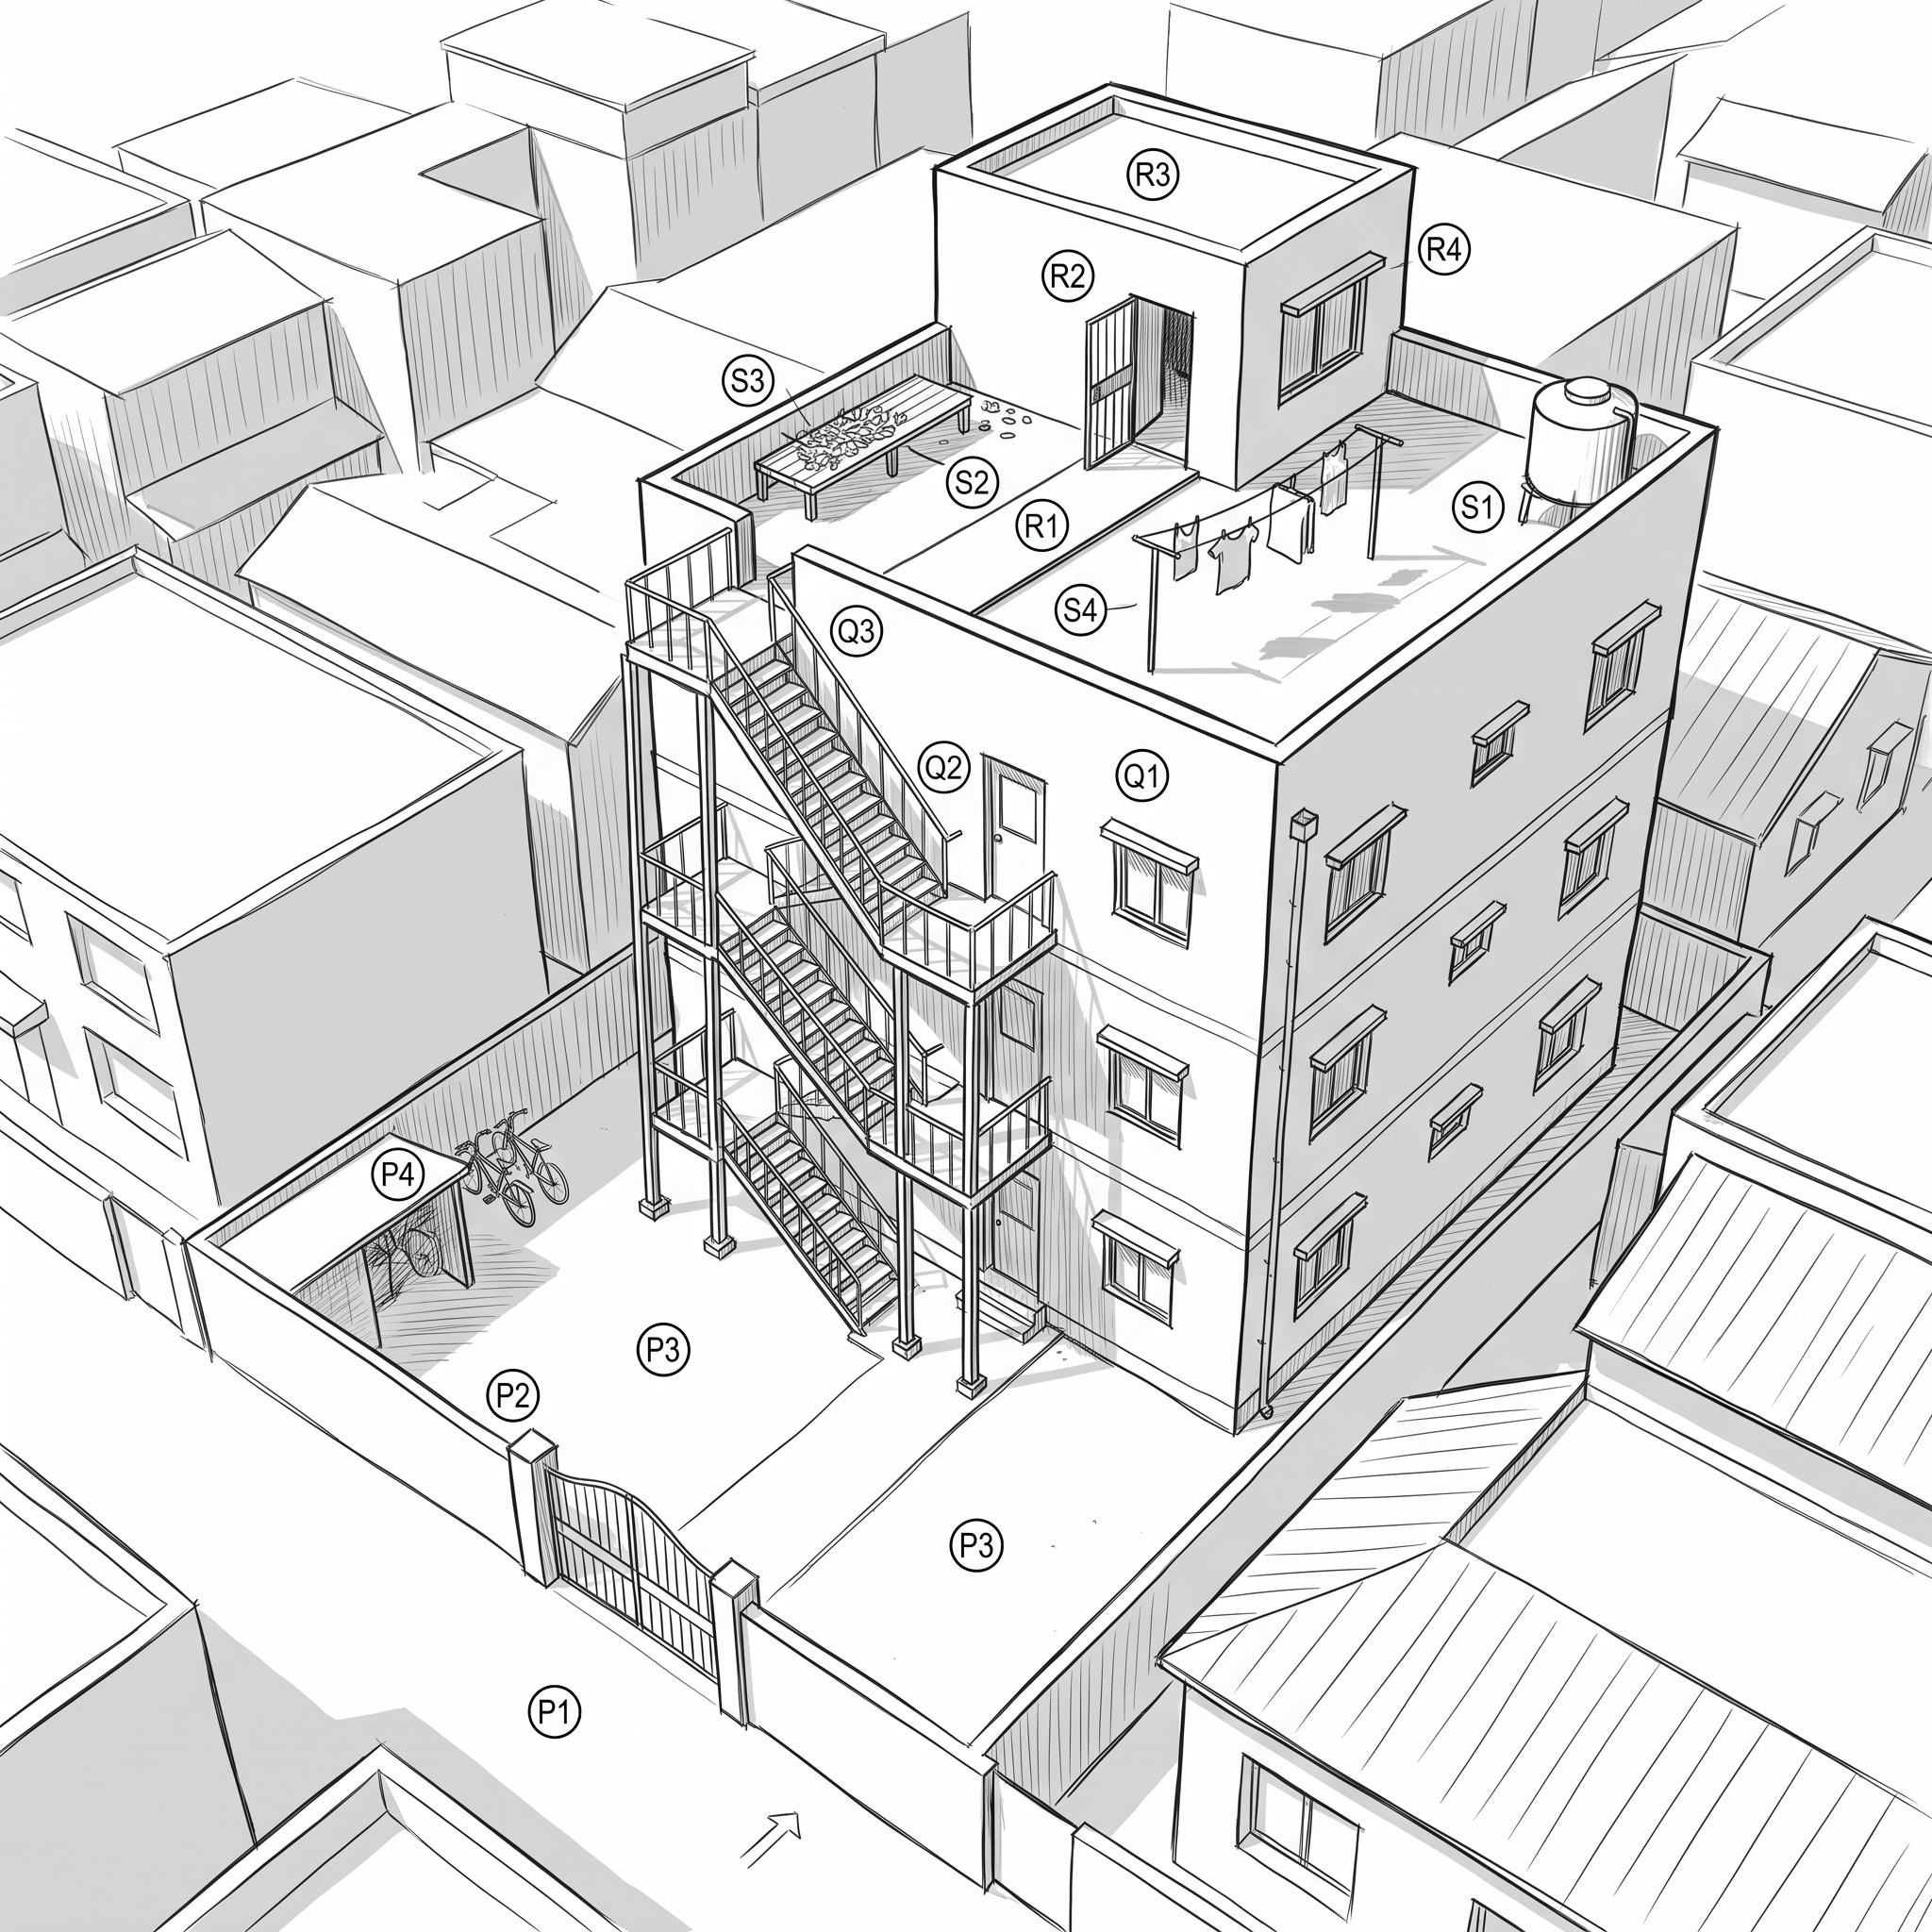
| P1 | alley approach | approach | Show the alley approach at the lower edge of the detail sketch, leading directly toward the filming property gate and able to support bicycle movement. | E001 |
| P2 | multi-family villa gate | gate | Place the gate on the alley frontage so that opening it leads directly into the property yard. | E002 |
| P3 | yard | yard | Draw the yard immediately inside the gate, between the alley entry and the exterior stair route. | E003 |
| P4 | secluded bicycle corner | yard feature | Set a tucked-away corner within the yard where a bicycle can be left roughly, separated from the main gate-to-stair path. | E003 |
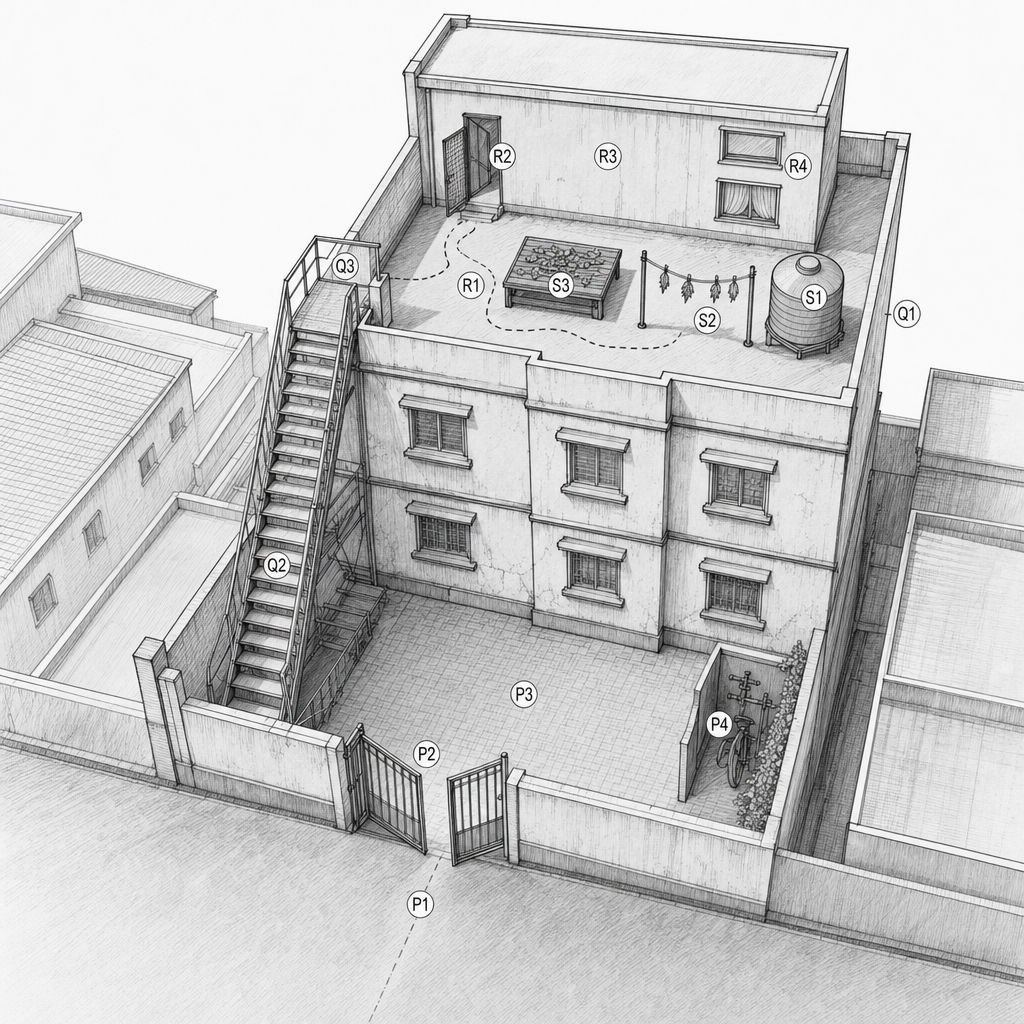
| Q1 | rooftop-room building footprint | building footprint | Place the aged multi-family villa footprint along the yard, carrying the rooftop-room level above. | E018 |
| Q2 | exterior steel retrofit stair run | stair | Attach the exterior steel retrofit stair to the building wall, starting from the yard and rising outside the building toward the rooftop landing. | E025 (inferred) |
| Q3 | upper stair landing | landing | Place the landing at the top of the exterior stair where the iron entrance door is immediately visible. | E006 |
| R1 | landing-to-door roof path | roof path | Draw the roof path from the landing toward the iron door so it passes beside the bench area and the clothesline area. | E012 |
| R2 | iron entrance door | door | Set the iron door on the rooftop-room unit facing the landing path; include the door-gap flyer detail and allow it to be shown partly open. | E015 |
| R3 | rooftop-room unit | rooftop unit | Place the rooftop-room unit on the roof surface, connected to the iron entrance door and containing the indicated window openings. | E023 |
| R4 | rooftop-room window set | window | Mark the small living-room window and the curtained room window on the rooftop-room unit, with at least one window oriented for the low-wall sightline. | E023 |
| S1 | water tank | roof object | Place the water tank on the roof surface near the rooftop deck contents, clear of the landing-to-door path. | E011 |
| S2 | clothesline | roof object | Run the clothesline across the roof surface close enough to the approach path that hanging or dried leaves can brush a passerby. | E011 |
| S3 | wooden drying bench with dried leaves | roof object | Place the wooden drying bench on the rooftop near the clothesline and along the path toward the iron door, carrying the dried leaves. | E011 |
| S4 | low-angle night light-source position | lighting position | Mark a low-angle light-source position affecting the rooftop path, only to support the long-shadow cue and without assigning any broader colour mood. | E014 (inferred) |
Draw ONE detailed top-down architectural sketch of the filming

property shown inside the dashed boundary of the FIRST attached

image (a neighbourhood map). Zoom into that property so the

building, its rooftop deck, the external stair, the yard and the

approach fill the frame; keep every block's relative position,

proportion and opening exactly where the map draws them. This is

a zoomed REDRAW of that map area, not a copy of the map.

LAYOUT DETAIL (the content ground truth):
Begin the detail sketch from the alley approach at the bottom, with the route leading straight to the gate on the property frontage. Immediately inside the gate, draw the yard as the first usable space, with the main path continuing toward the exterior stair. Put the secluded bicycle corner off that main path so it reads as a tucked-away part of the yard rather than the open center. Set the building footprint along the yard edge, and attach the exterior steel retrofit stair to the outside wall so its foot is reachable from the yard. Carry the stair upward to the rooftop landing, and make the landing face the iron door without obstruction. On the roof, draw the path from landing to iron door passing beside the clothesline and the wooden drying bench with dried leaves. Place the water tank as another rooftop object on the same roof surface, not blocking the landing-to-door approach. Draw the rooftop-room unit behind the iron door, with its window set oriented so the window-to-low-wall sightline can be understood. If the light-source position is shown, keep it as a functional low-angle source for shadows only, not as a general mood or material cue.

CIRCLED MARKERS (all of them, nothing else — these codes replace

the map's codes entirely):
- (P1) alley approach — Show the alley approach at the lower edge of the detail sketch, leading directly toward the filming property gate and able to support bicycle movement.
- (P2) multi-family villa gate — Place the gate on the alley frontage so that opening it leads directly into the property yard.
- (P3) yard — Draw the yard immediately inside the gate, between the alley entry and the exterior stair route.
- (P4) secluded bicycle corner — Set a tucked-away corner within the yard where a bicycle can be left roughly, separated from the main gate-to-stair path.
- (Q1) rooftop-room building footprint — Place the aged multi-family villa footprint along the yard, carrying the rooftop-room level above.
- (Q2) exterior steel retrofit stair run — Attach the exterior steel retrofit stair to the building wall, starting from the yard and rising outside the building toward the rooftop landing.
- (Q3) upper stair landing — Place the landing at the top of the exterior stair where the iron entrance door is immediately visible.
- (R1) landing-to-door roof path — Draw the roof path from the landing toward the iron door so it passes beside the bench area and the clothesline area.
- (R2) iron entrance door — Set the iron door on the rooftop-room unit facing the landing path; include the door-gap flyer detail and allow it to be shown partly open.
- (R3) rooftop-room unit — Place the rooftop-room unit on the roof surface, connected to the iron entrance door and containing the indicated window openings.
- (R4) rooftop-room window set — Mark the small living-room window and the curtained room window on the rooftop-room unit, with at least one window oriented for the low-wall sightline.
- (S1) water tank — Place the water tank on the roof surface near the rooftop deck contents, clear of the landing-to-door path.
- (S2) clothesline — Run the clothesline across the roof surface close enough to the approach path that hanging or dried leaves can brush a passerby.
- (S3) wooden drying bench with dried leaves — Place the wooden drying bench on the rooftop near the clothesline and along the path toward the iron door, carrying the dried leaves.
- (S4) low-angle night light-source position — Mark a low-angle light-source position affecting the rooftop path, only to support the long-shadow cue and without assigning any broader colour mood.

Allowed zone labels: Alley Approach, Yard, Exterior Stair, Rooftop Deck

Drawing style: a clean flat 2D architectural site map, straight-down
orthographic view — the exact drafting language of the attached style
reference: pure white page background, thin dark outlines, flat muted
pastel colour fills per zone (pale yellow, pale cyan, pale blue, light
tan, soft green, light grey), heavier dark strokes for building
outer walls, simple flat plan symbols. NO 3D, no axonometric tilt, no
perspective, no shadows, no photo textures, no people, no story
props.
Markers: ONLY the circled markers listed below — each is a small
white circle with a thin black ring containing a short code (one
capital letter + one digit). Place each circle exactly on its listed
target. Besides these circles, the only text allowed is the short
English zone labels listed below and a small 'N' north arrow at the
top-right corner. No other words, numbers, legend or title.

The LAST attached image is a site plan from the same production —
use it ONLY as the DRAFTING-STYLE reference (line weight, pastel
fill language, circled-marker look, label typography). Its place and
layout have NOTHING to do with this map — never copy its content.
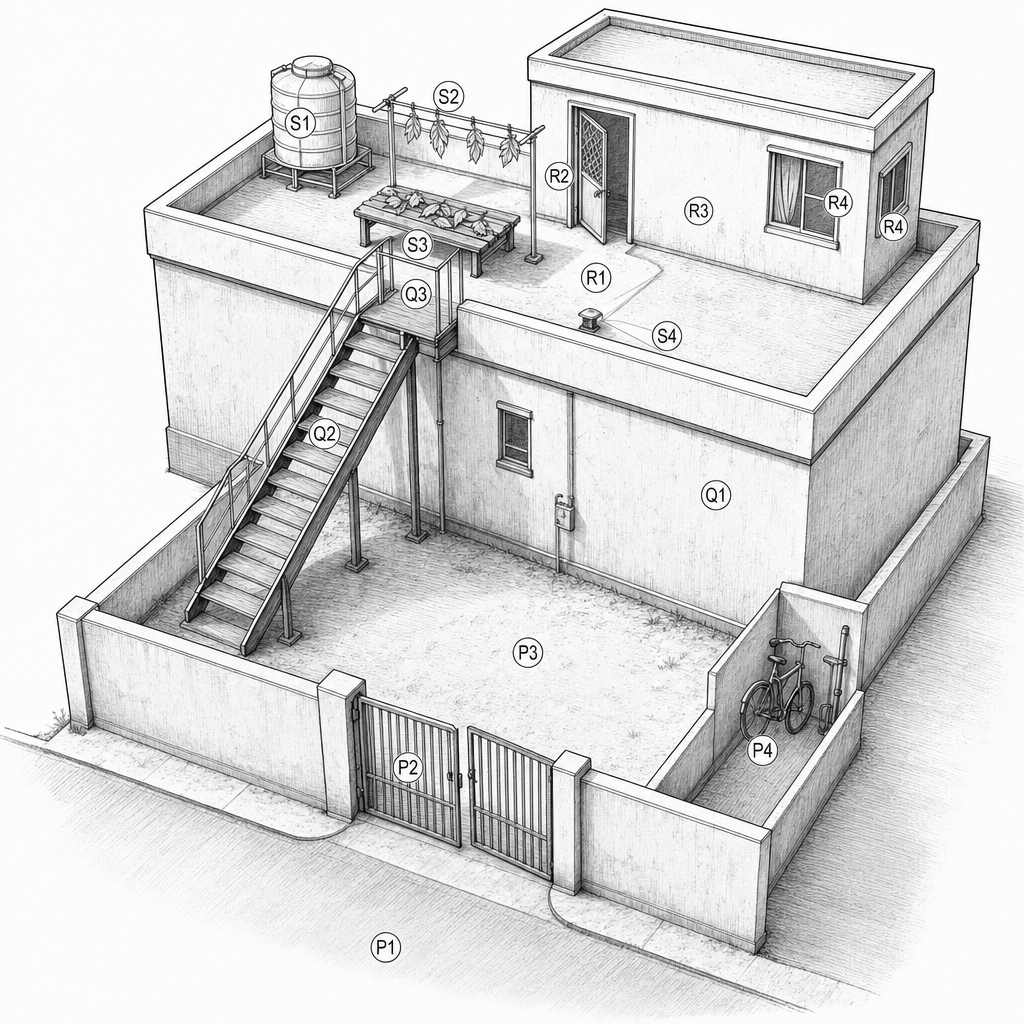
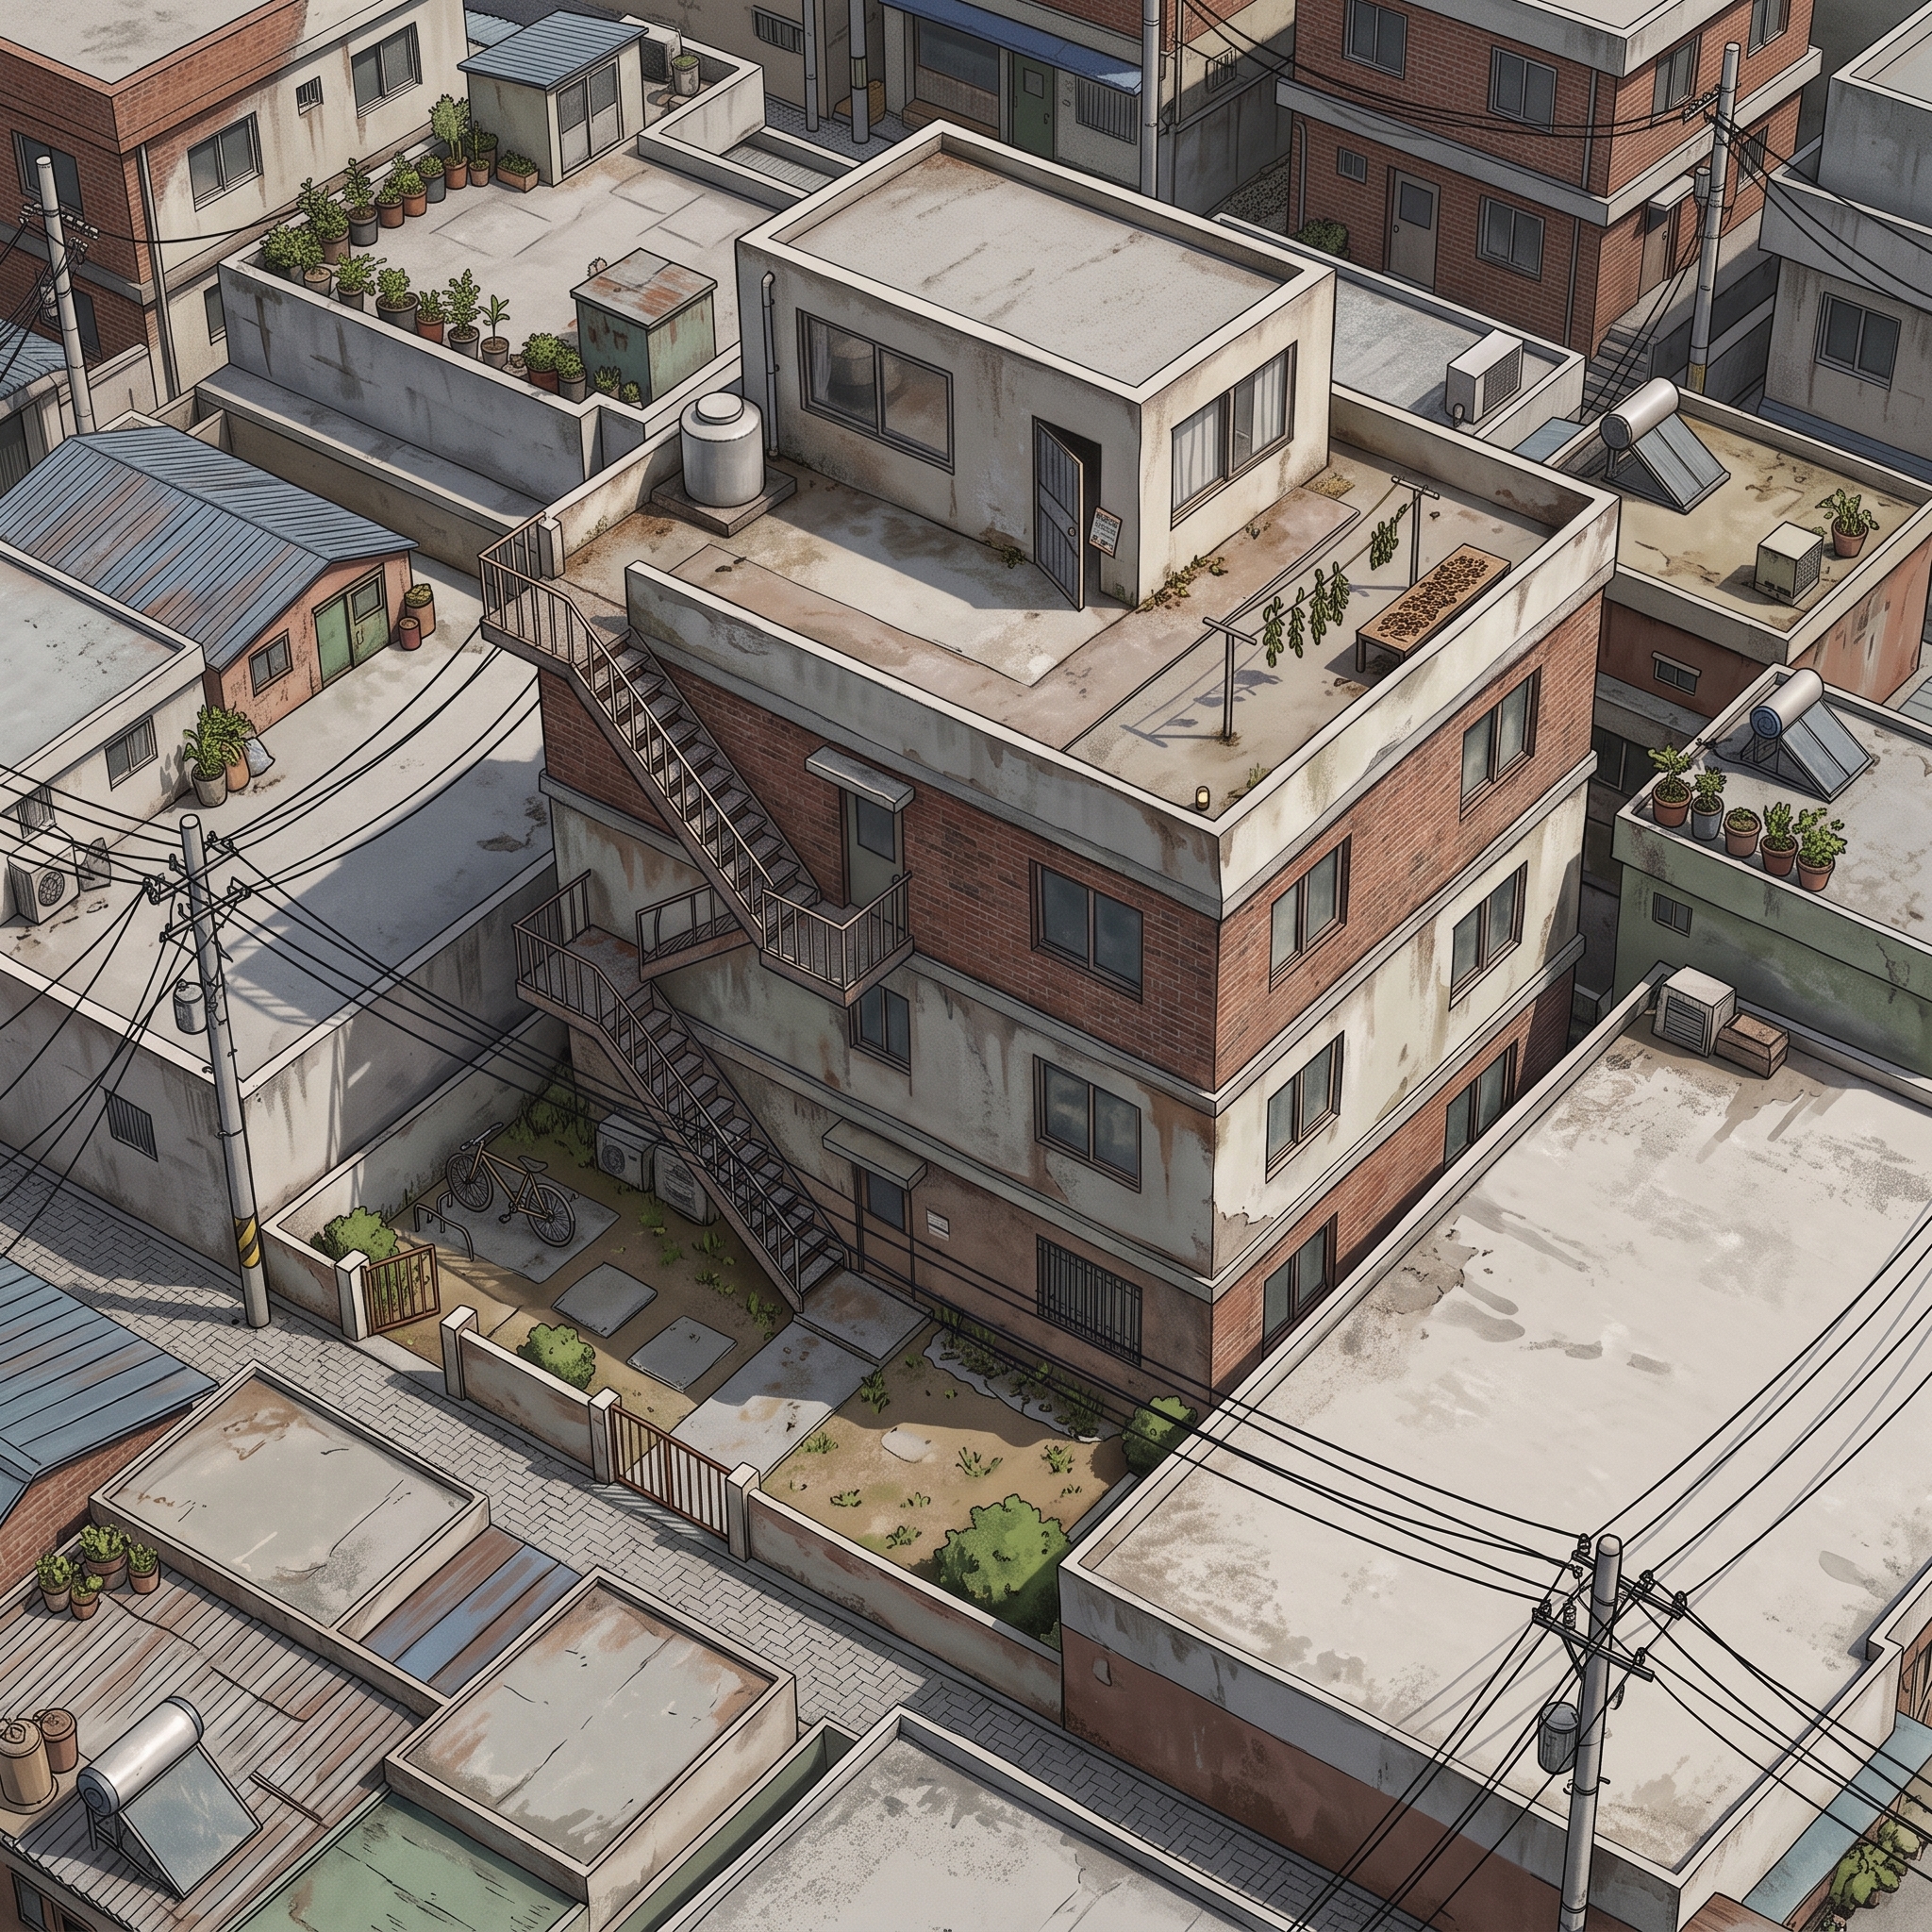
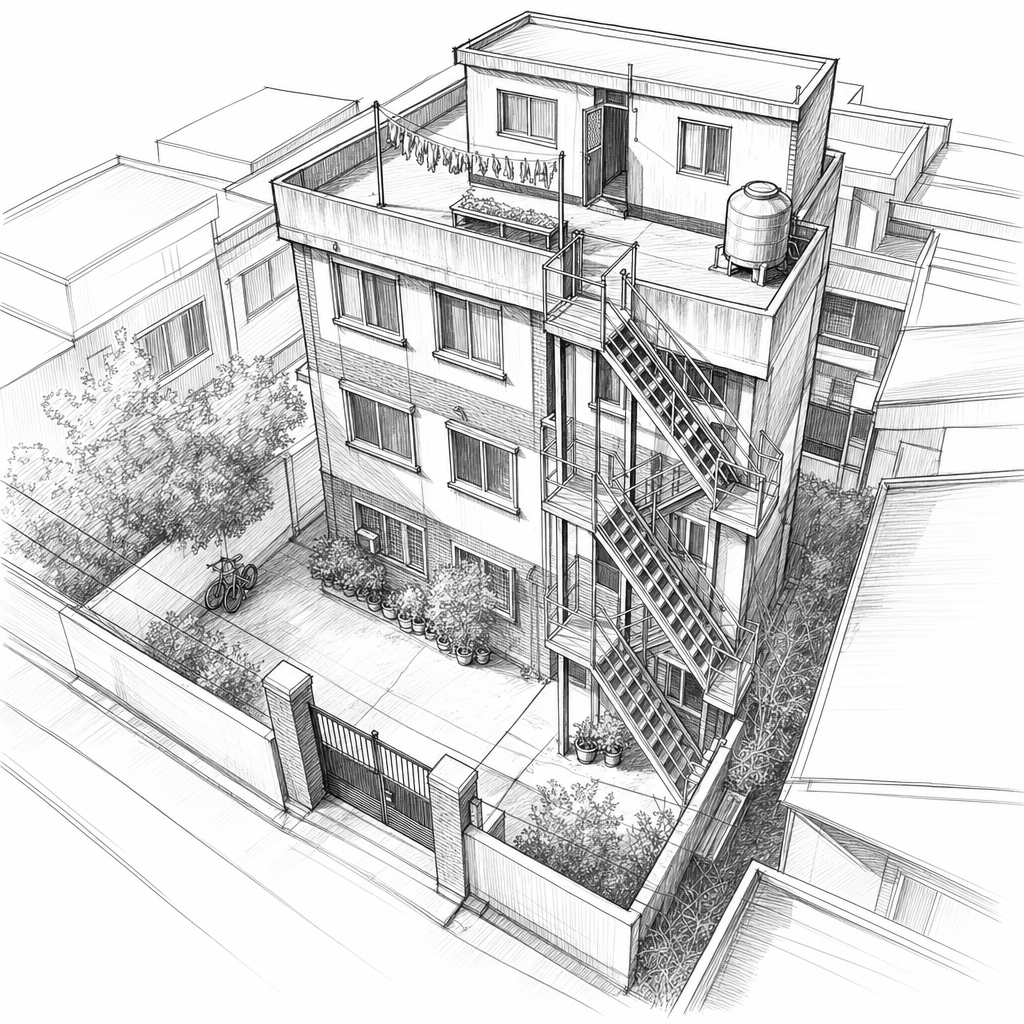
Convert the attached top-down architectural plan (the FIRST

attached image — the layout source of truth) into ONE 45-degree

high-angle aerial PERSPECTIVE SKETCH of the same filming

property.

Camera: elevated three-quarter aerial view from the alley side

(the plan's bottom edge), high enough that the whole property —

alley approach, gate, yard, external stair, the building mass and

its rooftop deck with the rooftop-room unit — fits in one frame,

looking across the yard toward the building.

Geometry: keep every structure's position, footprint, proportion

and opening exactly where the plan draws them — the plan fixes

the LAYOUT only; the VERTICAL SCALE comes from the block below.

SCALE & MASSING (evidence-bound ground truth):

- The main building is an aged MULTI-FAMILY VILLA of THREE full

  storeys — its roof deck sits roughly 8-10 m above the yard.

  NOT a single-storey building.

- The rooftop-room unit stands on that roof deck as a small

  fourth-level volume, clearly smaller than the floors below.

- The exterior stair is a later-added steel retrofit stair that

  climbs the FULL three storeys along the outer wall from the

  yard to the rooftop landing — a long multi-flight zig-zag run

  with intermediate landings, never a short single flight. Open

  treads, thin steel plate stringers, support posts, pipe

  railings (creator-confirmed fact).

- Each of the three facade storeys shows a few modest windows of

  the regional multi-family-villa type; the rooftop room keeps

  its own small windows exactly as the plan places them.

- Surrounding neighbour blocks stay dense low-rise context,

  generally lower than or similar to the villa.

Do not invent weather, atmosphere, materials or measurements

beyond this.

LAYOUT DETAIL (the content ground truth):
Begin the detail sketch from the alley approach at the bottom, with the route leading straight to the gate on the property frontage. Immediately inside the gate, draw the yard as the first usable space, with the main path continuing toward the exterior stair. Put the secluded bicycle corner off that main path so it reads as a tucked-away part of the yard rather than the open center. Set the building footprint along the yard edge, and attach the exterior steel retrofit stair to the outside wall so its foot is reachable from the yard. Carry the stair upward to the rooftop landing, and make the landing face the iron door without obstruction. On the roof, draw the path from landing to iron door passing beside the clothesline and the wooden drying bench with dried leaves. Place the water tank as another rooftop object on the same roof surface, not blocking the landing-to-door approach. Draw the rooftop-room unit behind the iron door, with its window set oriented so the window-to-low-wall sightline can be understood. If the light-source position is shown, keep it as a functional low-angle source for shadows only, not as a general mood or material cue.

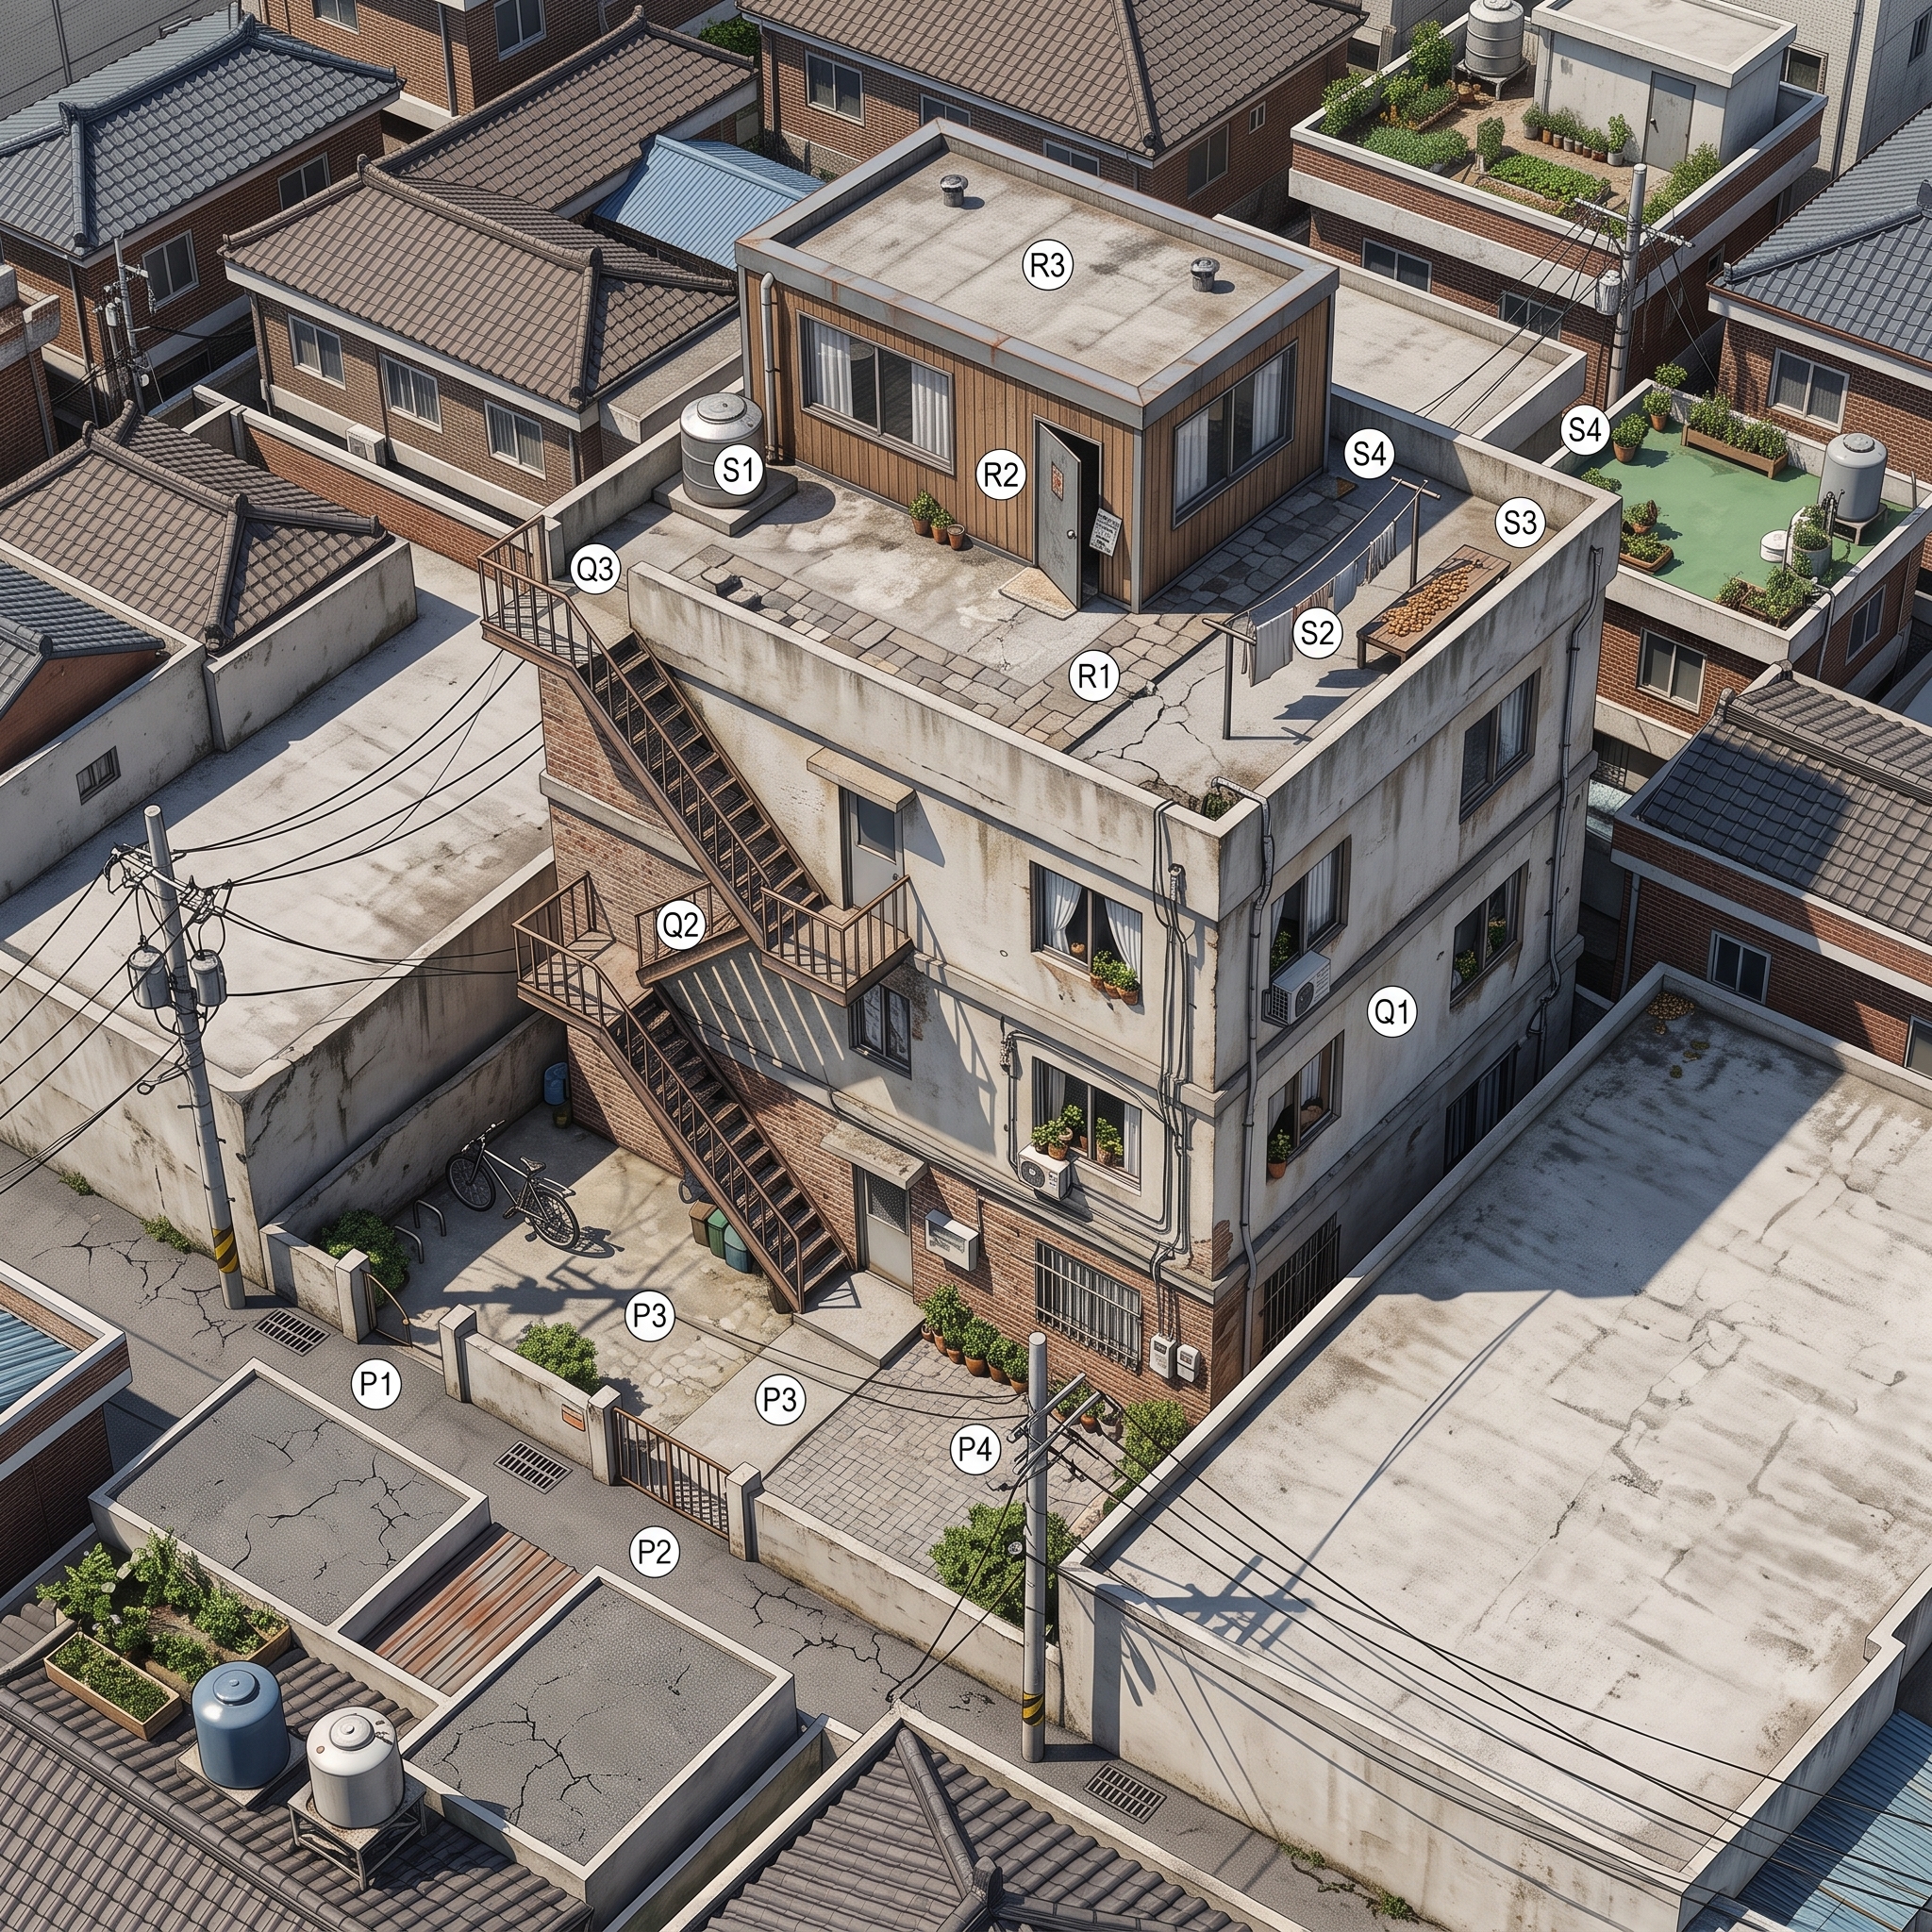
CIRCLED MARKERS: reproduce EVERY circled code below as a small

white circle with a thin black ring, attached to the same element

in the sketch:
- (P1) alley approach — Show the alley approach at the lower edge of the detail sketch, leading directly toward the filming property gate and able to support bicycle movement.
- (P2) multi-family villa gate — Place the gate on the alley frontage so that opening it leads directly into the property yard.
- (P3) yard — Draw the yard immediately inside the gate, between the alley entry and the exterior stair route.
- (P4) secluded bicycle corner — Set a tucked-away corner within the yard where a bicycle can be left roughly, separated from the main gate-to-stair path.
- (Q1) rooftop-room building footprint — Place the aged multi-family villa footprint along the yard, carrying the rooftop-room level above.
- (Q2) exterior steel retrofit stair run — Attach the exterior steel retrofit stair to the building wall, starting from the yard and rising outside the building toward the rooftop landing.
- (Q3) upper stair landing — Place the landing at the top of the exterior stair where the iron entrance door is immediately visible.
- (R1) landing-to-door roof path — Draw the roof path from the landing toward the iron door so it passes beside the bench area and the clothesline area.
- (R2) iron entrance door — Set the iron door on the rooftop-room unit facing the landing path; include the door-gap flyer detail and allow it to be shown partly open.
- (R3) rooftop-room unit — Place the rooftop-room unit on the roof surface, connected to the iron entrance door and containing the indicated window openings.
- (R4) rooftop-room window set — Mark the small living-room window and the curtained room window on the rooftop-room unit, with at least one window oriented for the low-wall sightline.
- (S1) water tank — Place the water tank on the roof surface near the rooftop deck contents, clear of the landing-to-door path.
- (S2) clothesline — Run the clothesline across the roof surface close enough to the approach path that hanging or dried leaves can brush a passerby.
- (S3) wooden drying bench with dried leaves — Place the wooden drying bench on the rooftop near the clothesline and along the path toward the iron door, carrying the dried leaves.
- (S4) low-angle night light-source position — Mark a low-angle light-source position affecting the rooftop path, only to support the long-shadow cue and without assigning any broader colour mood.

Media: clean monochrome concept sketch — confident dark

ink/pencil linework, light hatching for shade, plain white

background. No colour fills, no photo textures, no people, no

vehicles. Besides the circled codes there is NO text at all — no

zone labels, no notes, no compass, no title.

The result must be a PERSPECTIVE drawing — not a top-down plan.
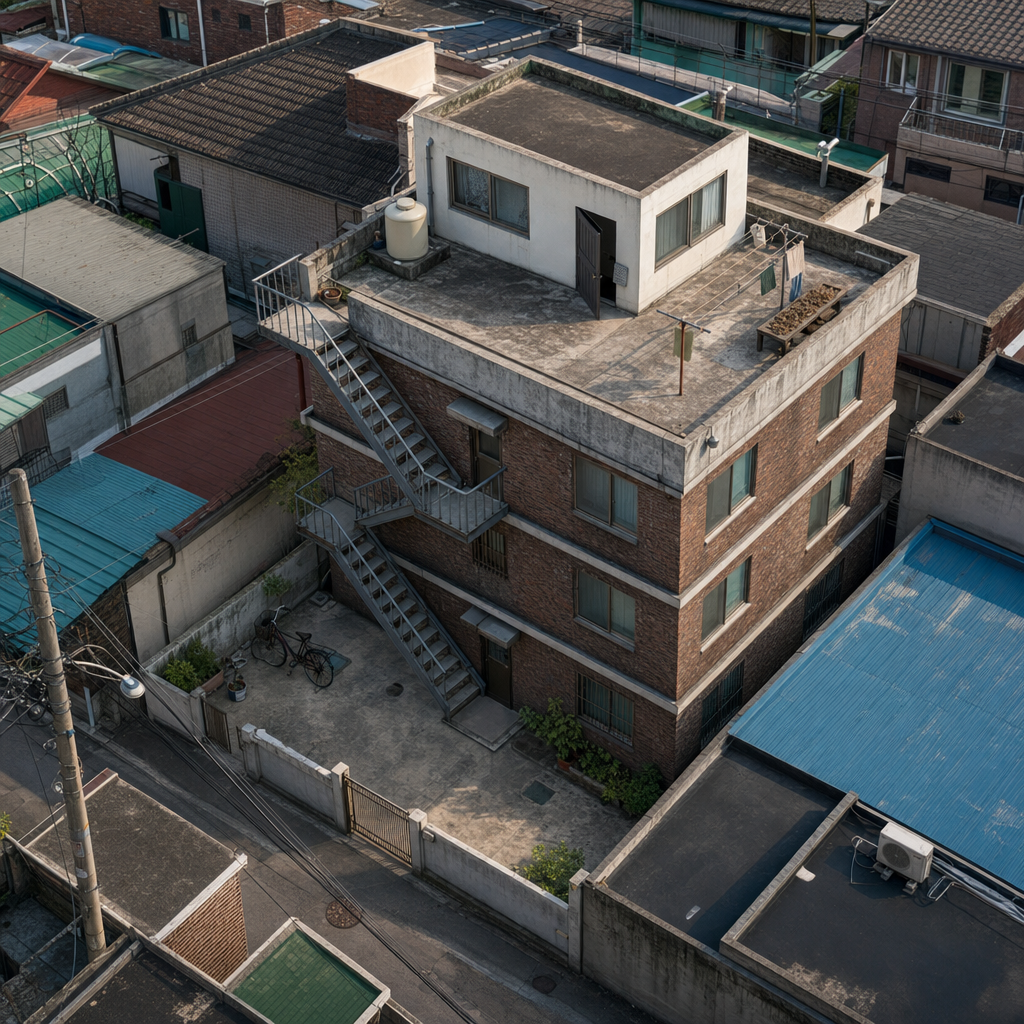
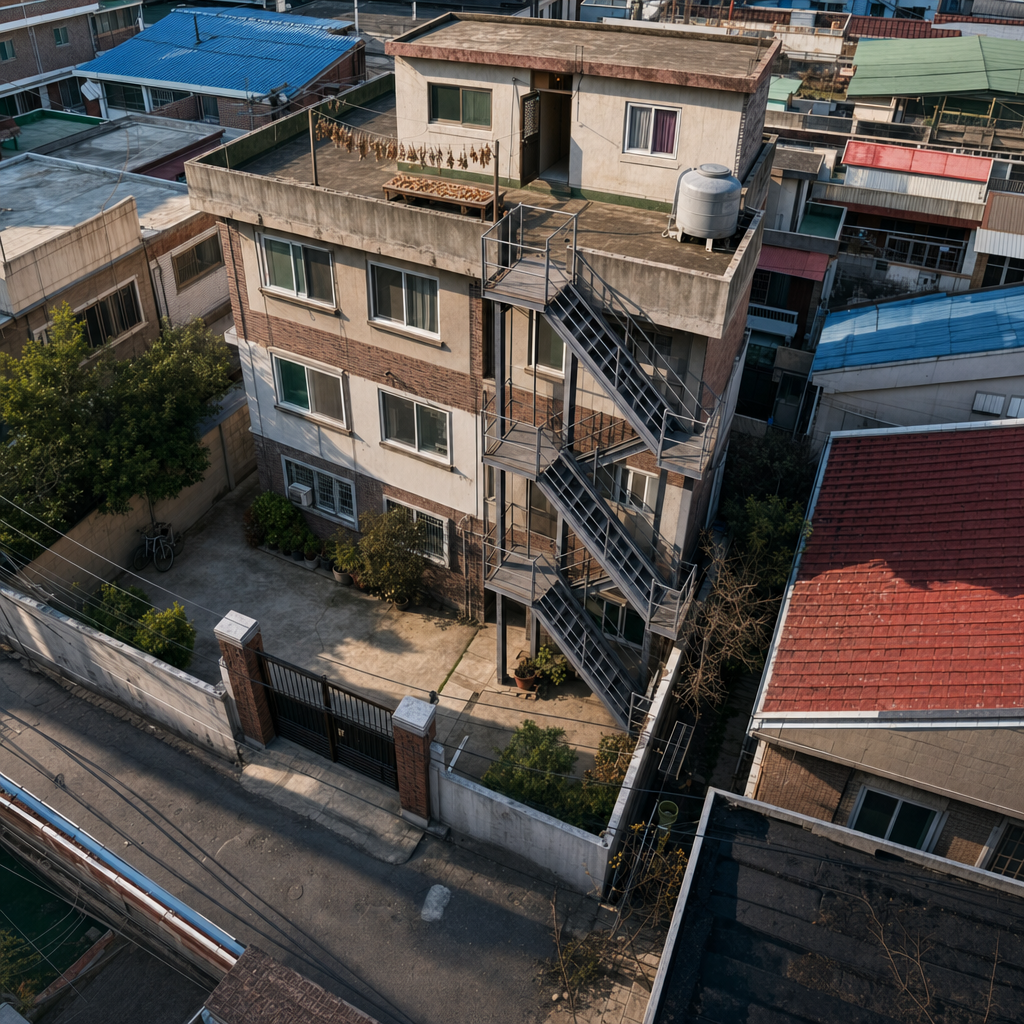
Create ONE PHOTOREALISTIC location still using the attached

perspective SKETCH as reference. The sketch is ONLY the

STRUCTURAL SKELETON: it fixes the camera (same 45-degree high

aerial view), and each structure's position, size and proportion.

Everything else must be FLESHED OUT as the real world: real

surfaces, real materials, real weathering — and the SIMPLIFIED

SURROUNDINGS in the sketch (bare neighbour blocks, empty roofs,

blank walls, plain ground) must be AUGMENTED into fully real

buildings and streets: real neighbouring houses of a dense

low-rise Korean town with their own windows, doors, rooftop

clutter, awnings, utility poles and wires, pavement texture —

nothing in the frame may look like an untextured model or a

simplified block.

MARKER LEGEND (annotations on the sketch only): the sketch

carries small circled codes identifying elements. Use this

legend to know what each element is, then render the real

thing:
- (P1) = alley approach — Show the alley approach at the lower edge of the detail sketch, leading directly toward the filming property gate and able to support bicycle movement.
- (P2) = multi-family villa gate — Place the gate on the alley frontage so that opening it leads directly into the property yard.
- (P3) = yard — Draw the yard immediately inside the gate, between the alley entry and the exterior stair route.
- (P4) = secluded bicycle corner — Set a tucked-away corner within the yard where a bicycle can be left roughly, separated from the main gate-to-stair path.
- (Q1) = rooftop-room building footprint — Place the aged multi-family villa footprint along the yard, carrying the rooftop-room level above.
- (Q2) = exterior steel retrofit stair run — Attach the exterior steel retrofit stair to the building wall, starting from the yard and rising outside the building toward the rooftop landing.
- (Q3) = upper stair landing — Place the landing at the top of the exterior stair where the iron entrance door is immediately visible.
- (R1) = landing-to-door roof path — Draw the roof path from the landing toward the iron door so it passes beside the bench area and the clothesline area.
- (R2) = iron entrance door — Set the iron door on the rooftop-room unit facing the landing path; include the door-gap flyer detail and allow it to be shown partly open.
- (R3) = rooftop-room unit — Place the rooftop-room unit on the roof surface, connected to the iron entrance door and containing the indicated window openings.
- (R4) = rooftop-room window set — Mark the small living-room window and the curtained room window on the rooftop-room unit, with at least one window oriented for the low-wall sightline.
- (S1) = water tank — Place the water tank on the roof surface near the rooftop deck contents, clear of the landing-to-door path.
- (S2) = clothesline — Run the clothesline across the roof surface close enough to the approach path that hanging or dried leaves can brush a passerby.
- (S3) = wooden drying bench with dried leaves — Place the wooden drying bench on the rooftop near the clothesline and along the path toward the iron door, carrying the dried leaves.
- (S4) = low-angle night light-source position — Mark a low-angle light-source position affecting the rooftop path, only to support the long-shadow cue and without assigning any broader colour mood.

The output image must contain ZERO annotations — no circles, no
codes, no letters, no numbers, no text, no signage lettering, no
arrows, no dashed lines.

Real-world rendering facts (creator-confirmed / evidence-bound):
- The main building is an aged MULTI-FAMILY VILLA of three full
  storeys (roof deck roughly 8-10 m above the yard) with the small
  rooftop-room unit on its roof deck — regional vernacular materials
  with varied lived-in aging.
- The exterior stair is a later-added STEEL retrofit stair climbing
  the full three storeys: open treads, thin steel plate stringers,
  support posts, pipe railings. It is NOT a concrete stair.
Lighting: plain neutral daytime light. Do NOT add fog, rain,
dramatic weather, colour-grade moods, or people. No text overlays.

The parked bicycle from the sketch stays; add no other vehicles.
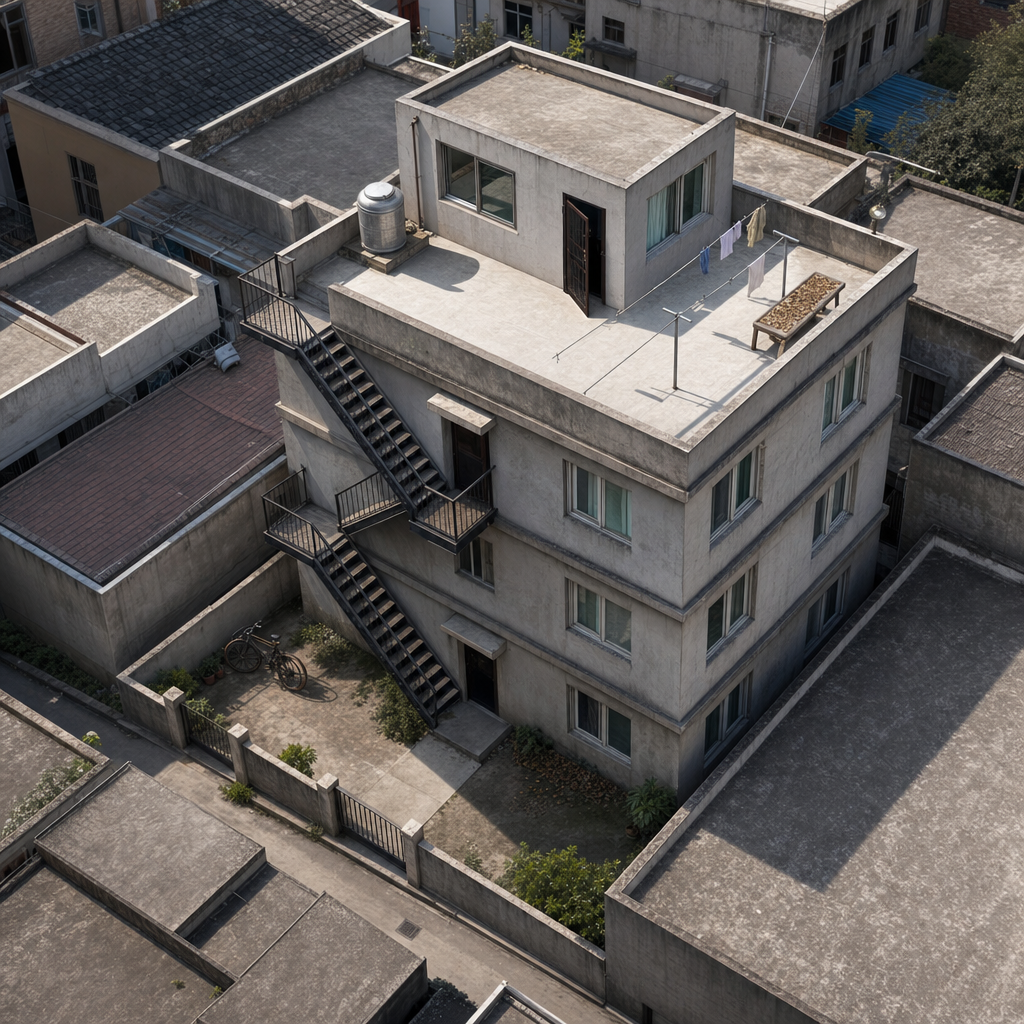
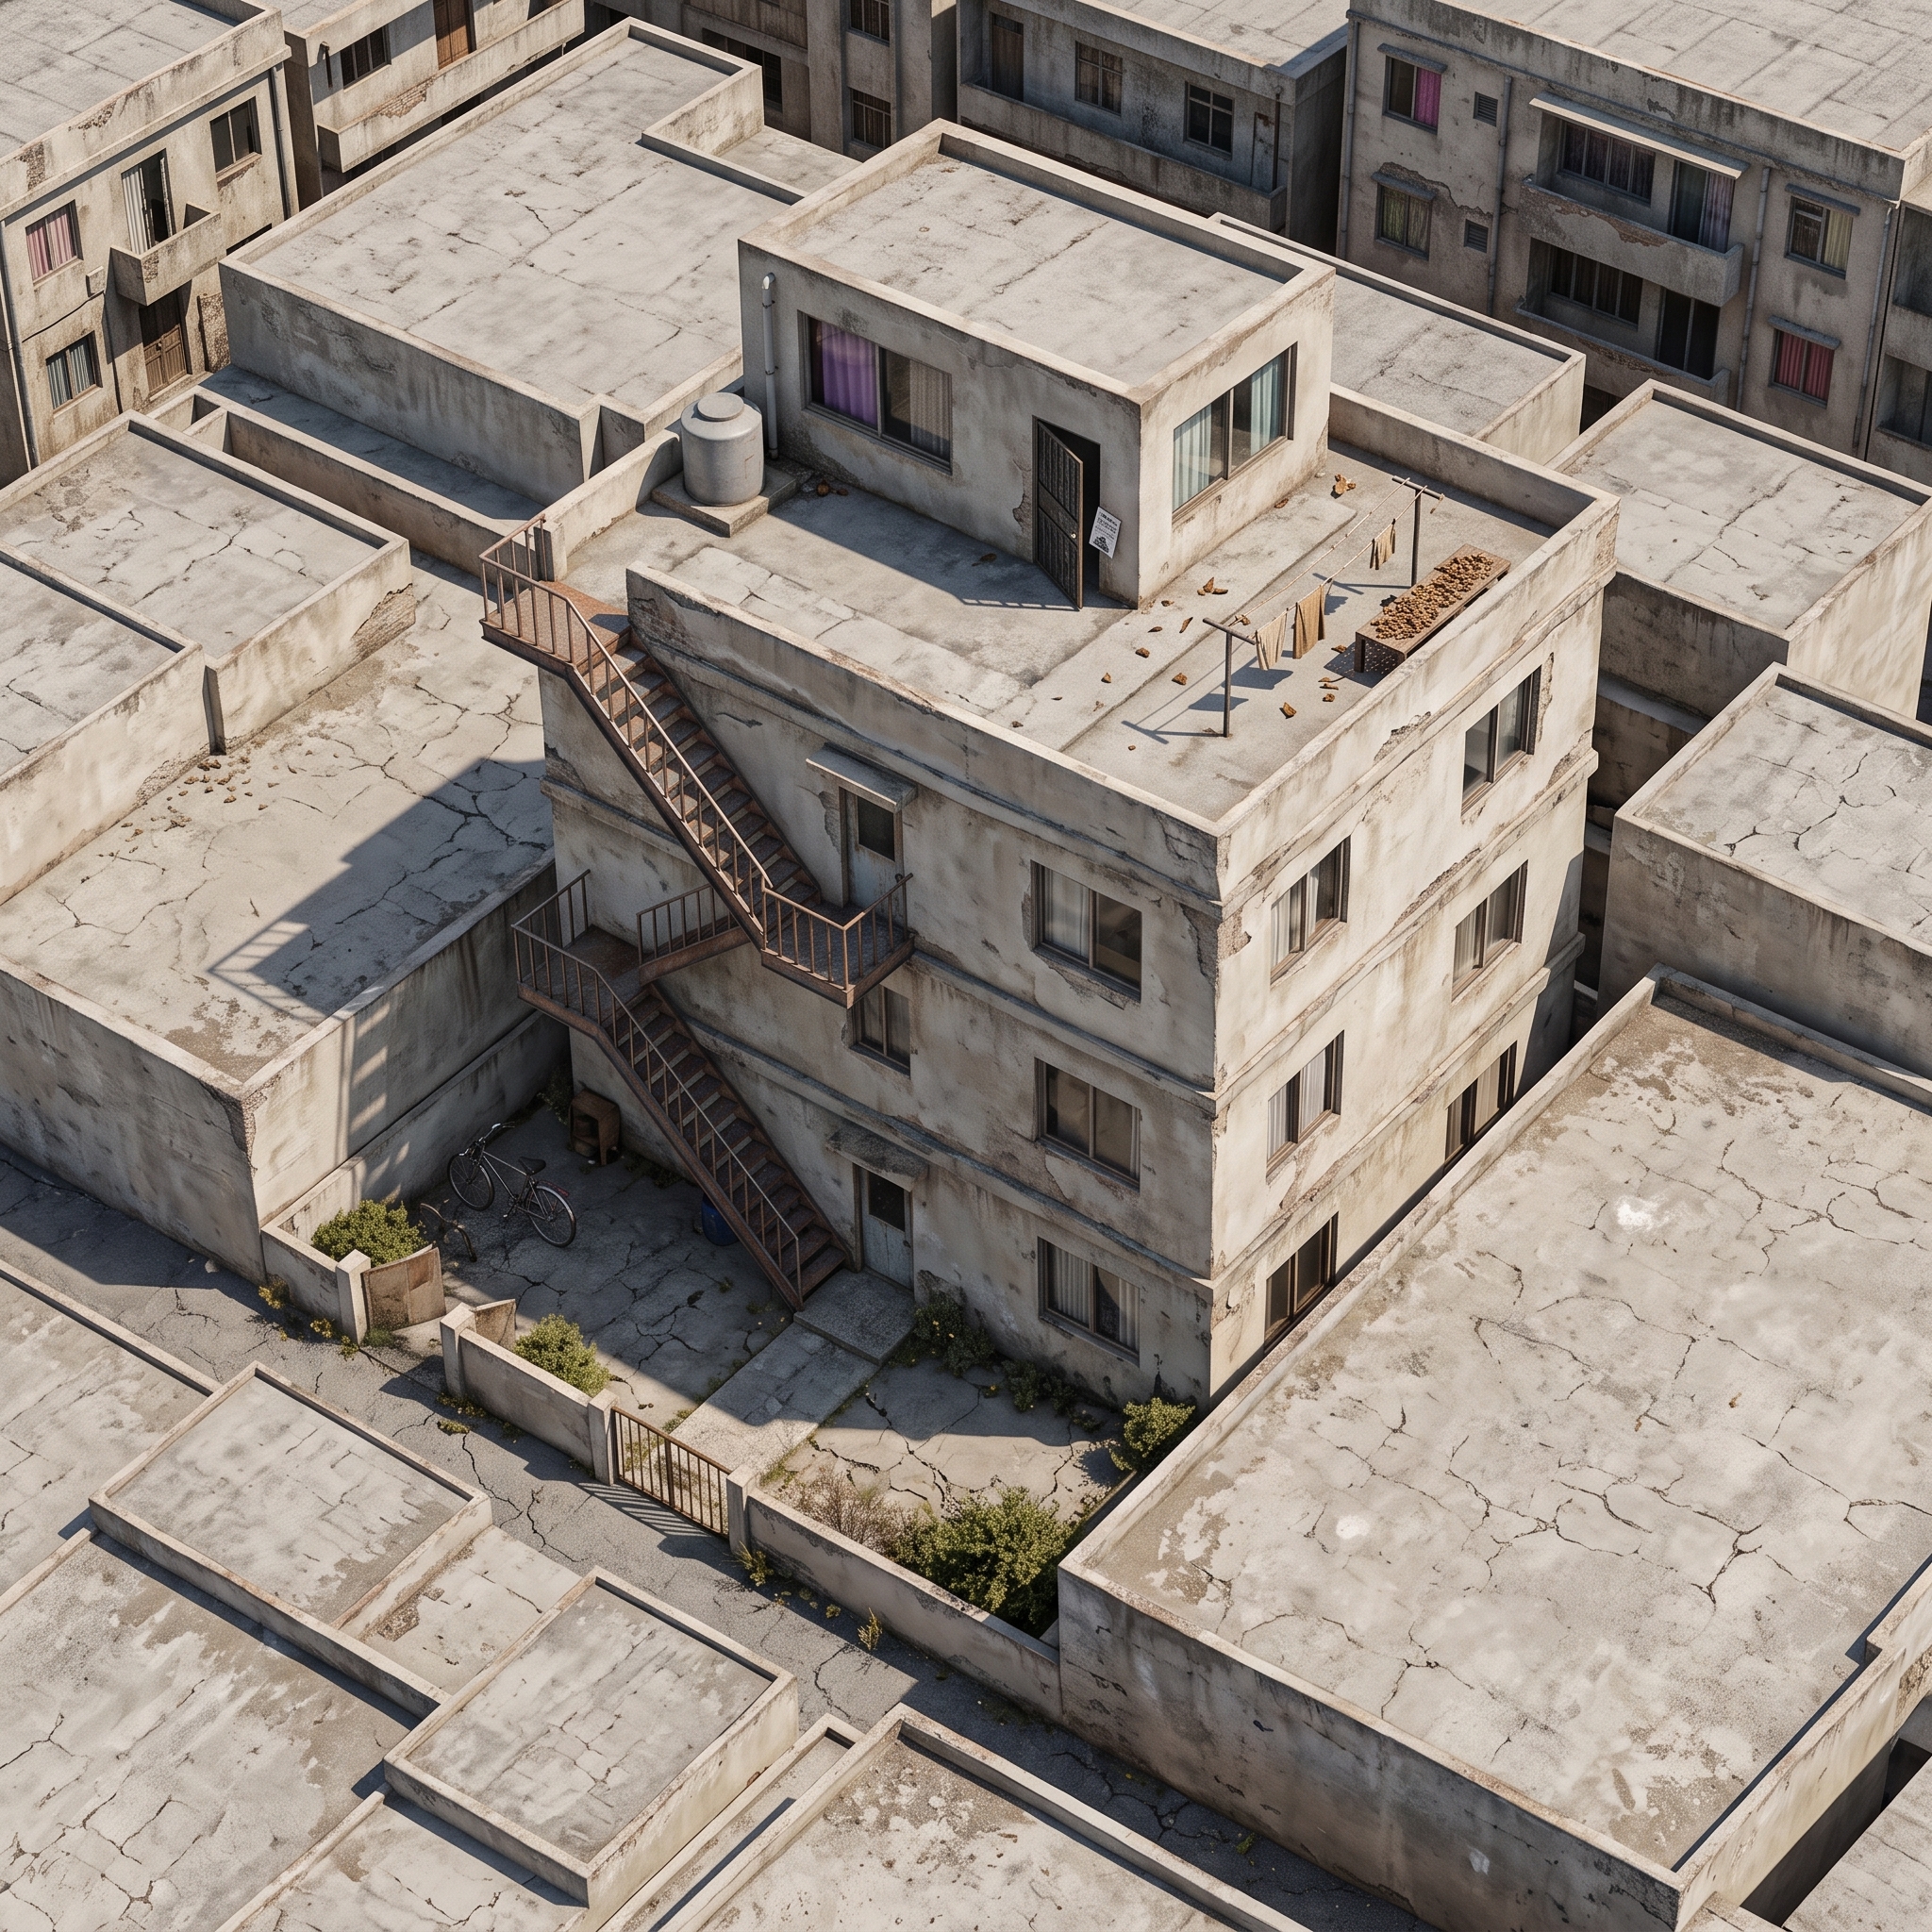
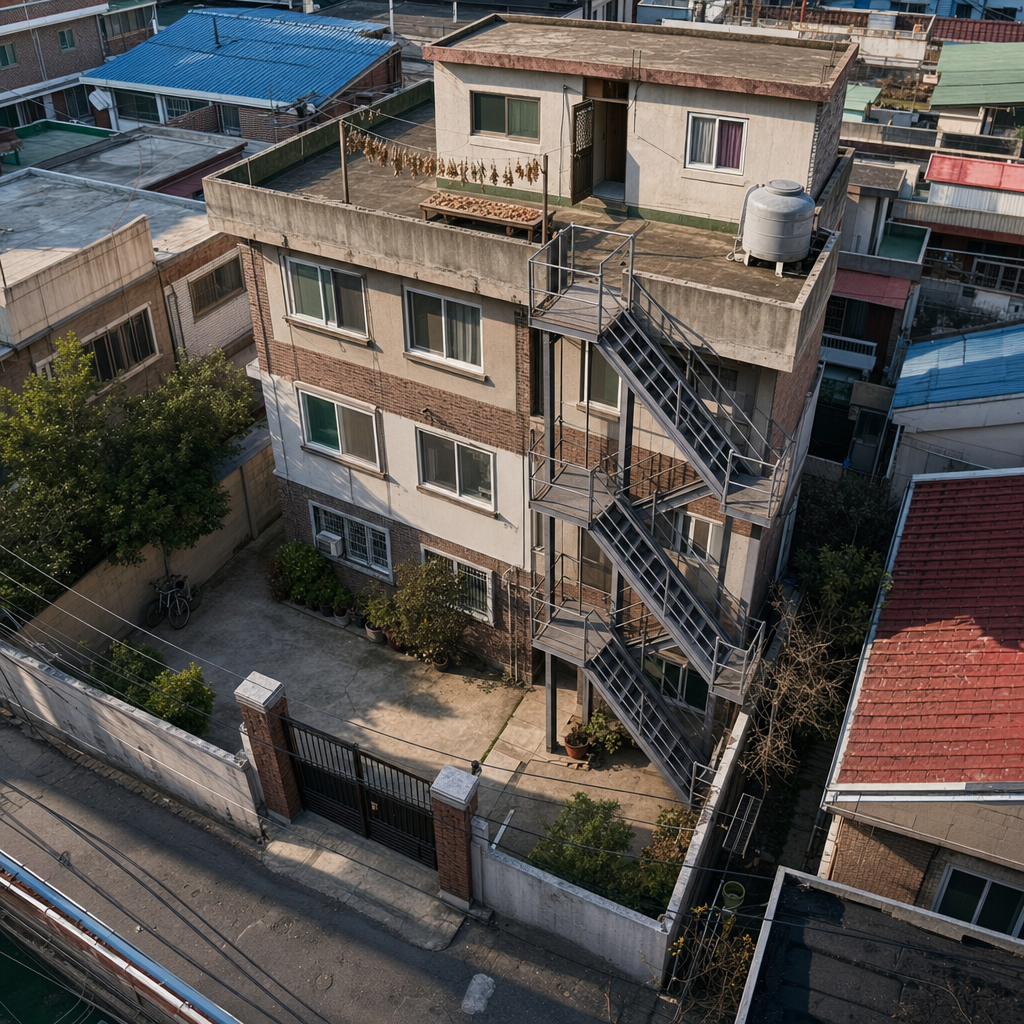
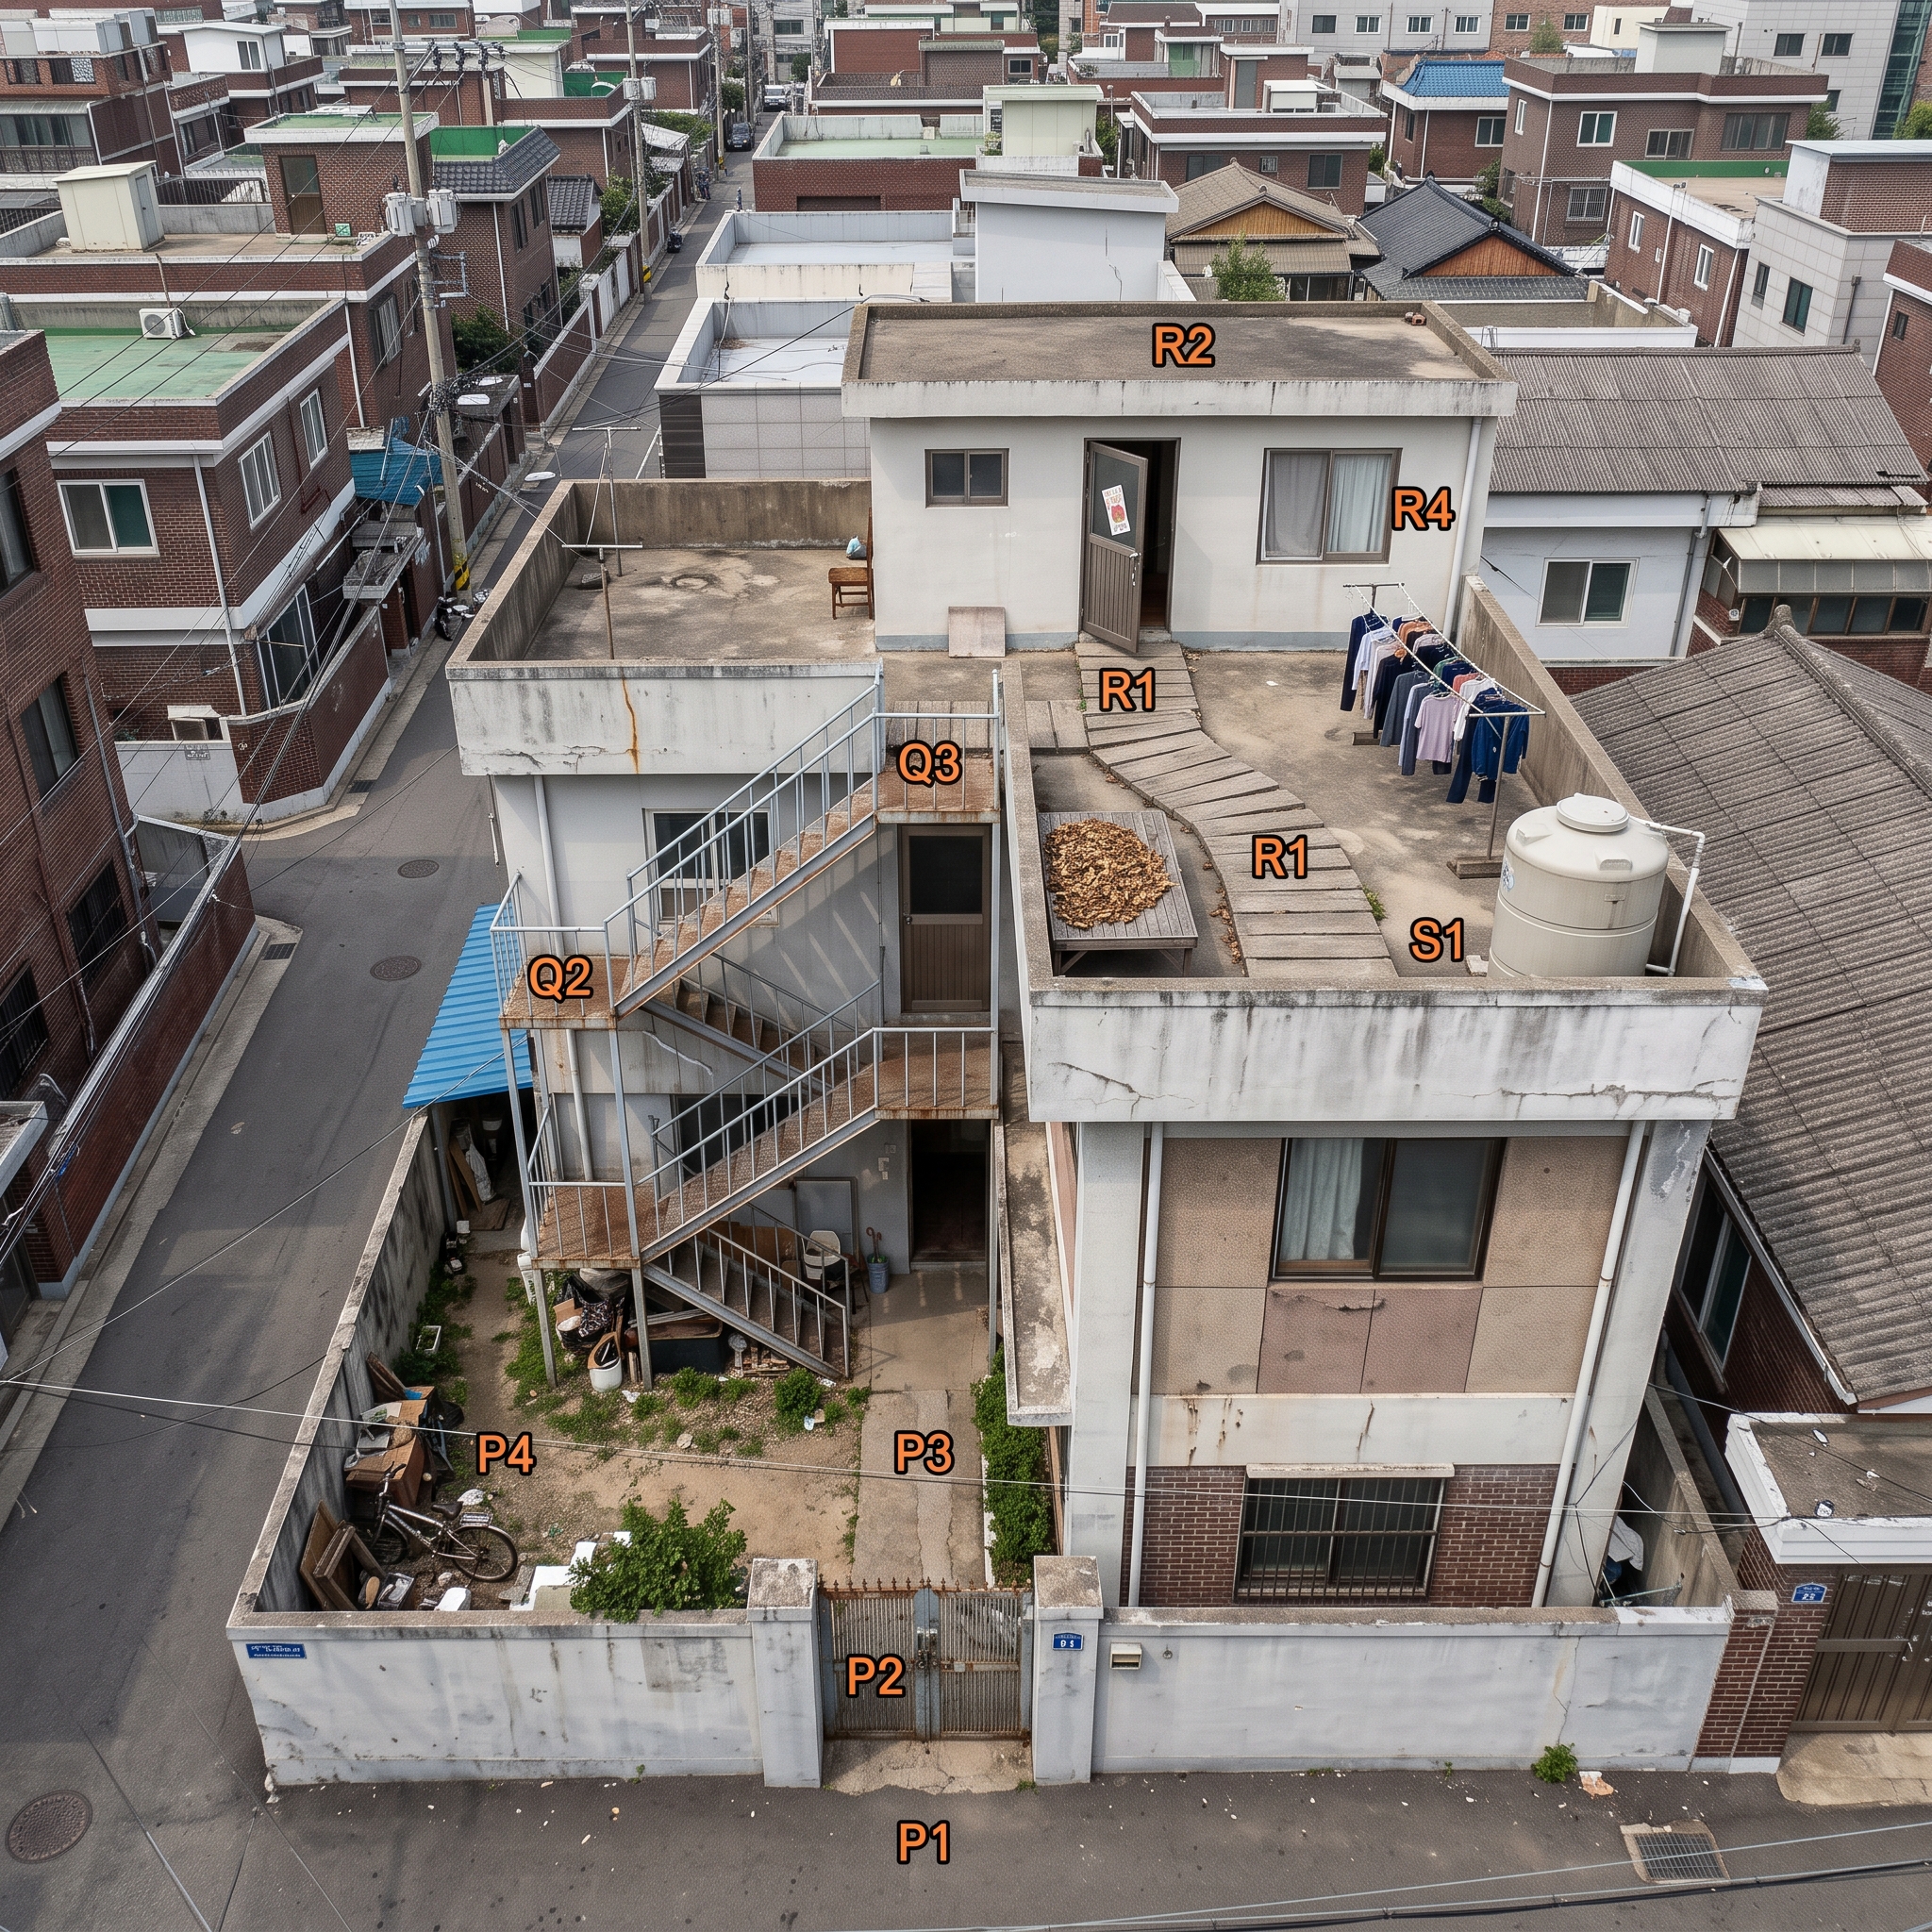
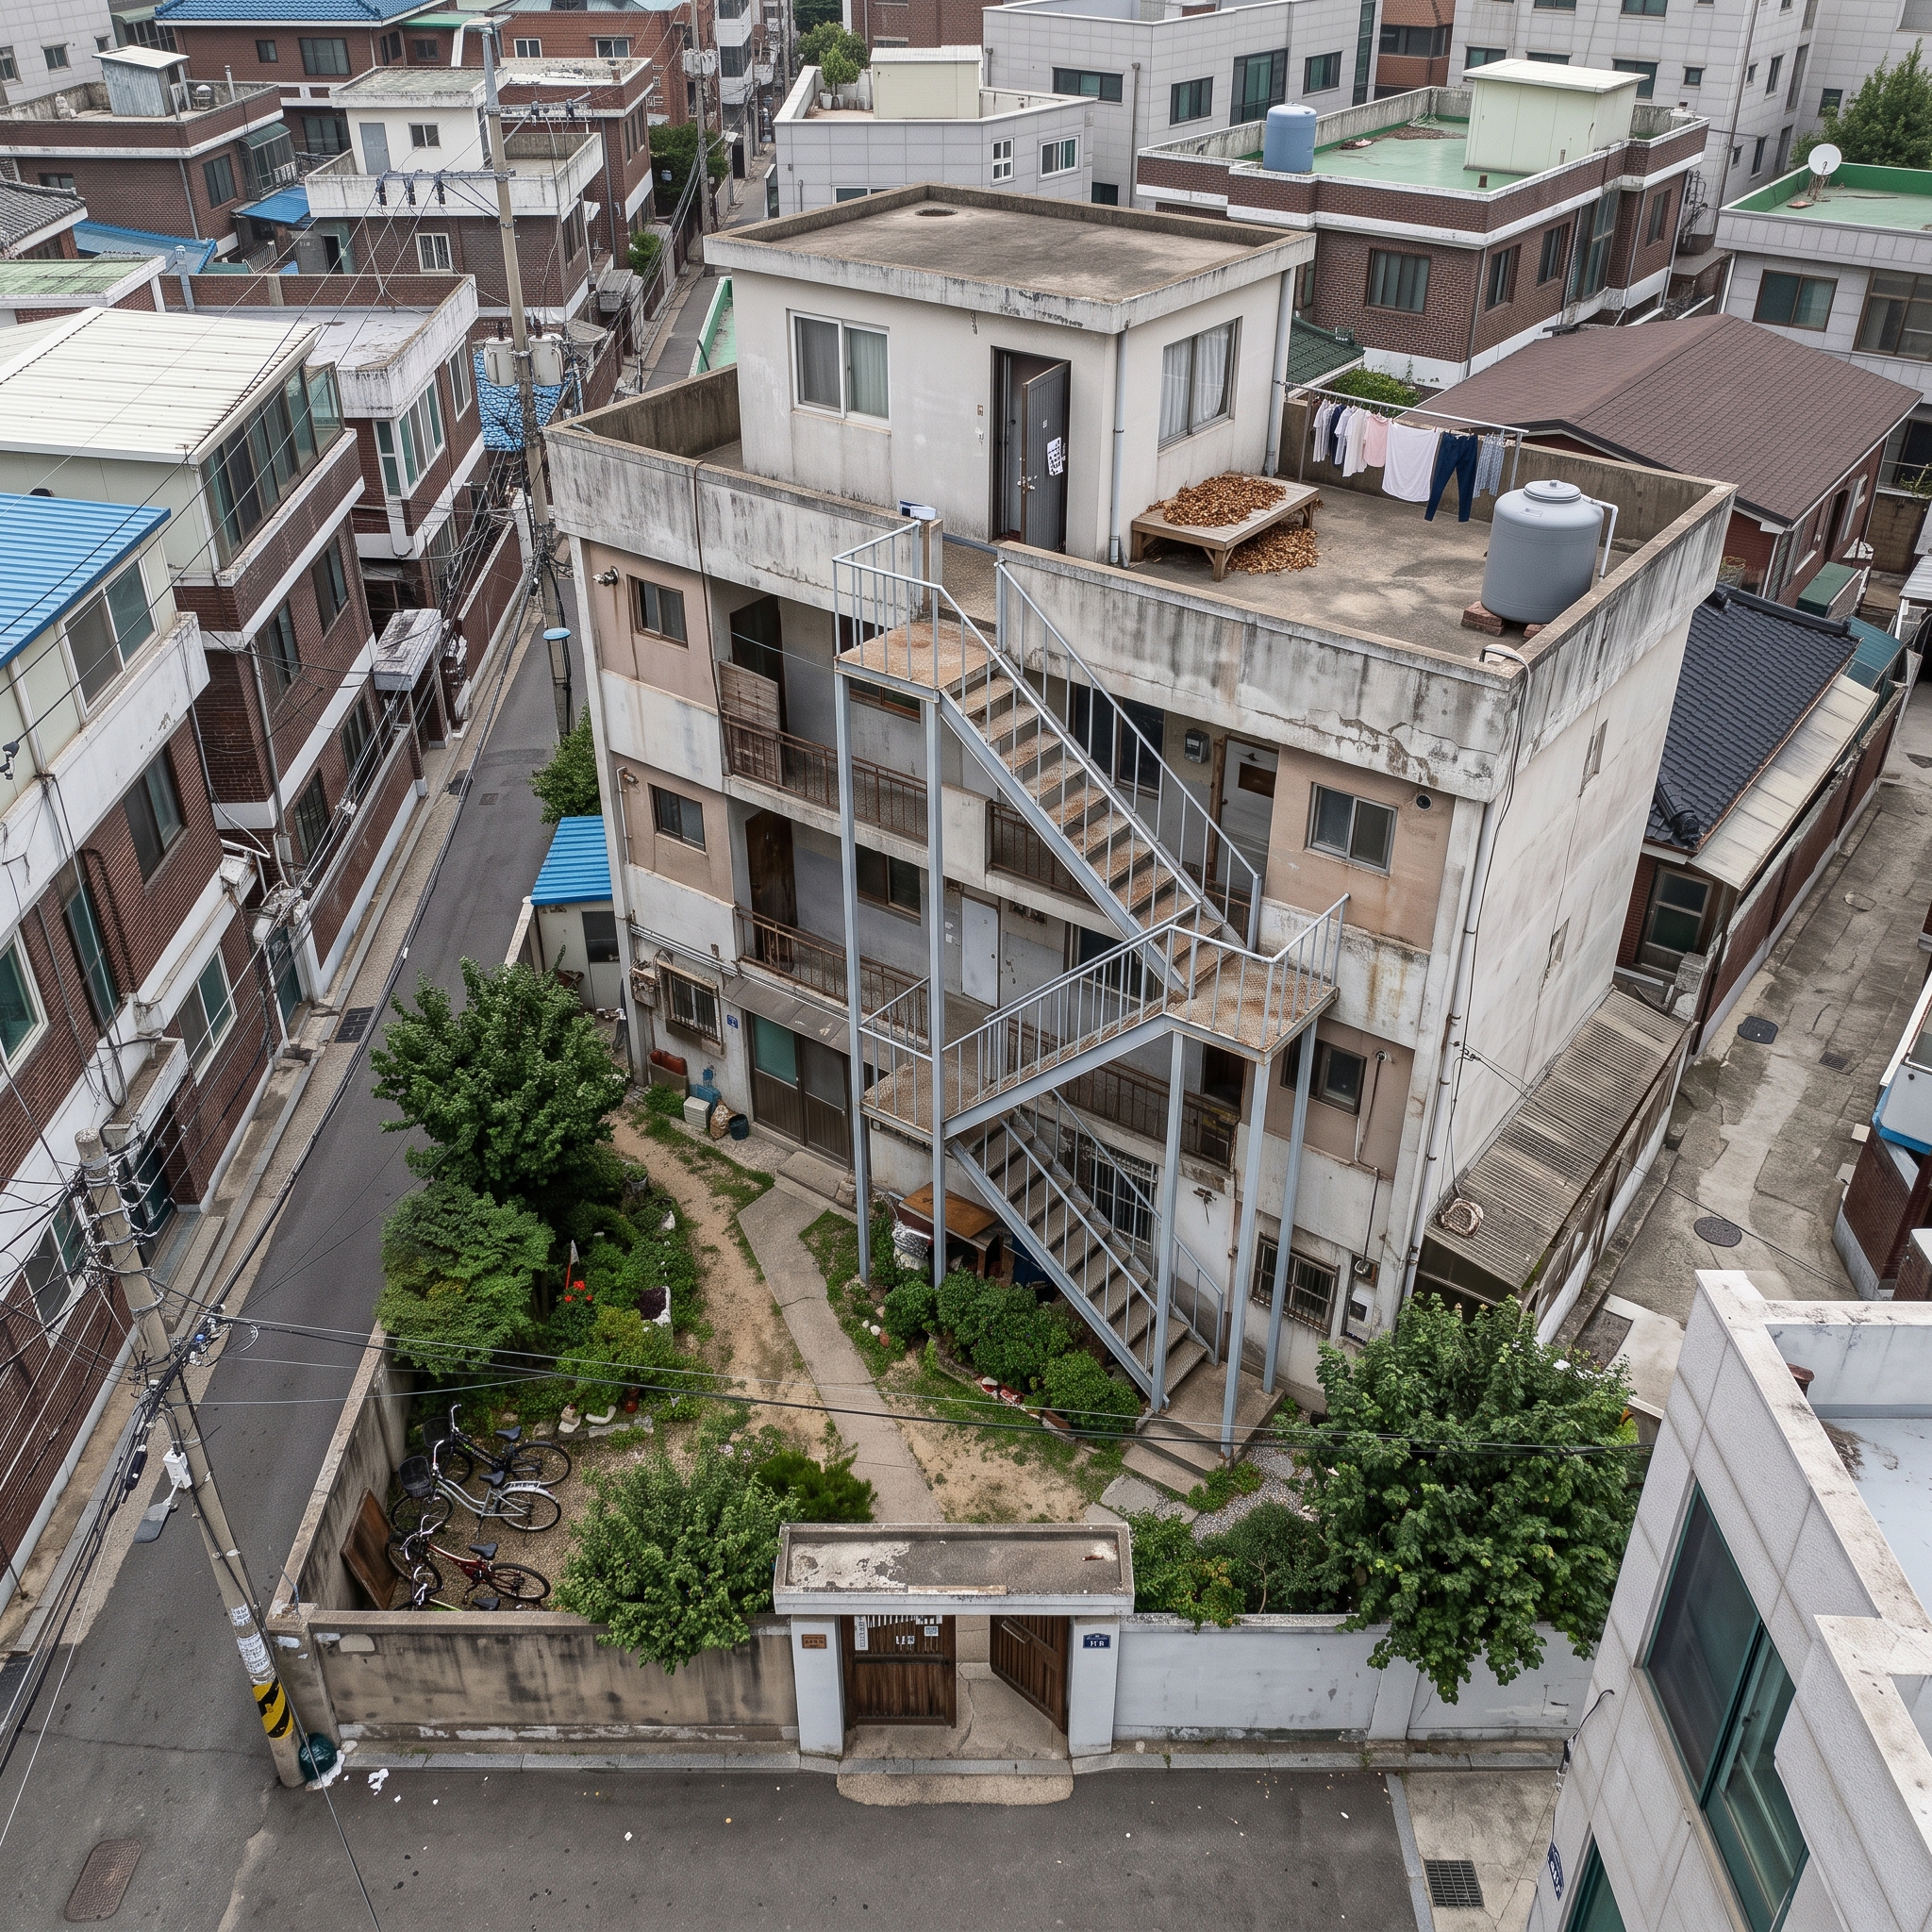
Create ONE PHOTOREALISTIC aerial location still of a filming

property, from a 45-degree high aerial camera looking across the

yard toward the building (whole property in frame). No reference

image is attached — build the scene from this text alone.

LAYOUT (ground truth):
Begin the detail sketch from the alley approach at the bottom, with the route leading straight to the gate on the property frontage. Immediately inside the gate, draw the yard as the first usable space, with the main path continuing toward the exterior stair. Put the secluded bicycle corner off that main path so it reads as a tucked-away part of the yard rather than the open center. Set the building footprint along the yard edge, and attach the exterior steel retrofit stair to the outside wall so its foot is reachable from the yard. Carry the stair upward to the rooftop landing, and make the landing face the iron door without obstruction. On the roof, draw the path from landing to iron door passing beside the clothesline and the wooden drying bench with dried leaves. Place the water tank as another rooftop object on the same roof surface, not blocking the landing-to-door approach. Draw the rooftop-room unit behind the iron door, with its window set oriented so the window-to-low-wall sightline can be understood. If the light-source position is shown, keep it as a functional low-angle source for shadows only, not as a general mood or material cue.

ELEMENTS (render each as the real thing, in its listed place):
- (P1) = alley approach — Show the alley approach at the lower edge of the detail sketch, leading directly toward the filming property gate and able to support bicycle movement.
- (P2) = multi-family villa gate — Place the gate on the alley frontage so that opening it leads directly into the property yard.
- (P3) = yard — Draw the yard immediately inside the gate, between the alley entry and the exterior stair route.
- (P4) = secluded bicycle corner — Set a tucked-away corner within the yard where a bicycle can be left roughly, separated from the main gate-to-stair path.
- (Q1) = rooftop-room building footprint — Place the aged multi-family villa footprint along the yard, carrying the rooftop-room level above.
- (Q2) = exterior steel retrofit stair run — Attach the exterior steel retrofit stair to the building wall, starting from the yard and rising outside the building toward the rooftop landing.
- (Q3) = upper stair landing — Place the landing at the top of the exterior stair where the iron entrance door is immediately visible.
- (R1) = landing-to-door roof path — Draw the roof path from the landing toward the iron door so it passes beside the bench area and the clothesline area.
- (R2) = iron entrance door — Set the iron door on the rooftop-room unit facing the landing path; include the door-gap flyer detail and allow it to be shown partly open.
- (R3) = rooftop-room unit — Place the rooftop-room unit on the roof surface, connected to the iron entrance door and containing the indicated window openings.
- (R4) = rooftop-room window set — Mark the small living-room window and the curtained room window on the rooftop-room unit, with at least one window oriented for the low-wall sightline.
- (S1) = water tank — Place the water tank on the roof surface near the rooftop deck contents, clear of the landing-to-door path.
- (S2) = clothesline — Run the clothesline across the roof surface close enough to the approach path that hanging or dried leaves can brush a passerby.
- (S3) = wooden drying bench with dried leaves — Place the wooden drying bench on the rooftop near the clothesline and along the path toward the iron door, carrying the dried leaves.
- (S4) = low-angle night light-source position — Mark a low-angle light-source position affecting the rooftop path, only to support the long-shadow cue and without assigning any broader colour mood.

SCALE & MASSING: the main building is a three-storey aged

multi-family villa, roof deck roughly 8-10 m above the yard,

with the small rooftop-room unit as a fourth-level volume on the

deck; the steel retrofit stair climbs the full three storeys as

a multi-flight zig-zag run with intermediate landings; each

facade storey shows a few modest windows of the regional

multi-family type; surrounding blocks are a dense low-rise

Korean town, fully real (windows, roofs, wires, pavement).

The output image must contain ZERO annotations — no circles, no
codes, no letters, no numbers, no text, no signage lettering, no
arrows, no dashed lines.

Real-world rendering facts (creator-confirmed / evidence-bound):
- The main building is an aged MULTI-FAMILY VILLA of three full
  storeys (roof deck roughly 8-10 m above the yard) with the small
  rooftop-room unit on its roof deck — regional vernacular materials
  with varied lived-in aging.
- The exterior stair is a later-added STEEL retrofit stair climbing
  the full three storeys: open treads, thin steel plate stringers,
  support posts, pipe railings. It is NOT a concrete stair.
Lighting: plain neutral daytime light. Do NOT add fog, rain,
dramatic weather, colour-grade moods, or people. No text overlays.
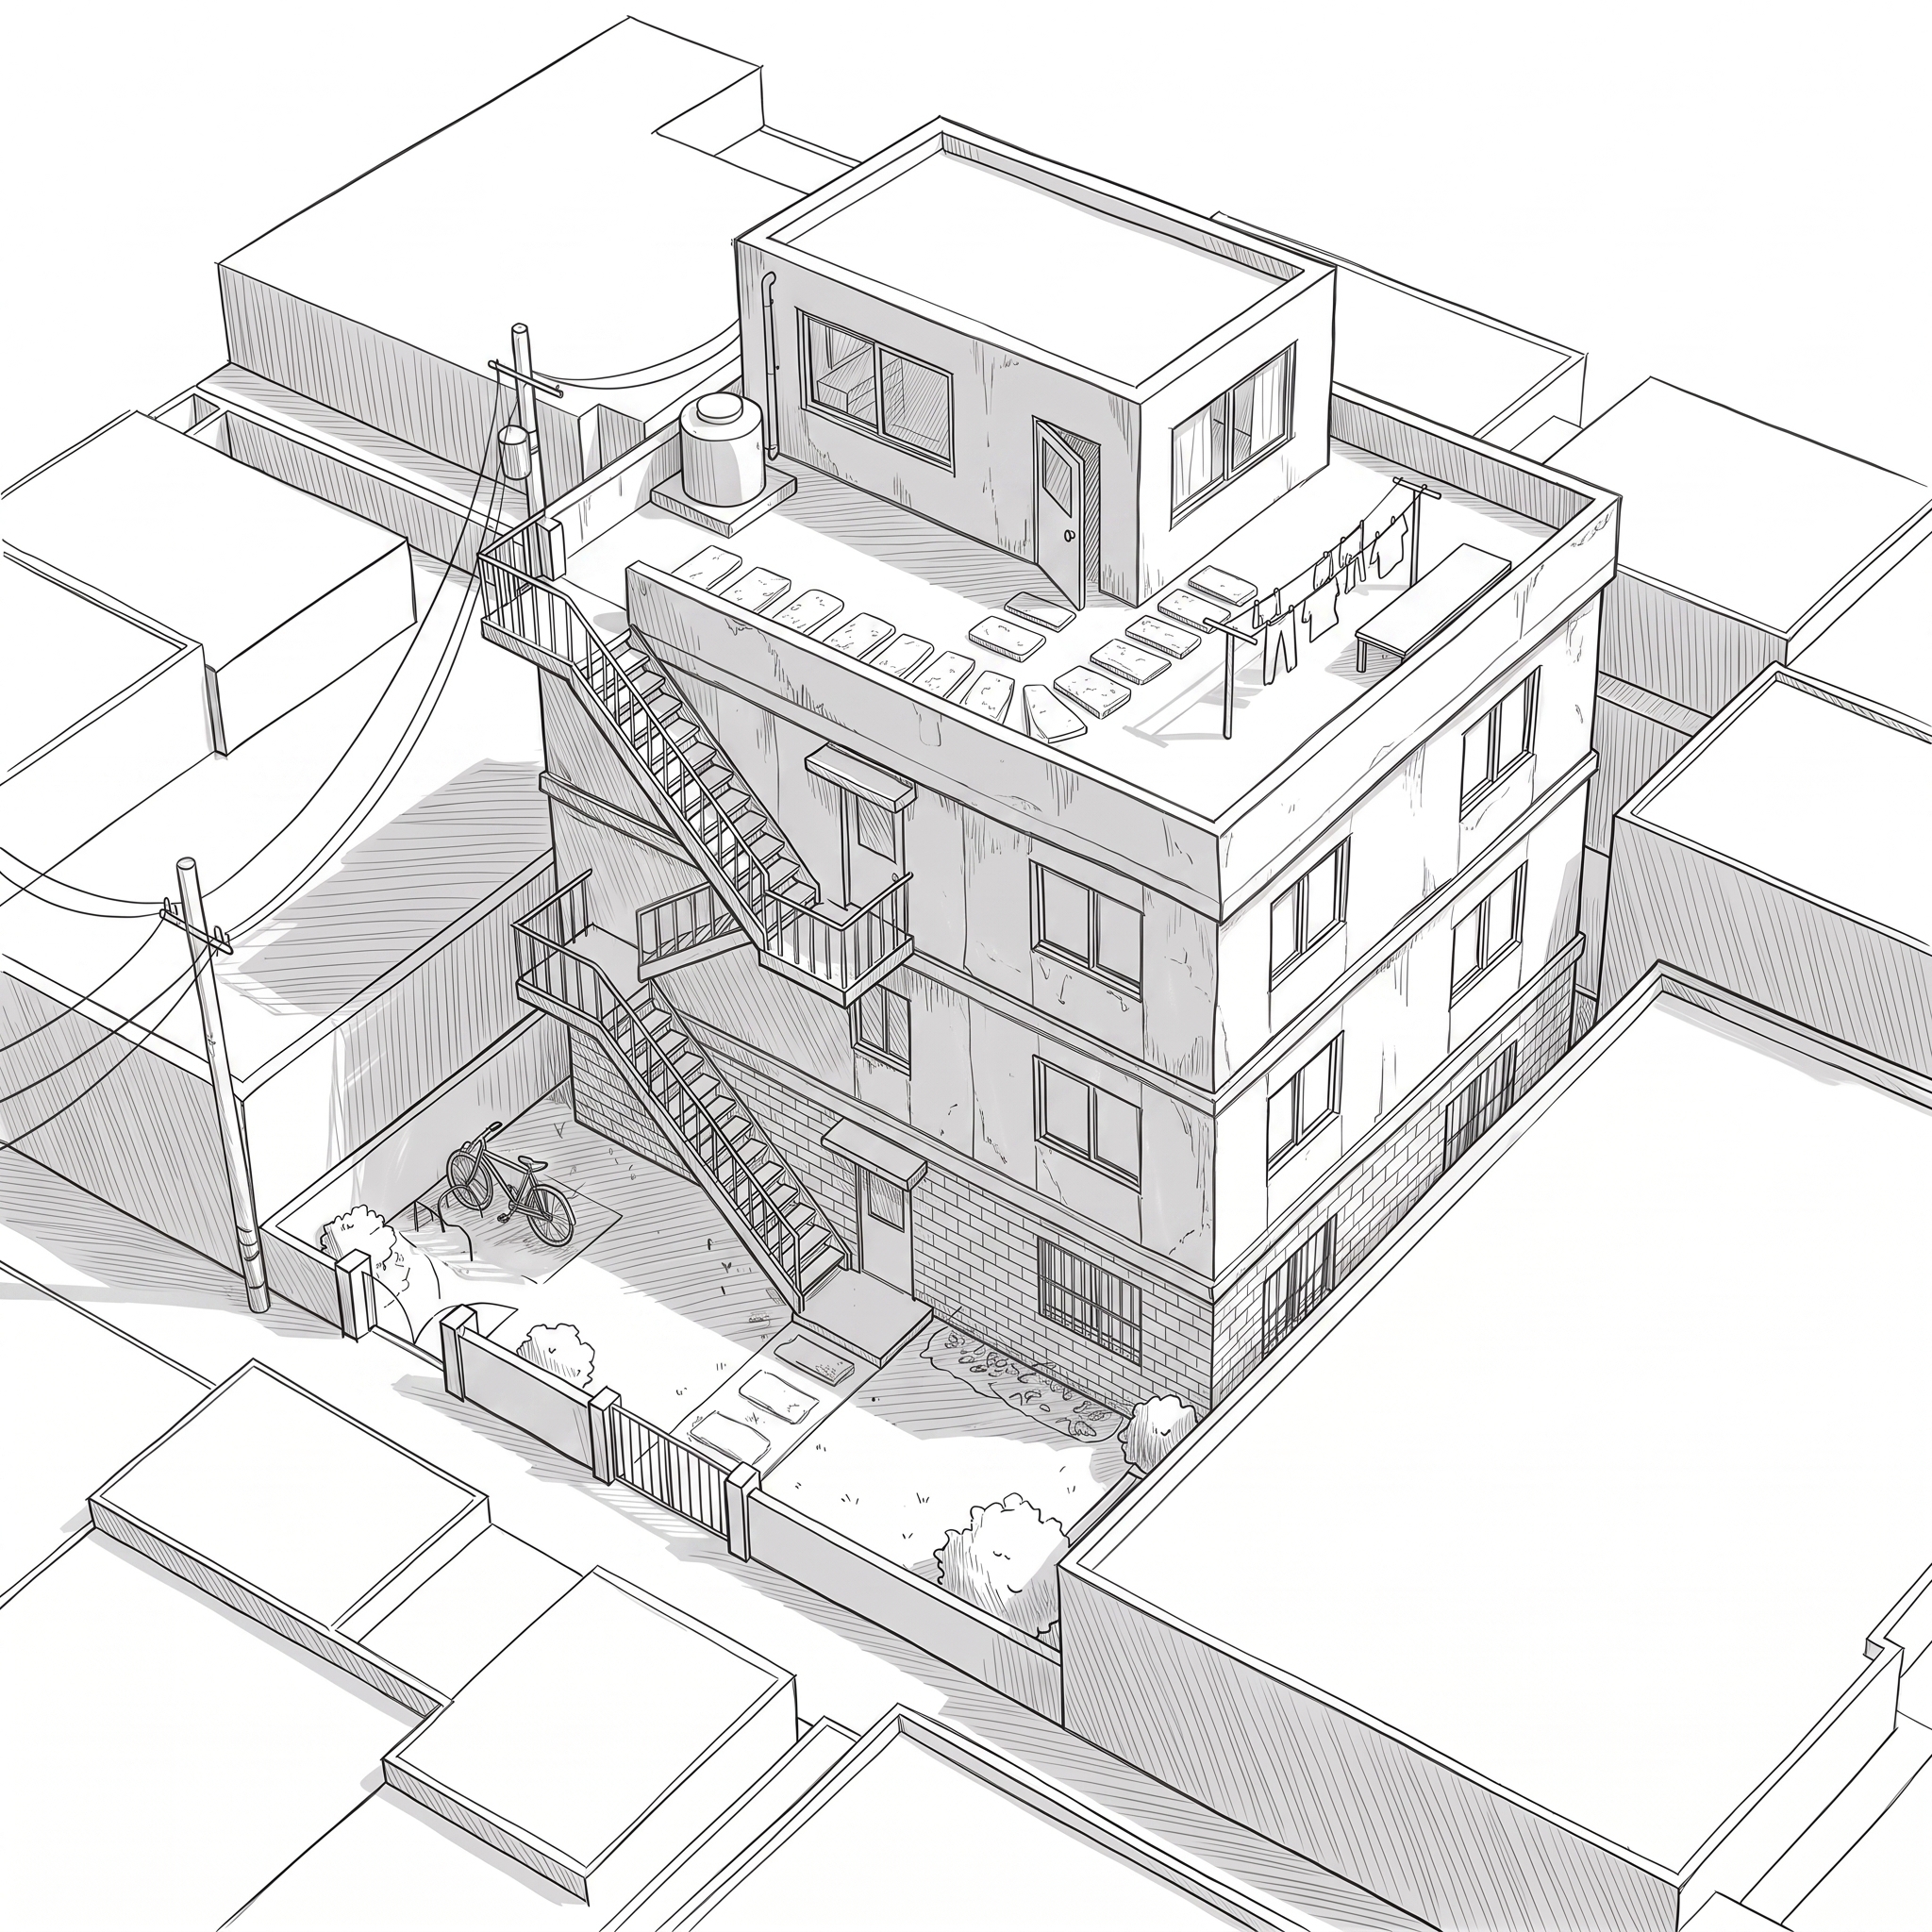
Draw ONE monochrome perspective CONCEPT SKETCH from the two

attached images.

Reference roles:

- The PHOTO is the reality reference — what the place, its

  materials and its surroundings actually look like.

- The SKETCH is the structural skeleton — camera, positions,

  proportions and openings. On conflict the SKETCH's structure

  wins; the photo only fleshes out detail.

Output media: clean monochrome concept sketch — confident dark

ink/pencil linework, light hatching for shade, plain white

background. No colour, no photo textures.

The output image must contain ZERO annotations — no circles, no
codes, no letters, no numbers, no text, no signage lettering, no
arrows, no dashed lines.
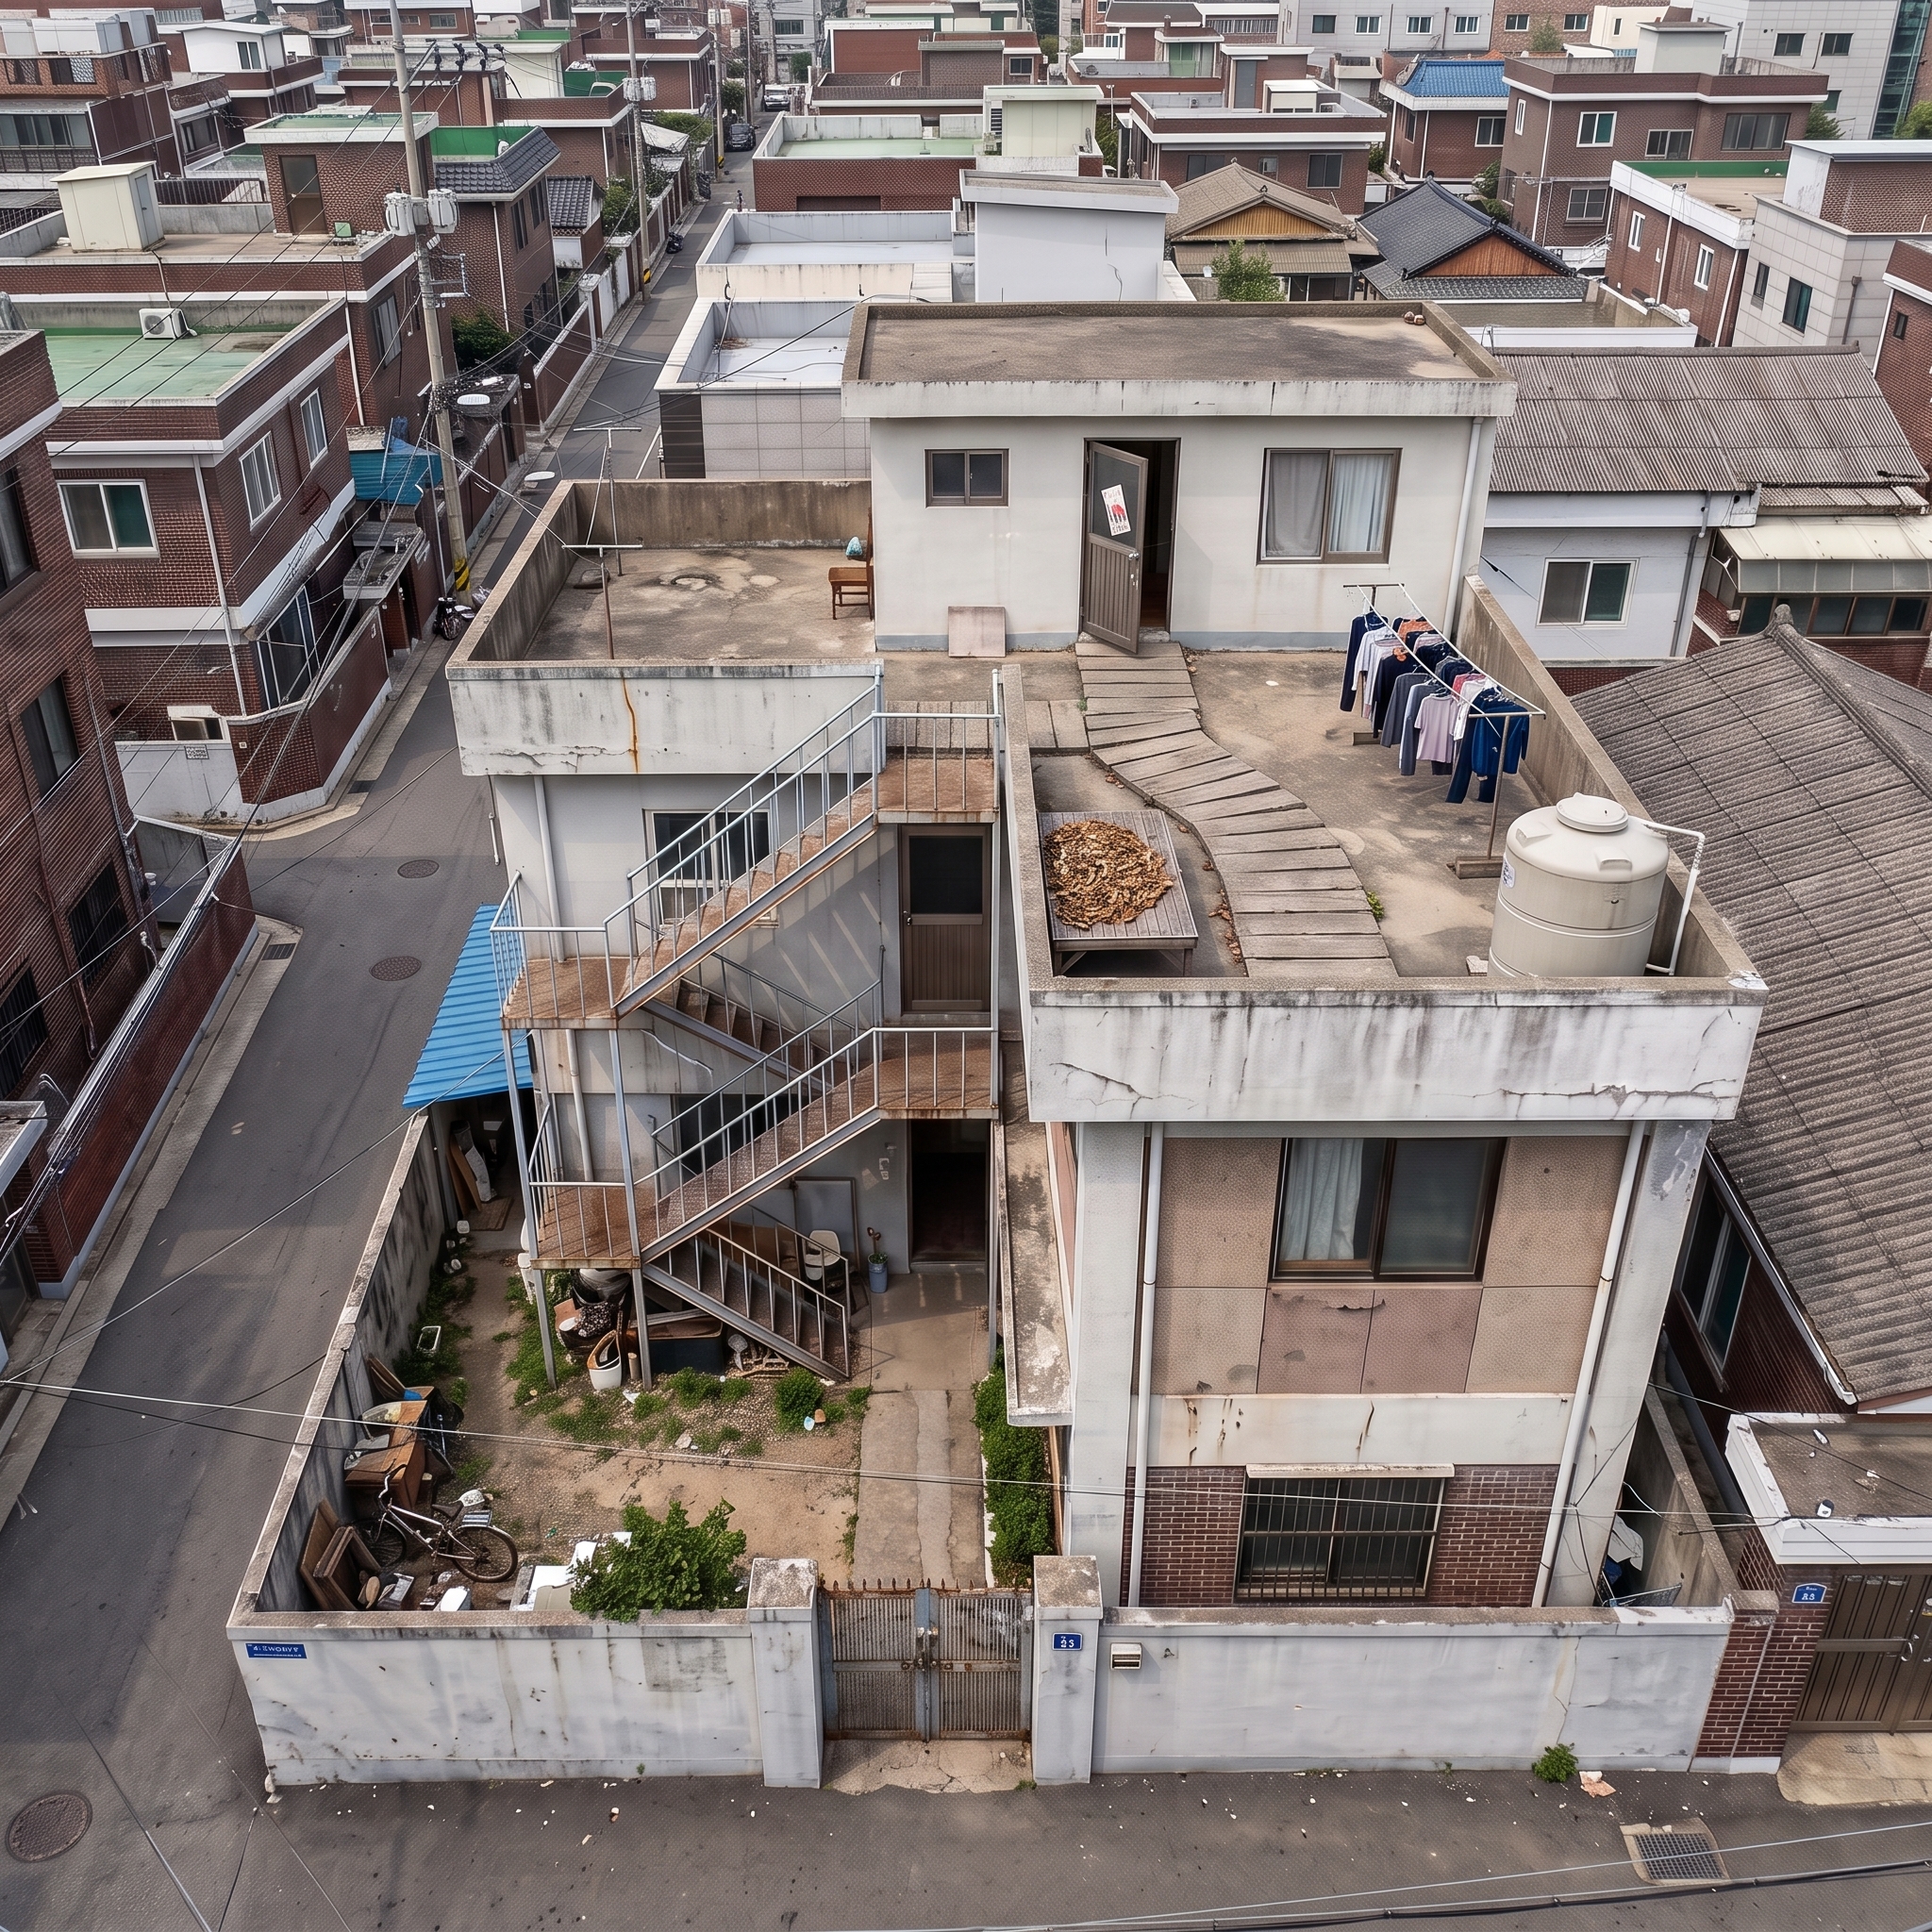
Create ONE PHOTOREALISTIC location still from the two attached

images.

Reference roles:

- The PHOTO is the look source of truth — materials, weathering,

  lighting, the reality of the town around.

- The FLOOR PLAN (flat top-down diagram) is the LAYOUT source of

  truth — where every structure, opening and object sits. On

  conflict the floor plan wins.

Camera: keep the photo's 45-degree high aerial view of the whole

property.

MARKER LEGEND (annotations on the floor plan only — never drawn

in the photo):
- (P1) = alley approach — Show the alley approach at the lower edge of the detail sketch, leading directly toward the filming property gate and able to support bicycle movement.
- (P2) = multi-family villa gate — Place the gate on the alley frontage so that opening it leads directly into the property yard.
- (P3) = yard — Draw the yard immediately inside the gate, between the alley entry and the exterior stair route.
- (P4) = secluded bicycle corner — Set a tucked-away corner within the yard where a bicycle can be left roughly, separated from the main gate-to-stair path.
- (Q1) = rooftop-room building footprint — Place the aged multi-family villa footprint along the yard, carrying the rooftop-room level above.
- (Q2) = exterior steel retrofit stair run — Attach the exterior steel retrofit stair to the building wall, starting from the yard and rising outside the building toward the rooftop landing.
- (Q3) = upper stair landing — Place the landing at the top of the exterior stair where the iron entrance door is immediately visible.
- (R1) = landing-to-door roof path — Draw the roof path from the landing toward the iron door so it passes beside the bench area and the clothesline area.
- (R2) = iron entrance door — Set the iron door on the rooftop-room unit facing the landing path; include the door-gap flyer detail and allow it to be shown partly open.
- (R3) = rooftop-room unit — Place the rooftop-room unit on the roof surface, connected to the iron entrance door and containing the indicated window openings.
- (R4) = rooftop-room window set — Mark the small living-room window and the curtained room window on the rooftop-room unit, with at least one window oriented for the low-wall sightline.
- (S1) = water tank — Place the water tank on the roof surface near the rooftop deck contents, clear of the landing-to-door path.
- (S2) = clothesline — Run the clothesline across the roof surface close enough to the approach path that hanging or dried leaves can brush a passerby.
- (S3) = wooden drying bench with dried leaves — Place the wooden drying bench on the rooftop near the clothesline and along the path toward the iron door, carrying the dried leaves.
- (S4) = low-angle night light-source position — Mark a low-angle light-source position affecting the rooftop path, only to support the long-shadow cue and without assigning any broader colour mood.

The output image must contain ZERO annotations — no circles, no
codes, no letters, no numbers, no text, no signage lettering, no
arrows, no dashed lines.

Real-world rendering facts (creator-confirmed / evidence-bound):
- The main building is an aged MULTI-FAMILY VILLA of three full
  storeys (roof deck roughly 8-10 m above the yard) with the small
  rooftop-room unit on its roof deck — regional vernacular materials
  with varied lived-in aging.
- The exterior stair is a later-added STEEL retrofit stair climbing
  the full three storeys: open treads, thin steel plate stringers,
  support posts, pipe railings. It is NOT a concrete stair.
Lighting: plain neutral daytime light. Do NOT add fog, rain,
dramatic weather, colour-grade moods, or people. No text overlays.